


Start with a high-quality on-mountain lesson to build control and reduce falls. For first-timers, that hands-on coaching gives you the feel for turning, stopping, and pace, so you know what to expect rather than guessing like nothing else. This approach helps you learn safely and can help others on the slope.
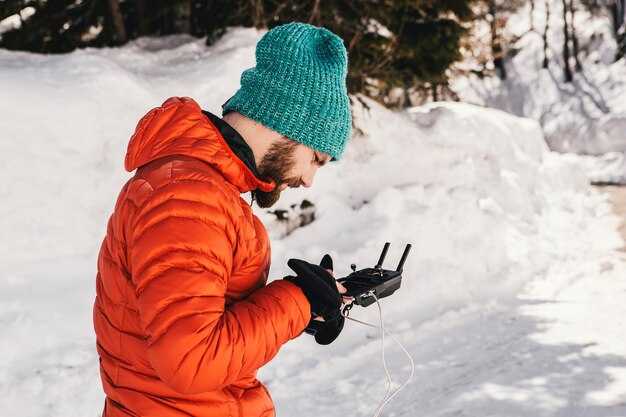
Choose high-quality gear and a properly fitting helmet to protect your head and mask your face from wind. For on-mountain comfort, pick boots that fit well, and gloves with good grip. In colorado, cold days demand smart layering: avoid cotton, and choose moisture-wicking fabrics for a bright, dry feeling all day. green runs welcome to beginners when conditions are stable.
Plan food and water wisely to maintain energy and focus. Carry quick snacks and a small bottle so you can stay alert between runs, reducing risks. Short breaks allow you to reset balance and prevent fatigue between runs. Advice from on-mountain staff helps you choose safer lines and keep your day pleasant.
Respect others on the slope and set personal limits early. Do not follow faster skiers too closely; keep a safe distance and watch for changing conditions. Use a mask when needed to stay comfortable in windy sections and keep your vision clear. Listen to advice from instructors and local staff–they spot icy patches and weather shifts that influence your line.
Expert-Recommended Pitfalls for First-Time Skiers
Start with a certified beginner lesson and buy a lift ticket for the beginner area. This builds a solid foundation before tackling longer runs. An instructor shows you how to glide, stop, and turn with control, reducing the risk of a hard fall. Wear lightweight, well-fitting gear and avoid bulky packs that slow you down. A calm, focused start keeps you safe and makes the day feel great.
Prioritize layering: base layer, middle layer, and an outer shell made of breathable fabrics. The base layer wicks moisture, the middle layer adds warmth, and the shell blocks wind and snow. Test the fit by moving and bending; there should be no pinching at the neck. Keep a few essentials in a pocket–lip balm, sunscreen, and a small snack–for quick access. A cozy mid-layer adds warmth without bulk.
Be mindful of exposure to sun and wind on the mountains. Use goggles with 100% UV protection and sunscreen on exposed skin. The glare from the snow can surprise you, so protect your eyes on sunny chair rides and throughout your time on the slopes.
Schedule short rests every hour and drink water to avoid fatigue. Pack a quick snack to sustain energy; for the season-long effort, consistency matters. Take a longer lunch break if you feel tired, but keep moving enough to stay warm and avoid stiffness. Rest helps your form improve faster.
Practice safe lift etiquette: ride with the chair out front and avoid sudden movements while boarding. On the slope, stay in control, focusing on doing slow, deliberate turns and stopping gently to avoid collisions with others. Keep your neck relaxed and your weight centered to reduce neck strain during transitions.
Don’t rush to the middle of the mountain; stay in the beginner area until you can link turns smoothly. Rushing makes it easy to lose balance and go off the trail. Keep shoes, poles, and gear properly fitted and tested before you start moving fast. A cautious pace protects your knees and your confidence.
Respect the culture of ski resorts and the family-friendly vibe on the slopes. Follow posted signs, yield to riders in front, and wait your turn in lines. theres value in clear communication and steady progress, especially when you’re learning with kids or a group. Others will notice your safety habits and respond with patience.
Be prepared for a practical reminder: a beaver-like snug strap around the helmet keeps chin and neck secure. Tie cords and straps neatly so nothing dangles. This simple habit saves you from distractions while you focus on the snow.
theres always room to grow with each session. Build a plan for the rest of the season: pick a few easy runs, gradually build speed, and enjoy family trips to practice common moves. Bring a breathable pocket for snacks, keep exposure minimal on windy days, and celebrate small wins with your crew.
Smart Packing: Avoid Overpacking and Forgetting Key Gear
Pack a single compact daypack that holds a base layer, a mid-layer fleece, a water-resistant outer shell, two pairs of socks, gloves, a hat, goggles, sunscreen, lip balm, a small first-aid kit, a compact multitool, a spare lens, a water bottle, and energy bars.
Choose layering that adapts to conditions: a breathable base layer, a warm mid-layer, and a dry outer shell; each item should compress well and dry fast.
Plan two zones of packing: the daypack holds items needed on the slope; the remaining gear stays in a larger bag stored in the car or a locker at the lodge.
Test the pack at home and trim items until the total weight feels manageable; aim for roughly 6–8 pounds (3–4 kg) in the daypack for a half-day outing.
Choose compact alternatives: foldable water bottle, micro towel, small charging cable, and a spare battery.
If gear is rented, assemble a minimal personal kit and verify it before leaving the house.
Do a final check before leaving the house: confirm you have water, snacks, spare lens, charging cable, and a basic first-aid item; verify that you can access everything during the day.
Smart packing supports a smooth day on snow and reduces stress for all ages and abilities.
Gear Decisions: Rent vs Buy, and When to Bring Your Own Boots
Rent boots for your first ski trip. If you already own a well-fitting pair, bring them, but start with rentals to test fit early and feel how your body responds on easy runs. Book a fitting with a boot specialist to compare options, and decide which path feels best for you. This approach saves time and keeps the adventure enjoyable from day one.
Typical boot rentals run about 15–35 per day, with weekly bundles that save a bit. For a 3–4 day trip, expect roughly 60–140; a 7 day plan can reach 100–250. Always wear thin ski socks and test two sizes if needed to ensure heel hold and toe clearance; the right pair should stay down when you flex, and you should feel no numbness after a few minutes. If anything feels off, switch to a different width or a larger shell, and they can help you adjust quickly at the shop. Find a setup somewhere in your plan, and stay hydrated with water or a warm drink during breaks.
The biggest benefit of owning boots is consistent control, which translates to better safety on icy patches and longer fatigue-free sessions. If you ski 8–12 days per season, or you have feet that need a custom insole or wider/narrower volume, buying makes sense. Schedule a final fit with a certified boot fitter to dial in shell size, liner, and footbeds, and test the setup on easy runs before moving to more challenging terrain. The time you invest now pays off on longer days and faster transitions on steeper sections.
Bring your own boots when you travel often, especially for longer stays or multi-stop trips such as Thanksgiving weeks or trips to places like Japan, where you’ll want the same feel across days. Personal boots reduce sizing quirks at the shop and help you stay cozy on cold days; they support orthotics and high-arch feet when needed. If you do bring them, check airline rules for skis and boots, pack them in a sturdy boot bag, and run them through a boot dryer when you return to keep them in shape. On the hill, they help you stay onto the slope and set you up for the next adventure.
Final tips: If you rent, reserve ahead and verify width options; if you buy, plan a 2–3 hour fitting with a pro and bring your own socks, insole inserts, and a boot bag. A quick check on a gentle slope after a short break will reveal if you’ve found the right setup; while you wait, sip a hot drink and keep mittens handy. If anything doesnt feel right, adjust immediately; they wont fix themselves.
Layering Strategy: Base Layers, Insulation, and Outerwear for Cold Days
Start with a snug, moisture-wicking base layer made from merino wool or a high-performance synthetic blend. This first layer sits close to the skin and moves moisture away through the whole day, keeping you dry and warm while skiing. Some runners prefer cotton shirts, but cotton traps moisture and fails when exposure matters, so avoid it at the base. After you secure the base, add a mid-layer that is thick enough to trap heat but breathable, so you stay comfortable on long climbs through changing conditions.
Mid-layer options include thick fleece or light down. Strongly consider pieces that compress well for easy packing and fit under your shell. For what you will experience across a resort town, choose a mid-layer that can adapt to bright sun and chilly wind; on bright days you want warmth without overheating, and on windy, cold days you still need protection. In many cases, the right mid-layer keeps you enjoying the day and reduces fatigue. Also, this layer supports the culture of practical, all-weather clothing that works here and across town centers.
Finish with a weatherproof outer shell that blocks wind and sheds moisture. Look for a waterproof membrane with good breathability, taped seams, and adjustable cuffs. Outerwear offers protection on exposed sections of the trail and on chairlifts, and it should be able to vent when you heat up during a long run. Mittens or insulated gloves, a hat, and a neck gaiter complete the setup so your exposure to cold stays limited here in town or at the resort, and you stay comfortable from first chair to last run. This clothing system is safe and flexible for big days.
Testing at home helps. When you pack for a first ski trip, this whole layering strategy pays off across many destinations. It works in small town hills and in large, bright resort complexes. The biggest payoff comes from a simple rule: adjust layers as conditions change through the day. What matters most is warmth with breathability, protection with mobility, and readiness for weather shifts on snow. This approach keeps you comfortable during experiences you enjoy with friends and family.
| Layer | Material Options | اہم فائدہ | عملی نکات |
|---|---|---|---|
| Base Layer | Merino wool, synthetic blends (polyester, polypropylene) | Moisture wicking; fast drying | Choose snug fit; avoid cotton |
| Insulation (Mid-layer) | Thick fleece, light down, synthetic fill | حرارت کو برقرار رکھنا؛ سانس لینے کی صلاحیت | اگر آپ زیادہ سفر کرتے ہیں تو ایک کمپیکٹ آپشن کا انتخاب کریں۔ |
| بیرونی لباس | واٹر پروف/سانس لینے والا شیل؛ موصل اختیارات | ہوا بند؛ نمی سے تحفظ | ٹیپ شدہ سیونز، ایڈجسٹ ایبل کف، وینٹیلیشن زِپرز تلاش کریں۔ |
مہارت کی تیاری: ڈھلوانوں پر جانے سے پہلے سبق بک کروائیں۔
ڈھلوانوں پر جانے سے پہلے ایک سبق بک کروائیں۔ ایک پیشہ ور کوچ آپ کا انداز طے کرتا ہے اور محفوظ، دہرائی جانے والی تکنیک دکھاتا ہے، تاکہ آپ کی پہلی دوڑیں خطرناک کے بجائے قابو میں محسوس ہوں۔ انہوں نے کہا کہ تجاویز آپ کی سطح کے مطابق ہوتی ہیں، فوری رائے دیتی ہیں، اور صبح بھر میں آپ کو مسلسل ترقی سے لطف اندوز ہونے میں مدد کرتی ہیں، جیسے کہ ایک سادہ موڑ میں مہارت حاصل کرنا۔ جب آپ ہدایات سے آغاز کرتے ہیں، تو آپ اعتماد حاصل کرتے ہیں اور بری عادتوں کو کم کرتے ہیں۔ خاص طور پر نئے آنے والوں کے لیے، یہ رہنمائی آپ کو بنیادی باتوں سے آرام دہ بناتی ہے۔ وہ ایک دہرائی جانے والا سلسلہ سکھاتے ہیں جسے آپ کسی بھی ڈھلوان پر دوبارہ استعمال کر سکتے ہیں۔.
سیشن کے دوران آپ پھسلنے سے بچنے، وزن کی منتقلی اور ٹرن میں ایک صاف ستھرا رِدھم بنانے کا طریقہ سیکھیں گے۔ کوچ آپ کو ایسی مشقیں کروائے گا جو آپ حقیقی رن میں استعمال کر سکتے ہیں، اور وہ آپ کی رفتار کے مطابق ڈھل جائیں گے تاکہ سواری حوصلہ افزائی کرنے والی رہے بجائے اس کے کہ آپ پر بوجھ بنے۔ کچھ مبتدیوں کو پہلی گلائیڈ مشکل لگتی ہے، اور آپ رہنمائی کے ساتھ کچھ مشکل لمحات پر قابو پالیں گے، اور انہیں مسلسل، لطف اندوز ہونے والی پیش رفت میں بدل دیں گے۔ یہاں ایک ہموار ڈھلوان پر ٹائرولین طرز کا روٹ بھی ہے تاکہ دباؤ کے بغیر ایکسپوژر بنایا جا سکے۔.
روانہ ہونے سے پہلے، اس پیکیج کی تصدیق کر لیں جو آپ چاہتے ہیں: ایک سنگل سبق، ایک نجی سیشن، یا ایک گروپ کلاس۔ بہت سی دکانیں گیئر بنڈل پیش کرتی ہیں، لہذا اگر آپ کے پاس نہ ہوں تو آپ بوٹ، ہیلمٹ اور پول ادھار لے سکتے ہیں۔ آرام دہ پرتیں اور ایک ہیلمٹ پہنیں؛ دستانے، سن اسکرین اور ایک بوتل لائیں۔ اگر آپ کے پاس پہلے سے ٹکٹ ہے، تو آپ اسے اپنے سبق کے ساتھ منسلک کر سکتے ہیں اور پورے ریزورٹ میں وقت بچا سکتے ہیں۔ کچھ مقامات آپ کو کرایے کی میز پر بھیڑ سے بچنے کے لیے بِبس محفوظ کرنے کی بھی اجازت دیتے ہیں۔ اگر آپ کو کچھ اور چاہیے تو ڈیسک کے عملے سے پوچھیں۔.
رسد اور حفاظت: لفٹ پاس، دن کے اوقات اور گیئر چیک کی منصوبہ بندی کریں۔
کم از کم 7 دن پہلے آن لائن بک لفٹ پاسز کریں اور قطاروں کو کم سے کم کرنے اور پہاڑ پر آسانی سے شروعات کرنے کے لیے ایک صبح کی ونڈو کا انتخاب کریں، خاص طور پر ابتدائی افراد کے لیے۔.
- لفٹ پاس اور گروپ لاجسٹکس کی منصوبہ بندی
- آن لائن 7-14 دن پہلے خریدیں؛ ڈیجیٹل پاسز داخلے کو تیز کرتے ہیں اور ٹچ پوائنٹس کو کم کرتے ہیں۔.
- ایک گروپ کے لیے، بالغوں اور بچوں کی تعداد کا حساب لگائیں اور ٹکٹوں کے انتظام اور سب کو اکٹھا رکھنے کے لیے ایک شریک رکن کو مقرر کریں۔.
- اپنے فون پر یا پرنٹ میں کہیں قابل رسائی جگہ پر پاس اسٹور کریں، اور جان لیں کہ انہیں کہاں سے لینا ہے – ہوٹل کا فرنٹ ڈیسک یا ریزورٹ انفارمیشن ڈیسک مدد کر سکتا ہے۔.
- ہمیشہ ایک متبادل منصوبہ رکھیں: اگر کسی ونڈو سے محروم ہوجائیں تو ، بعد والی سلاٹ میں تبدیل ہوجائیں۔ خاص طور پر پہلی بار شرکت کرنے والوں کے لیے ، پہلی لفٹ کے لیے بہت دیر سے پہنچ کر اسے مت چھوڑیں۔.
- ابتدائی ٹِپ: اپنے دن کا آغاز آسان ڈھلوانوں سے کریں؛ اس سے آپ کا اعتماد بڑھتا ہے اور تھکاوٹ سے متعلق غلطیوں کا خطرہ کم ہوتا ہے۔.
- دن کے اوقات اور پہاڑ پر موجود تال۔
- منصوبہ بنائیں کہ صبح 08:30–09:00 تک پہاڑ پر موجود ہوں۔ زیادہ تر لفٹس اس دوران کھل جاتی ہیں، اور جلدی پہنچنے سے آہستہ آہستہ گرم ہونے میں مدد ملتی ہے، جیسے ایک نرم وارم اپ۔.
- دھوپ والی جگہ پر دوپہر کے وقت وقفہ کریں تاکہ زیادہ محنت سے بچا جا سکے۔ توانائی سے بھرپور غذا اور پانی کی بوتل ساتھ رکھیں تاکہ مسلسل توانائی ملتی رہے، خاص طور پر طویل دنوں کے لیے۔.
- ایک سادہ آن-ماؤنٹین لوپ استعمال کریں: وارم-اَپ رن، پھر کچھ آسان رنیں، پھر اپنی سطح بہتر ہونے کے ساتھ ڈھلوان حصوں کی طرف بڑھیں۔.
- موسم تیزی سے بدل سکتا ہے؛ سورج سے بچاؤ ضروری ہے–سن اسکرین دوبارہ لگائیں، ٹوپی پہنیں اور جلد کو دھوپ سے بچانے کے لیے ڈھانپیں؛ تہوں کو ترتیب دینے سے آپ بدلتے ہوئے درجہ حرارت میں آرام دہ رہتے ہیں۔.
- یہاں ریسارٹ گائیڈ اور نقشے پڑھیں تاکہ مبتدی دوستانہ علاقے اور اپنے گائیڈ کے ساتھ دوبارہ ملنے کی جگہ کی تصدیق ہو سکے۔.
- گیئر چیکس اور پری رن پریپ
- سامان کی فوری جانچ پڑتال کرلیں: بائنڈنگز، سکرو، بریکس اور بوٹ فٹ کو چیک کریں؛ اس بات کو یقینی بنائیں کہ ہیلمٹ محفوظ ہے اور چشمے صاف ہیں۔.
- کناروں کو چیک کریں اور اسکی یا بورڈ پر ویکس لگائیں؛ ایک بنیادی ٹیون کنٹرول کو بہتر بناتا ہے اور لمبی ڈھلوانوں پر تھکاوٹ کو کم کرتا ہے۔.
- تہہ بہ تہہ ہوشیاری سے لباس پہنیں: بیس لیئر، مڈ لیئر اور شیل؛ زیادہ گرم ہوئے بغیر گرم رہنے کے لیے انڈر جیکٹ انسولیشن کو ایڈجسٹ کریں۔.
- ضروری سامان: پانی کی بوتل، انرجی فوڈ، لپ بام، سنسکرین، ایک چھوٹا ٹول کٹ، اضافی پرزے، اور ایک کمپیکٹ ریپیر پیچ؛ بیگ کو کسی ایسی جگہ پر رکھیں جہاں یہ آسانی سے پہنچ میں ہو۔.
- فوری جانچ پڑتال کرنے سے پہاڑ پر وقت کی بچت ہوتی ہے اور بعد میں آپ کو ممکنہ مسائل سے بچنے میں مدد ملتی ہے۔.
- دن کے بعد گیئر دھونے اور اچھی طرح خشک کرنے کا منصوبہ بنائیں؛ زنگ یا سختی سے بچنے کے لیے سامان کو ہوٹل میں مناسب طریقے سے اسٹور کریں۔.
- پہاڑ پر حفاظت اور ڈسپلن
- ڈھلوان آداب پر عمل کریں: ابتدائی علاقے دائیں طرف رہیں، تیز رفتار اسکیئرز کو راستہ دیں، اور بند راستوں سے دور رہیں۔.
- اپنی سطح کو پہچانیں اور مناسب علاقے میں رہیں؛ اگر آپ تھک رہے ہیں، تو چھوٹی اور آسان دوڑیں اختیار کریں اور غلطیوں سے بچنے کے لیے آرام کریں۔.
- موسم اور لفٹ کی صورتحال پر نظر رکھیں؛ اگر حد نگاہ کم ہو جائے تو اپنی رن کی لمبائی کم کریں اور حفاظتی زونز کی طرف واپس چلے جائیں۔.
- ہمیشہ ہوٹل اور ریسورٹ کے عملے کے لیے رابطہ کی معلومات ساتھ رکھیں؛ علیحدگی کی صورت میں، متفقہ میٹنگ پوائنٹ پر جمع ہوں اور اپنے گروپ میں جلدی شامل ہونے کے لیے آویزاں نشانیاں پڑھیں۔.
- حفاظت کا ایک حصہ یہ ہے کہ آپ کے پاس ایک منصوبہ ہو جس کی آپ نے اپنے گائیڈ اور ہوٹل کے عملے کے ساتھ مشق کی ہو۔.
- بعد از دن کا معمول اور جن غلطیوں سے بچنا چاہیے۔
- ہوٹل واپس پہنچ کر، سن اسکرین دھو لیں، گیئر خشک کریں، اور آلات کو خشک، ہوادار جگہ پر محفوظ کریں۔.
- جائزہ لیں کہ کیا اچھا ہوا اور اگلے دن کیا ایڈجسٹ کرنا ہے۔ یہ آپ کو ایک جیسی غلطیوں کو دہرانے سے بچنے اور آپ کی مجموعی حفاظت کو بہتر بنانے میں مدد کرتا ہے۔.
- بحالی کے لیے پانی پیئیں اور متوازن غذا کھائیں؛ دوپہر کے وقت زیادہ دیر تک ٹھنڈک سے نقاہت اور سورج کی تمازت شام تک باقی نہیں رہے گی۔.
- اپنی سطح کے لیے کارآمد چیزوں کا ایک سادہ لاگ بنائیں اور کل کے پہاڑی راستے اور گیئر چیک کی منصوبہ بندی کریں۔.