


Start with a high-quality on-mountain lesson to build control and reduce falls. For first-timers, that hands-on coaching gives you the feel for turning, stopping, and pace, so you know what to expect rather than guessing like nothing else. This approach helps you learn safely and can help others on the slope.
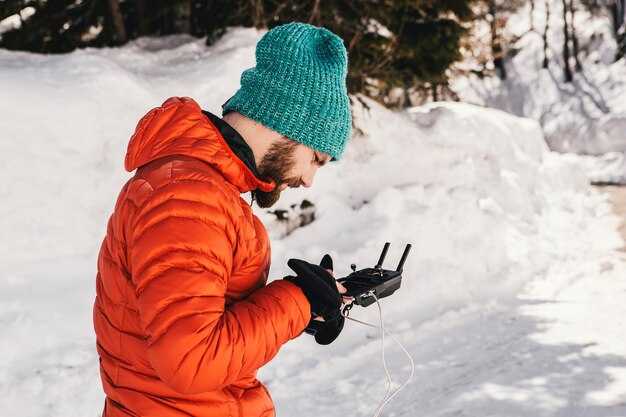
Choose high-quality gear and a properly fitting helmet to protect your head and mask your face from wind. For on-mountain comfort, pick boots that fit well, and gloves with good grip. In colorado, cold days demand smart layering: avoid cotton, and choose moisture-wicking fabrics for a bright, dry feeling all day. green runs welcome to beginners when conditions are stable.
Plan food and water wisely to maintain energy and focus. Carry quick snacks and a small bottle so you can stay alert between runs, reducing risks. Short breaks allow you to reset balance and prevent fatigue between runs. Advice from on-mountain staff helps you choose safer lines and keep your day pleasant.
Respect others on the slope and set personal limits early. Do not follow faster skiers too closely; keep a safe distance and watch for changing conditions. Use a mask when needed to stay comfortable in windy sections and keep your vision clear. Listen to advice from instructors and local staff–they spot icy patches and weather shifts that influence your line.
Expert-Recommended Pitfalls for First-Time Skiers
Start with a certified beginner lesson and buy a lift ticket for the beginner area. This builds a solid foundation before tackling longer runs. An instructor shows you how to glide, stop, and turn with control, reducing the risk of a hard fall. Wear lightweight, well-fitting gear and avoid bulky packs that slow you down. A calm, focused start keeps you safe and makes the day feel great.
Prioritize layering: base layer, middle layer, and an outer shell made of breathable fabrics. The base layer wicks moisture, the middle layer adds warmth, and the shell blocks wind and snow. Test the fit by moving and bending; there should be no pinching at the neck. Keep a few essentials in a pocket–lip balm, sunscreen, and a small snack–for quick access. A cozy mid-layer adds warmth without bulk.
Be mindful of exposure to sun and wind on the mountains. Use goggles with 100% UV protection and sunscreen on exposed skin. The glare from the snow can surprise you, so protect your eyes on sunny chair rides and throughout your time on the slopes.
Schedule short rests every hour and drink water to avoid fatigue. Pack a quick snack to sustain energy; for the season-long effort, consistency matters. Take a longer lunch break if you feel tired, but keep moving enough to stay warm and avoid stiffness. Rest helps your form improve faster.
Practice safe lift etiquette: ride with the chair out front and avoid sudden movements while boarding. On the slope, stay in control, focusing on doing slow, deliberate turns and stopping gently to avoid collisions with others. Keep your neck relaxed and your weight centered to reduce neck strain during transitions.
Don’t rush to the middle of the mountain; stay in the beginner area until you can link turns smoothly. Rushing makes it easy to lose balance and go off the trail. Keep shoes, poles, and gear properly fitted and tested before you start moving fast. A cautious pace protects your knees and your confidence.
Respect the culture of ski resorts and the family-friendly vibe on the slopes. Follow posted signs, yield to riders in front, and wait your turn in lines. theres value in clear communication and steady progress, especially when you’re learning with kids or a group. Others will notice your safety habits and respond with patience.
Be prepared for a practical reminder: a beaver-like snug strap around the helmet keeps chin and neck secure. Tie cords and straps neatly so nothing dangles. This simple habit saves you from distractions while you focus on the snow.
theres always room to grow with each session. Build a plan for the rest of the season: pick a few easy runs, gradually build speed, and enjoy family trips to practice common moves. Bring a breathable pocket for snacks, keep exposure minimal on windy days, and celebrate small wins with your crew.
Smart Packing: Avoid Overpacking and Forgetting Key Gear
Pack a single compact daypack that holds a base layer, a mid-layer fleece, a water-resistant outer shell, two pairs of socks, gloves, a hat, goggles, sunscreen, lip balm, a small first-aid kit, a compact multitool, a spare lens, a water bottle, and energy bars.
Choose layering that adapts to conditions: a breathable base layer, a warm mid-layer, and a dry outer shell; each item should compress well and dry fast.
Plan two zones of packing: the daypack holds items needed on the slope; the remaining gear stays in a larger bag stored in the car or a locker at the lodge.
Test the pack at home and trim items until the total weight feels manageable; aim for roughly 6–8 pounds (3–4 kg) in the daypack for a half-day outing.
Choose compact alternatives: foldable water bottle, micro towel, small charging cable, and a spare battery.
If gear is rented, assemble a minimal personal kit and verify it before leaving the house.
Do a final check before leaving the house: confirm you have water, snacks, spare lens, charging cable, and a basic first-aid item; verify that you can access everything during the day.
Smart packing supports a smooth day on snow and reduces stress for all ages and abilities.
Gear Decisions: Rent vs Buy, and When to Bring Your Own Boots
Rent boots for your first ski trip. If you already own a well-fitting pair, bring them, but start with rentals to test fit early and feel how your body responds on easy runs. Book a fitting with a boot specialist to compare options, and decide which path feels best for you. This approach saves time and keeps the adventure enjoyable from day one.
Typical boot rentals run about 15–35 per day, with weekly bundles that save a bit. For a 3–4 day trip, expect roughly 60–140; a 7 day plan can reach 100–250. Always wear thin ski socks and test two sizes if needed to ensure heel hold and toe clearance; the right pair should stay down when you flex, and you should feel no numbness after a few minutes. If anything feels off, switch to a different width or a larger shell, and they can help you adjust quickly at the shop. Find a setup somewhere in your plan, and stay hydrated with water or a warm drink during breaks.
The biggest benefit of owning boots is consistent control, which translates to better safety on icy patches and longer fatigue-free sessions. If you ski 8–12 days per season, or you have feet that need a custom insole or wider/narrower volume, buying makes sense. Schedule a final fit with a certified boot fitter to dial in shell size, liner, and footbeds, and test the setup on easy runs before moving to more challenging terrain. The time you invest now pays off on longer days and faster transitions on steeper sections.
Bring your own boots when you travel often, especially for longer stays or multi-stop trips such as Thanksgiving weeks or trips to places like Japan, where you’ll want the same feel across days. Personal boots reduce sizing quirks at the shop and help you stay cozy on cold days; they support orthotics and high-arch feet when needed. If you do bring them, check airline rules for skis and boots, pack them in a sturdy boot bag, and run them through a boot dryer when you return to keep them in shape. On the hill, they help you stay onto the slope and set you up for the next adventure.
Final tips: If you rent, reserve ahead and verify width options; if you buy, plan a 2–3 hour fitting with a pro and bring your own socks, insole inserts, and a boot bag. A quick check on a gentle slope after a short break will reveal if you’ve found the right setup; while you wait, sip a hot drink and keep mittens handy. If anything doesnt feel right, adjust immediately; they wont fix themselves.
Layering Strategy: Base Layers, Insulation, and Outerwear for Cold Days
Start with a snug, moisture-wicking base layer made from merino wool or a high-performance synthetic blend. This first layer sits close to the skin and moves moisture away through the whole day, keeping you dry and warm while skiing. Some runners prefer cotton shirts, but cotton traps moisture and fails when exposure matters, so avoid it at the base. After you secure the base, add a mid-layer that is thick enough to trap heat but breathable, so you stay comfortable on long climbs through changing conditions.
Mid-layer options include thick fleece or light down. Strongly consider pieces that compress well for easy packing and fit under your shell. For what you will experience across a resort town, choose a mid-layer that can adapt to bright sun and chilly wind; on bright days you want warmth without overheating, and on windy, cold days you still need protection. In many cases, the right mid-layer keeps you enjoying the day and reduces fatigue. Also, this layer supports the culture of practical, all-weather clothing that works here and across town centers.
Finish with a weatherproof outer shell that blocks wind and sheds moisture. Look for a waterproof membrane with good breathability, taped seams, and adjustable cuffs. Outerwear offers protection on exposed sections of the trail and on chairlifts, and it should be able to vent when you heat up during a long run. Mittens or insulated gloves, a hat, and a neck gaiter complete the setup so your exposure to cold stays limited here in town or at the resort, and you stay comfortable from first chair to last run. This clothing system is safe and flexible for big days.
Testing at home helps. When you pack for a first ski trip, this whole layering strategy pays off across many destinations. It works in small town hills and in large, bright resort complexes. The biggest payoff comes from a simple rule: adjust layers as conditions change through the day. What matters most is warmth with breathability, protection with mobility, and readiness for weather shifts on snow. This approach keeps you comfortable during experiences you enjoy with friends and family.
| Katman | Material Options | Temel Fayda | Pratik İpuçları |
|---|---|---|---|
| Base Layer | Merino wool, synthetic blends (polyester, polypropylene) | Moisture wicking; fast drying | Choose snug fit; avoid cotton |
| Insulation (Mid-layer) | Thick fleece, light down, synthetic fill | Heat retention; breathability | Çok hareket ediyorsanız, kompakt bir seçeneği tercih edin. |
| Dış Giyim | Su geçirmez/nefes alabilir dış katman; yalıtımlı seçenekler | Rüzgar geçirmez; nem koruması | Bantlanmış dikişlere, ayarlanabilir manşetlere ve havalandırma fermuarlarına bakın |
Kayak Hazırlığı: Pistlere Çıkmadan Önce Bir Ders Ayarlayın
Pistlere çıkmadan önce bir ders ayırtın. Profesyonel bir eğitmen duruşunuzu ayarlar ve güvenli, tekrarlanabilir teknikler gösterir, böylece ilk kayışlarınız riskli olmaktan ziyade kontrollü hisseder. İpuçlarının seviyenize göre ayarlandığı, anında geri bildirim sağladığı ve basit bir dönüşte ustalaşmak gibi sabah boyunca istikrarlı bir ilerleme kaydetmenize yardımcı olduğu söyleniyor. Eğitime başladığınızda, güven kazanırsınız ve kötü alışkanlıkları azaltırsınız. Özellikle ilk kez kayak yapanlar için bu rehberlik, temeller konusunda rahat olmanızı sağlar. Herhangi bir eğimde yeniden kullanabileceğiniz tekrarlanabilir bir sıra öğretirler.
Seans sırasında düşme güvenliği, ağırlık aktarımı ve dönüşlere temiz bir ritim nasıl oturtulacağını öğreneceksiniz. Eğitmen, gerçek sürüşlere taşıyabileceğiniz alıştırmalar kullanır ve hızınıza uyum sağlayarak sürüşün bunaltıcı olmaktan ziyade teşvik edici kalmasını sağlar. Bazı yeni başlayanlar ilk kayışı zor bulur ve rehberlikle birkaç zorlu anın üstesinden gelerek bunları istikrarlı, keyifli bir ilerlemeye dönüştüreceksiniz. Baskı olmadan maruz kalma oluşturmak için hafif eğimli bir arazide Tirol tarzı bir geçiş vardır.
Dışarı çıkmadan önce, istediğiniz paketi onaylayın: tek ders, özel oturum veya grup dersi. Birçok dükkan ekipman paketleri sunar, bu nedenle botlarınız, kaskınız ve batonlarınız yoksa ödünç alabilirsiniz. Rahat katmanlar ve bir kask giyin; eldiven, güneş kremi ve bir şişe getirin. Zaten bir biletiniz varsa, dersinize bağlayabilir ve tesis genelinde zamandan tasarruf edebilirsiniz. Bazı mekanlar ayrıca kiralama masasındaki kalabalığı önlemek için önlük ayırtmanıza olanak tanır. Başka bir şey isterseniz, resepsiyon personeline sormanız yeterli.
Lojistik ve Güvenlik: Kayak Kartlarını, Günlük Zamanlamayı ve Ekipman Kontrollerini Planlayın
Kayak biletlerini en az 7 gün önceden çevrimiçi alın ve özellikle başlangıç seviyesindekiler için, kuyrukları en aza indirmek ve dağda sorunsuz bir başlangıç yapmak için bir sabah aralığı seçin.
- Kayak kartlarını ve grup lojistiğini planlama
- 7–14 gün öncesinden çevrimiçi satın alın; dijital biletler girişleri hızlandırır ve temas noktalarını azaltır.
- Bir grup için yetişkin ve çocuk adedini hesaplayın ve biletleri yönetmesi ve herkesi bir arada tutması için katılımcı bir üyeyi görevlendirin.
- Kartlarınızı telefonunuzda veya basılı olarak erişilebilir bir yerde saklayın ve nereden alacağınızı bilin; otel resepsiyonu veya tesis bilgi masası yardımcı olabilir.
- Her zaman bir B planınız olsun: bir pencere kaçırılırsa, daha sonraki bir saate geçin; özellikle ilk kez katılanlar için ilk kaldırışı kaçıracak kadar geç kalmayın.
- Yeni başlayanlara tavsiye: Gününüzü önce kolay eğimler etrafında şekillendirin; bu, kendinize olan güveninizi artırmanıza ve yorgunluğa bağlı hatalar riskini azaltmanıza yardımcı olur.
- Gündüz zamanlamaları ve dağdaki ritim
- 08:30–09:00 gibi dağda olmayı planlayın; çoğu telesiyej o zaman diliminde açılır ve erken varmak, nazik bir ısınma gibi yavaş yavaş ısınmanıza yardımcı olur.
- Aşırı yorgunluğu önlemek için güneşli bir yerde öğle arası planlayın; özellikle uzun, daha uzun günler için sürekli enerji sağlamak amacıyla yanınızda enerji verici yiyecekler ve bir şişe su bulundurun.
- Dağda basit bir döngü kullanın: ısınma koşusu, ardından birkaç kolay koşu, seviyeniz geliştikçe daha dik bölümlere geçin.
- Hava hızla değişebilir; güneşten korunma önemlidir; güneş kremi sürmeyi ihmal etmeyin, şapka takın ve güneş yanıklarını önlemek için açıkta kalan cildinizi örtün; katmanlı giyinmek, değişen sıcaklıklarda rahat kalmanızı sağlar.
- Başlangıç seviyesine uygun alanlar için nereye gideceğinizi ve rehberinizle nerede tekrar bir araya geleceğinizi doğrulamak için tesis kılavuzunu ve haritaları buradan okuyun.
- Ekipman kontrolleri ve koşu öncesi hazırlık
- Hızlı bir gün öncesi ekipman kontrolü yapın: Bağlamaları, vidaları, frenleri ve botların uyumunu inceleyin; kaskın güvenli ve gözlüklerin net olduğundan emin olun.
- Kayakların veya boardların kenarlarını kontrol edin ve cilalayın; basit bir bakım, kontrolü iyileştirir ve uzun pistlerde yorgunluğu azaltır.
- Akıllıca giyinin: iç katman, orta katman ve dış katman; aşırı ısınmadan sıcak kalmak için ceket altı yalıtımını ayarlayın.
- Gerekli malzemeler: su şişesi, enerji verici yiyecek, dudak kremi, güneş kremi, küçük bir alet çantası, yedek parçalar ve kompakt bir onarım yaması; çantayı kolay erişilebilir bir yerde saklayın.
- Şimdi hızlı bir kontrol yapmak, dağda zaman kazandırır ve daha sonra yapılacak ayarlamaları kaçırmamanıza yardımcı olur.
- Ekipmanları her gün yıkamayı ve iyice kurutmayı planlayın; paslanma veya sertleşmeyi önlemek için ekipmanları otelde uygun şekilde saklayın.
- Dağda güvenlik ve disiplin
- Kayak pisti kurallarına uyun: acemi bölgeleri sağda kalsın, daha hızlı kayakçılara yol verin ve kapalı pistlere girmeyin.
- Seviyenizi bilin ve uygun zeminde kalın; yoruluyorsanız, hata yapmayı önlemek için daha kısa, daha kolay koşulara geçin ve dinlenin.
- Hava durumunu ve liftlerin durumunu takip edin; görüş mesafesi düşerse, kayak iniş uzunluğunuzu kısaltın ve güvenli bölgelere geri dönün.
- Otel ve tatil köyü personelinin iletişim bilgilerini daima yanınızda bulundurun; ayrılmanız durumunda, kararlaştırılan buluşma noktasında toplanın ve grubunuza hızla yeniden katılmak için asılı levhaları okuyun.
- Güvenliğin bir parçası da rehberiniz ve otel personeli ile birlikte uyguladığınız bir plana sahip olmaktır.
- Gün sonrası rutin ve kaçınılması gereken hatalar
- Otele döndüğünüzde güneş kremini yıkayın, ekipmanları kurulayın ve kuru, havalandırılan bir alanda saklayın.
- Nelerin iyi gittiğini ve ertesi gün neleri ayarlaman gerektiğini gözden geçir; bu, aynı hataları tekrarlamaktan kaçınmana ve genel güvenliğini artırmana yardımcı olur.
- İyileşmek için su için ve dengeli bir yemek yiyin; daha uzun bir öğleden sonra soğuma, yorgunluğun ve güneşe maruz kalmanın akşama kadar sürmesini önleyebilir.
- Seviyen için işe yarayanların basit bir kaydını tut ve yarınki dağ rotası ile ekipman kontrolleri için bir plan yap.