


Start with a high-quality on-mountain lesson to build control and reduce falls. For first-timers, that hands-on coaching gives you the feel for turning, stopping, and pace, so you know what to expect rather than guessing like nothing else. This approach helps you learn safely and can help others on the slope.
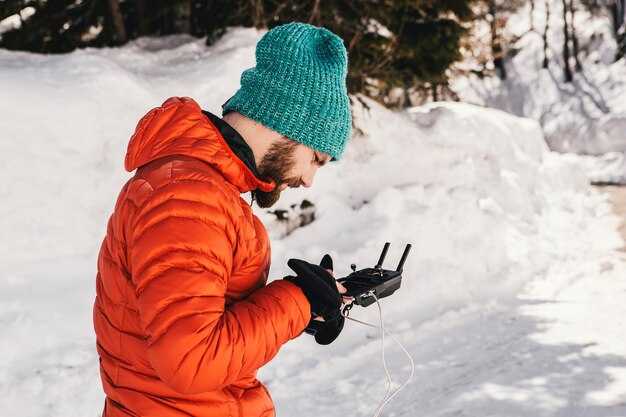
Choose high-quality gear and a properly fitting helmet to protect your head and mask your face from wind. For on-mountain comfort, pick boots that fit well, and gloves with good grip. In colorado, cold days demand smart layering: avoid cotton, and choose moisture-wicking fabrics for a bright, dry feeling all day. green runs welcome to beginners when conditions are stable.
Plan food and water wisely to maintain energy and focus. Carry quick snacks and a small bottle so you can stay alert between runs, reducing risks. Short breaks allow you to reset balance and prevent fatigue between runs. Advice from on-mountain staff helps you choose safer lines and keep your day pleasant.
Respect others on the slope and set personal limits early. Do not follow faster skiers too closely; keep a safe distance and watch for changing conditions. Use a mask when needed to stay comfortable in windy sections and keep your vision clear. Listen to advice from instructors and local staff–they spot icy patches and weather shifts that influence your line.
Expert-Recommended Pitfalls for First-Time Skiers
Start with a certified beginner lesson and buy a lift ticket for the beginner area. This builds a solid foundation before tackling longer runs. An instructor shows you how to glide, stop, and turn with control, reducing the risk of a hard fall. Wear lightweight, well-fitting gear and avoid bulky packs that slow you down. A calm, focused start keeps you safe and makes the day feel great.
Prioritize layering: base layer, middle layer, and an outer shell made of breathable fabrics. The base layer wicks moisture, the middle layer adds warmth, and the shell blocks wind and snow. Test the fit by moving and bending; there should be no pinching at the neck. Keep a few essentials in a pocket–lip balm, sunscreen, and a small snack–for quick access. A cozy mid-layer adds warmth without bulk.
Be mindful of exposure to sun and wind on the mountains. Use goggles with 100% UV protection and sunscreen on exposed skin. The glare from the snow can surprise you, so protect your eyes on sunny chair rides and throughout your time on the slopes.
Schedule short rests every hour and drink water to avoid fatigue. Pack a quick snack to sustain energy; for the season-long effort, consistency matters. Take a longer lunch break if you feel tired, but keep moving enough to stay warm and avoid stiffness. Rest helps your form improve faster.
Practice safe lift etiquette: ride with the chair out front and avoid sudden movements while boarding. On the slope, stay in control, focusing on doing slow, deliberate turns and stopping gently to avoid collisions with others. Keep your neck relaxed and your weight centered to reduce neck strain during transitions.
Don’t rush to the middle of the mountain; stay in the beginner area until you can link turns smoothly. Rushing makes it easy to lose balance and go off the trail. Keep shoes, poles, and gear properly fitted and tested before you start moving fast. A cautious pace protects your knees and your confidence.
Respect the culture of ski resorts and the family-friendly vibe on the slopes. Follow posted signs, yield to riders in front, and wait your turn in lines. theres value in clear communication and steady progress, especially when you’re learning with kids or a group. Others will notice your safety habits and respond with patience.
Be prepared for a practical reminder: a beaver-like snug strap around the helmet keeps chin and neck secure. Tie cords and straps neatly so nothing dangles. This simple habit saves you from distractions while you focus on the snow.
theres always room to grow with each session. Build a plan for the rest of the season: pick a few easy runs, gradually build speed, and enjoy family trips to practice common moves. Bring a breathable pocket for snacks, keep exposure minimal on windy days, and celebrate small wins with your crew.
Smart Packing: Avoid Overpacking and Forgetting Key Gear
Pack a single compact daypack that holds a base layer, a mid-layer fleece, a water-resistant outer shell, two pairs of socks, gloves, a hat, goggles, sunscreen, lip balm, a small first-aid kit, a compact multitool, a spare lens, a water bottle, and energy bars.
Choose layering that adapts to conditions: a breathable base layer, a warm mid-layer, and a dry outer shell; each item should compress well and dry fast.
Plan two zones of packing: the daypack holds items needed on the slope; the remaining gear stays in a larger bag stored in the car or a locker at the lodge.
Test the pack at home and trim items until the total weight feels manageable; aim for roughly 6–8 pounds (3–4 kg) in the daypack for a half-day outing.
Choose compact alternatives: foldable water bottle, micro towel, small charging cable, and a spare battery.
If gear is rented, assemble a minimal personal kit and verify it before leaving the house.
Do a final check before leaving the house: confirm you have water, snacks, spare lens, charging cable, and a basic first-aid item; verify that you can access everything during the day.
Smart packing supports a smooth day on snow and reduces stress for all ages and abilities.
Gear Decisions: Rent vs Buy, and When to Bring Your Own Boots
Rent boots for your first ski trip. If you already own a well-fitting pair, bring them, but start with rentals to test fit early and feel how your body responds on easy runs. Book a fitting with a boot specialist to compare options, and decide which path feels best for you. This approach saves time and keeps the adventure enjoyable from day one.
Typical boot rentals run about 15–35 per day, with weekly bundles that save a bit. For a 3–4 day trip, expect roughly 60–140; a 7 day plan can reach 100–250. Always wear thin ski socks and test two sizes if needed to ensure heel hold and toe clearance; the right pair should stay down when you flex, and you should feel no numbness after a few minutes. If anything feels off, switch to a different width or a larger shell, and they can help you adjust quickly at the shop. Find a setup somewhere in your plan, and stay hydrated with water or a warm drink during breaks.
The biggest benefit of owning boots is consistent control, which translates to better safety on icy patches and longer fatigue-free sessions. If you ski 8–12 days per season, or you have feet that need a custom insole or wider/narrower volume, buying makes sense. Schedule a final fit with a certified boot fitter to dial in shell size, liner, and footbeds, and test the setup on easy runs before moving to more challenging terrain. The time you invest now pays off on longer days and faster transitions on steeper sections.
Bring your own boots when you travel often, especially for longer stays or multi-stop trips such as Thanksgiving weeks or trips to places like Japan, where you’ll want the same feel across days. Personal boots reduce sizing quirks at the shop and help you stay cozy on cold days; they support orthotics and high-arch feet when needed. If you do bring them, check airline rules for skis and boots, pack them in a sturdy boot bag, and run them through a boot dryer when you return to keep them in shape. On the hill, they help you stay onto the slope and set you up for the next adventure.
Final tips: If you rent, reserve ahead and verify width options; if you buy, plan a 2–3 hour fitting with a pro and bring your own socks, insole inserts, and a boot bag. A quick check on a gentle slope after a short break will reveal if you’ve found the right setup; while you wait, sip a hot drink and keep mittens handy. If anything doesnt feel right, adjust immediately; they wont fix themselves.
Layering Strategy: Base Layers, Insulation, and Outerwear for Cold Days
Start with a snug, moisture-wicking base layer made from merino wool or a high-performance synthetic blend. This first layer sits close to the skin and moves moisture away through the whole day, keeping you dry and warm while skiing. Some runners prefer cotton shirts, but cotton traps moisture and fails when exposure matters, so avoid it at the base. After you secure the base, add a mid-layer that is thick enough to trap heat but breathable, so you stay comfortable on long climbs through changing conditions.
Mid-layer options include thick fleece or light down. Strongly consider pieces that compress well for easy packing and fit under your shell. For what you will experience across a resort town, choose a mid-layer that can adapt to bright sun and chilly wind; on bright days you want warmth without overheating, and on windy, cold days you still need protection. In many cases, the right mid-layer keeps you enjoying the day and reduces fatigue. Also, this layer supports the culture of practical, all-weather clothing that works here and across town centers.
Finish with a weatherproof outer shell that blocks wind and sheds moisture. Look for a waterproof membrane with good breathability, taped seams, and adjustable cuffs. Outerwear offers protection on exposed sections of the trail and on chairlifts, and it should be able to vent when you heat up during a long run. Mittens or insulated gloves, a hat, and a neck gaiter complete the setup so your exposure to cold stays limited here in town or at the resort, and you stay comfortable from first chair to last run. This clothing system is safe and flexible for big days.
Testing at home helps. When you pack for a first ski trip, this whole layering strategy pays off across many destinations. It works in small town hills and in large, bright resort complexes. The biggest payoff comes from a simple rule: adjust layers as conditions change through the day. What matters most is warmth with breathability, protection with mobility, and readiness for weather shifts on snow. This approach keeps you comfortable during experiences you enjoy with friends and family.
| Layer | Material Options | Key Benefit | Practical Tips |
|---|---|---|---|
| Base Layer | Merino wool, synthetic blends (polyester, polypropylene) | Moisture wicking; fast drying | Choose snug fit; avoid cotton |
| Insulation (Mid-layer) | Thick fleece, light down, synthetic fill | Heat retention; breathability | Go for a compact option if you move a lot |
| Outerwear | Waterproof/breathable shell; insulated options | Windproof; moisture protection | Look for taped seams, adjustable cuffs, ventilation zippers |
Skill Readiness: Book a Lesson Before Hitting the Slopes
Book a lesson before you hit the slopes. A pro coach sets your stance and shows safe, repeatable technique, so your first runs feel controlled rather than risky. They said tips are tailored to your level, give immediate feedback, and help you enjoy steady progress across the morning, like mastering a simple turn. When you start with instruction, you gain confidence and reduce bad habits. Especially for first-timers, this guidance makes you comfortable with the basics. They teach a repeatable sequence you can reuse on any slope.
During the session you’ll learn fall-safety, weight transfer, and how to set a clean rhythm into turns. The coach uses drills you can carry into real runs, and they adapt to your pace so the ride stays encouraging rather than overwhelming. Some beginners find the first glide difficult, and you’ll conquer a few challenging moments with guidance, turning them into steady, enjoyable progress. theres a tyrolean-style traverse on a gentle slope to build exposure without pressure.
Before you head out, confirm the package you want: a single lesson, a private session, or a group class. Many shops offer gear bundles, so you can borrow boots, helmet, and poles if you don’t own them. Wear comfortable layers and a helmet; bring gloves, sunscreen, and a bottle. If you already hold a ticket, you can link it to your lesson and save time across the resort. Some venues also allow you to reserve bibs to avoid crowding at the rental desk. If you want anything else, just ask the desk staff.
Logistics and Safety: Plan Lift Passes, Day Timings, and Gear Checks
Book lift passes online at least 7 days before and choose a morning window to minimize queues and smooth the start on-mountain, especially for beginners.
- Planning lift passes and group logistics
- Buy online 7–14 days ahead; digital passes speed entry and reduce touchpoints.
- For a group, calculate the quantity for adults and kids and assign one participating member to manage tickets and keep everyone together.
- Store passes somewhere accessible on your phone or in print, and know where to pick them up–hotel front desk or the resort information desk can help.
- Always have a backup plan: if a window is missed, shift to a later slot; do not miss the first lift by arriving too late, especially for first-time participants.
- Beginner tip: set your day around easy slopes first; this helps you build confidence and reduces risk of fatigue-related mistakes.
- Day timings and on-mountain rhythm
- Plan to be on-mountain by 08:30–09:00; most lifts open within that window, and arriving early helps you warm up gradually, like a gentle warm-up.
- Schedule a midday break in a sunny spot to avoid overexertion; carry energy food and a bottle of water for steady fuel, especially for long, longer days.
- Use a simple on-mountain loop: warm-up run, then a couple of easy runs, then progress to steeper sections as your level improves.
- Weather can shift quickly; sun protection matters–reapply sunscreen, wear a hat, and cover exposed skin to avoid sunburn; layer management keeps you comfortable on changing temps.
- Read here for the resort guide and maps to confirm where to go for beginner-friendly terrain and where to regroup with your guide.
- Gear checks and pre-run prep
- Do a quick pre-day gear check: inspect bindings, screws, brakes, and boot fits; ensure the helmet is secure and goggles are clear.
- Check edges and wax on skis or boards; a basic tune improves control and reduces fatigue on longer slopes.
- Layer smartly: base layer, mid-layer, and shell; adjust under-jacket insulation to stay warm without overheating.
- Pack essentials: water bottle, energy food, lip balm, sunscreen, a small tool kit, spare parts, and a compact repair patch; keep the bag somewhere accessible.
- Doing a quick check now saves time on-mountain and helps you avoid missed adjustments later.
- Plan to wash gear after day and dry thoroughly; store equipment properly at the hotel to prevent rust or stiffness.
- On-mountain safety and discipline
- Follow slope etiquette: beginner areas stay to the right, yield to faster skiers, and stay off closed runs.
- Know your level and stay on suitable terrain; if you’re getting tired, switch to shorter, easier runs and rest to prevent mistakes.
- Keep an eye on weather and lift status; if visibility drops, shorten your run length and head back to safety zones.
- Always carry contact info for the hotel and resort staff; in case of separation, assemble at the agreed meeting point and read the posted signs to rejoin your group quickly.
- Part of safety is having a plan that you practiced with your guide and hotel staff.
- Post-day routine and mistakes to avoid
- Back at the hotel, wash off sunscreen, dry gear, and store equipment in a dry, ventilated area.
- Review what went well and what to adjust next day; this helps you avoid repeating the same mistakes and improves your overall safety.
- Hydrate and eat a balanced meal to recover; a longer afternoon cooldown can prevent fatigue and sun exposure from lingering into the evening.
- Keep a simple log of what works for your level and make a plan for tomorrow’s on-mountain route and gear checks.