


Start with a high-quality on-mountain lesson to build control and reduce falls. For first-timers, that hands-on coaching gives you the feel for turning, stopping, and pace, so you know what to expect rather than guessing like nothing else. This approach helps you learn safely and can help others on the slope.
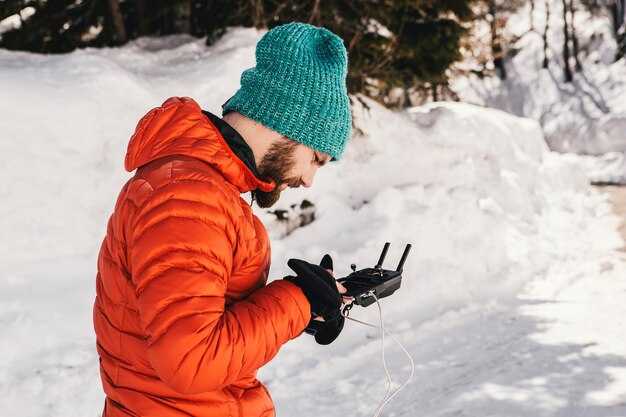
Choose high-quality gear and a properly fitting helmet to protect your head and mask your face from wind. For on-mountain comfort, pick boots that fit well, and gloves with good grip. In colorado, cold days demand smart layering: avoid cotton, and choose moisture-wicking fabrics for a bright, dry feeling all day. green runs welcome to beginners when conditions are stable.
Plan food and water wisely to maintain energy and focus. Carry quick snacks and a small bottle so you can stay alert between runs, reducing risks. Short breaks allow you to reset balance and prevent fatigue between runs. Advice from on-mountain staff helps you choose safer lines and keep your day pleasant.
Respect others on the slope and set personal limits early. Do not follow faster skiers too closely; keep a safe distance and watch for changing conditions. Use a mask when needed to stay comfortable in windy sections and keep your vision clear. Listen to advice from instructors and local staff–they spot icy patches and weather shifts that influence your line.
Expert-Recommended Pitfalls for First-Time Skiers
Start with a certified beginner lesson and buy a lift ticket for the beginner area. This builds a solid foundation before tackling longer runs. An instructor shows you how to glide, stop, and turn with control, reducing the risk of a hard fall. Wear lightweight, well-fitting gear and avoid bulky packs that slow you down. A calm, focused start keeps you safe and makes the day feel great.
Prioritize layering: base layer, middle layer, and an outer shell made of breathable fabrics. The base layer wicks moisture, the middle layer adds warmth, and the shell blocks wind and snow. Test the fit by moving and bending; there should be no pinching at the neck. Keep a few essentials in a pocket–lip balm, sunscreen, and a small snack–for quick access. A cozy mid-layer adds warmth without bulk.
Be mindful of exposure to sun and wind on the mountains. Use goggles with 100% UV protection and sunscreen on exposed skin. The glare from the snow can surprise you, so protect your eyes on sunny chair rides and throughout your time on the slopes.
Schedule short rests every hour and drink water to avoid fatigue. Pack a quick snack to sustain energy; for the season-long effort, consistency matters. Take a longer lunch break if you feel tired, but keep moving enough to stay warm and avoid stiffness. Rest helps your form improve faster.
Practice safe lift etiquette: ride with the chair out front and avoid sudden movements while boarding. On the slope, stay in control, focusing on doing slow, deliberate turns and stopping gently to avoid collisions with others. Keep your neck relaxed and your weight centered to reduce neck strain during transitions.
Don’t rush to the middle of the mountain; stay in the beginner area until you can link turns smoothly. Rushing makes it easy to lose balance and go off the trail. Keep shoes, poles, and gear properly fitted and tested before you start moving fast. A cautious pace protects your knees and your confidence.
Respect the culture of ski resorts and the family-friendly vibe on the slopes. Follow posted signs, yield to riders in front, and wait your turn in lines. theres value in clear communication and steady progress, especially when you’re learning with kids or a group. Others will notice your safety habits and respond with patience.
Be prepared for a practical reminder: a beaver-like snug strap around the helmet keeps chin and neck secure. Tie cords and straps neatly so nothing dangles. This simple habit saves you from distractions while you focus on the snow.
theres always room to grow with each session. Build a plan for the rest of the season: pick a few easy runs, gradually build speed, and enjoy family trips to practice common moves. Bring a breathable pocket for snacks, keep exposure minimal on windy days, and celebrate small wins with your crew.
Smart Packing: Avoid Overpacking and Forgetting Key Gear
Pack a single compact daypack that holds a base layer, a mid-layer fleece, a water-resistant outer shell, two pairs of socks, gloves, a hat, goggles, sunscreen, lip balm, a small first-aid kit, a compact multitool, a spare lens, a water bottle, and energy bars.
Choose layering that adapts to conditions: a breathable base layer, a warm mid-layer, and a dry outer shell; each item should compress well and dry fast.
Plan two zones of packing: the daypack holds items needed on the slope; the remaining gear stays in a larger bag stored in the car or a locker at the lodge.
Test the pack at home and trim items until the total weight feels manageable; aim for roughly 6–8 pounds (3–4 kg) in the daypack for a half-day outing.
Choose compact alternatives: foldable water bottle, micro towel, small charging cable, and a spare battery.
If gear is rented, assemble a minimal personal kit and verify it before leaving the house.
Do a final check before leaving the house: confirm you have water, snacks, spare lens, charging cable, and a basic first-aid item; verify that you can access everything during the day.
Smart packing supports a smooth day on snow and reduces stress for all ages and abilities.
Gear Decisions: Rent vs Buy, and When to Bring Your Own Boots
Rent boots for your first ski trip. If you already own a well-fitting pair, bring them, but start with rentals to test fit early and feel how your body responds on easy runs. Book a fitting with a boot specialist to compare options, and decide which path feels best for you. This approach saves time and keeps the adventure enjoyable from day one.
Typical boot rentals run about 15–35 per day, with weekly bundles that save a bit. For a 3–4 day trip, expect roughly 60–140; a 7 day plan can reach 100–250. Always wear thin ski socks and test two sizes if needed to ensure heel hold and toe clearance; the right pair should stay down when you flex, and you should feel no numbness after a few minutes. If anything feels off, switch to a different width or a larger shell, and they can help you adjust quickly at the shop. Find a setup somewhere in your plan, and stay hydrated with water or a warm drink during breaks.
The biggest benefit of owning boots is consistent control, which translates to better safety on icy patches and longer fatigue-free sessions. If you ski 8–12 days per season, or you have feet that need a custom insole or wider/narrower volume, buying makes sense. Schedule a final fit with a certified boot fitter to dial in shell size, liner, and footbeds, and test the setup on easy runs before moving to more challenging terrain. The time you invest now pays off on longer days and faster transitions on steeper sections.
Bring your own boots when you travel often, especially for longer stays or multi-stop trips such as Thanksgiving weeks or trips to places like Japan, where you’ll want the same feel across days. Personal boots reduce sizing quirks at the shop and help you stay cozy on cold days; they support orthotics and high-arch feet when needed. If you do bring them, check airline rules for skis and boots, pack them in a sturdy boot bag, and run them through a boot dryer when you return to keep them in shape. On the hill, they help you stay onto the slope and set you up for the next adventure.
Final tips: If you rent, reserve ahead and verify width options; if you buy, plan a 2–3 hour fitting with a pro and bring your own socks, insole inserts, and a boot bag. A quick check on a gentle slope after a short break will reveal if you’ve found the right setup; while you wait, sip a hot drink and keep mittens handy. If anything doesnt feel right, adjust immediately; they wont fix themselves.
Layering Strategy: Base Layers, Insulation, and Outerwear for Cold Days
Start with a snug, moisture-wicking base layer made from merino wool or a high-performance synthetic blend. This first layer sits close to the skin and moves moisture away through the whole day, keeping you dry and warm while skiing. Some runners prefer cotton shirts, but cotton traps moisture and fails when exposure matters, so avoid it at the base. After you secure the base, add a mid-layer that is thick enough to trap heat but breathable, so you stay comfortable on long climbs through changing conditions.
Mid-layer options include thick fleece or light down. Strongly consider pieces that compress well for easy packing and fit under your shell. For what you will experience across a resort town, choose a mid-layer that can adapt to bright sun and chilly wind; on bright days you want warmth without overheating, and on windy, cold days you still need protection. In many cases, the right mid-layer keeps you enjoying the day and reduces fatigue. Also, this layer supports the culture of practical, all-weather clothing that works here and across town centers.
Finish with a weatherproof outer shell that blocks wind and sheds moisture. Look for a waterproof membrane with good breathability, taped seams, and adjustable cuffs. Outerwear offers protection on exposed sections of the trail and on chairlifts, and it should be able to vent when you heat up during a long run. Mittens or insulated gloves, a hat, and a neck gaiter complete the setup so your exposure to cold stays limited here in town or at the resort, and you stay comfortable from first chair to last run. This clothing system is safe and flexible for big days.
Testing at home helps. When you pack for a first ski trip, this whole layering strategy pays off across many destinations. It works in small town hills and in large, bright resort complexes. The biggest payoff comes from a simple rule: adjust layers as conditions change through the day. What matters most is warmth with breathability, protection with mobility, and readiness for weather shifts on snow. This approach keeps you comfortable during experiences you enjoy with friends and family.
| Calque | Material Options | Avantage clé | Conseils pratiques |
|---|---|---|---|
| Base Layer | Merino wool, synthetic blends (polyester, polypropylene) | Moisture wicking; fast drying | Choose snug fit; avoid cotton |
| Insulation (Mid-layer) | Polaire épaisse, duvet léger, garnissage synthétique | Rétention de chaleur ; respirabilité | Optez pour une option compacte si vous bougez beaucoup. |
| Vêtements d'extérieur | Couche extérieure imperméable/respirante ; options isolées | Coupe-vent ; protection contre l'humidité | Recherchez des coutures étanchées, des manchettes réglables et des fermetures éclair de ventilation. |
Préparation aux pistes : Réservez un cours avant de vous lancer
Réservez une leçon avant de vous lancer sur les pistes. Un moniteur professionnel ajuste votre position et vous montre une technique sûre et reproductible, pour que vos premières descentes soient maîtrisées plutôt que risquées. On dit que les conseils sont adaptés à votre niveau, qu'ils donnent un retour immédiat et vous aident à progresser régulièrement tout au long de la matinée, comme maîtriser un virage simple. Lorsque vous commencez par un enseignement, vous gagnez en confiance et réduisez les mauvaises habitudes. Surtout pour les débutants, ces conseils vous familiarisent avec les bases. Ils enseignent une séquence reproductible que vous pouvez réutiliser sur n'importe quelle pente.
Pendant la session, vous apprendrez la sécurité en cas de chute, le transfert de poids et comment établir un rythme propre dans les virages. Le coach utilise des exercices que vous pourrez reproduire lors de vos descentes, et il s'adapte à votre rythme pour que la sortie reste encourageante plutôt qu'écrasante. Certains débutants trouvent la première glisse difficile, et vous surmonterez quelques moments délicats avec de l'aide, en les transformant en progrès constants et agréables. Il y a une traversée de type tyrolienne sur une pente douce pour développer l'exposition sans pression.
Avant de partir, confirmez le forfait que vous souhaitez : cours individuel, séance privée ou cours en groupe. De nombreux magasins proposent des packs d’équipement, vous pouvez donc emprunter des chaussures, un casque et des bâtons si vous n’en possédez pas. Portez plusieurs couches de vêtements confortables et un casque ; apportez des gants, de la crème solaire et une bouteille. Si vous avez déjà un forfait, vous pouvez le lier à votre cours et gagner du temps dans la station. Certains établissements vous permettent également de réserver des dossards pour éviter l’affluence au comptoir de location. Si vous désirez autre chose, n’hésitez pas à vous adresser au personnel d’accueil.
Logistique et Sécurité : Planifier les Forfaits de Remontées Mécaniques, les Horaires de la Journée et les Vérifications de l'Équipement
Réservez vos forfaits en ligne au moins 7 jours à l'avance et choisissez un créneau horaire matinal pour minimiser les files d'attente et faciliter le départ sur les pistes, surtout pour les débutants.
- Planification des forfaits de remontées mécaniques et de la logistique de groupe
- Achetez en ligne 7 à 14 jours à l'avance ; les pass numériques accélèrent l'entrée et réduisent les points de contact.
- Pour un groupe, calculez le nombre d'adultes et d'enfants et désignez un membre participant pour gérer les billets et s'assurer que tout le monde reste ensemble.
- Conservez vos forfaits dans un endroit facilement accessible sur votre téléphone ou en version papier, et sachez où aller les récupérer (la réception de l'hôtel ou le comptoir d'information de la station peuvent vous aider).
- Ayez toujours un plan de secours : si une fenêtre de tir est manquée, passez à un créneau ultérieur ; ne manquez pas la première tentative en arrivant trop tard, surtout pour les nouveaux participants.
- Conseil pour débutants : organisez votre journée en commençant par des pistes faciles ; cela vous aidera à gagner en confiance et à réduire le risque d'erreurs liées à la fatigue.
- Horaires et rythme sur la montagne
- Prévoyez d'être en montagne entre 08h30 et 09h00 ; la plupart des remontées mécaniques ouvrent dans cette fenêtre horaire, et arriver tôt vous aide à vous échauffer progressivement, comme un échauffement en douceur.
- Prévoyez une pause à midi dans un endroit ensoleillé pour éviter le surmenage ; emportez des aliments énergétiques et une bouteille d'eau pour un apport constant de carburant, surtout pour les longues, très longues journées.
- Privilégiez une boucle simple sur la montagne : une descente d’échauffement, puis quelques pistes faciles, avant de passer à des sections plus raides au fur et à mesure que votre niveau s’améliore.
- Le temps peut changer rapidement ; la protection solaire est essentielle – réappliquez de la crème solaire, portez un chapeau et couvrez la peau exposée pour éviter les coups de soleil ; la gestion des couches de vêtements vous permet de rester à l'aise lorsque les températures changent.
- Consultez ici le guide de la station et les plans pour confirmer où aller pour les terrains adaptés aux débutants et où retrouver votre guide.
- Vérification de l'équipement et préparation avant la course
- Faites une rapide vérification de votre équipement avant de partir : inspectez les fixations, les vis, les freins et l'ajustement des bottes ; assurez-vous que le casque est bien fixé et que les lunettes sont propres.
- Vérifiez les carres et fartez vos skis ou planches ; un entretien de base améliore le contrôle et réduit la fatigue sur les longues pistes.
- Superposez intelligemment : couche de base, couche intermédiaire et couche extérieure ; ajustez l'isolation sous la veste pour rester au chaud sans surchauffe.
- Indispensables : gourde, aliments énergétiques, baume à lèvres, crème solaire, une petite trousse à outils, des pièces de rechange et une rustine compacte ; rangez le sac dans un endroit accessible.
- Une petite vérification rapide maintenant vous permet de gagner du temps en montagne et d'éviter les ajustements manqués plus tard.
- Prévoir de laver l'équipement après chaque journée et de bien le sécher ; ranger correctement le matériel à l'hôtel afin d'éviter la rouille ou le durcissement.
- Sécurité et discipline en montagne
- Respectez l'étiquette des pistes : les zones débutants restent à droite, cédez le passage aux skieurs plus rapides et ne vous aventurez pas sur les pistes fermées.
- Connaissez votre niveau et restez sur un terrain adapté ; si vous vous sentez fatigué, passez à des parcours plus courts et plus faciles et reposez-vous pour éviter les erreurs.
- Surveillez la météo et l'état des remontées mécaniques ; si la visibilité diminue, réduisez la longueur de votre descente et dirigez-vous vers les zones de sécurité.
- Ayez toujours sur vous les coordonnées de l'hôtel et du personnel du complexe ; en cas de séparation, rassemblez-vous au point de rencontre convenu et lisez les panneaux affichés pour rejoindre rapidement votre groupe.
- Une partie de la sécurité consiste à avoir un plan que vous avez mis en pratique avec votre guide et le personnel de l'hôtel.
- Routine post-journée et erreurs à éviter
- De retour à l'hôtel, rincez la crème solaire, séchez l'équipement et rangez le matériel dans un endroit sec et ventilé.
- Passez en revue ce qui s'est bien passé et ce qu'il faut ajuster pour le lendemain ; cela vous aide à éviter de répéter les mêmes erreurs et améliore votre sécurité globale.
- Hydratez-vous et mangez un repas équilibré pour récupérer ; une période de refroidissement plus longue l'après-midi peut empêcher la fatigue et l'exposition au soleil de persister jusqu'au soir.
- Tenez un registre simple de ce qui fonctionne pour votre niveau et prévoyez l'itinéraire de demain en montagne, ainsi que les vérifications de votre équipement.