


Start with a high-quality on-mountain lesson to build control and reduce falls. For first-timers, that hands-on coaching gives you the feel for turning, stopping, and pace, so you know what to expect rather than guessing like nothing else. This approach helps you learn safely and can help others on the slope.
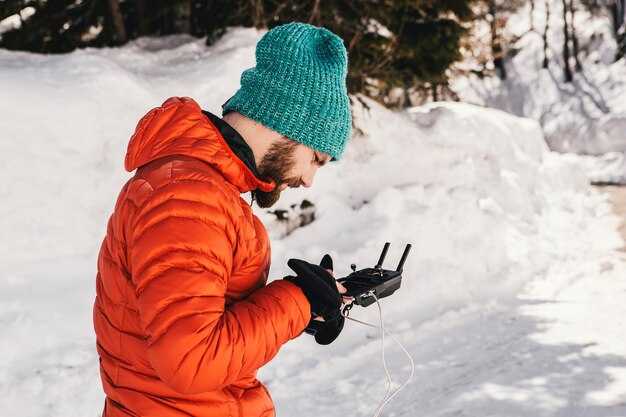
Choose high-quality gear and a properly fitting helmet to protect your head and mask your face from wind. For on-mountain comfort, pick boots that fit well, and gloves with good grip. In colorado, cold days demand smart layering: avoid cotton, and choose moisture-wicking fabrics for a bright, dry feeling all day. green runs welcome to beginners when conditions are stable.
Plan food and water wisely to maintain energy and focus. Carry quick snacks and a small bottle so you can stay alert between runs, reducing risks. Short breaks allow you to reset balance and prevent fatigue between runs. Advice from on-mountain staff helps you choose safer lines and keep your day pleasant.
Respect others on the slope and set personal limits early. Do not follow faster skiers too closely; keep a safe distance and watch for changing conditions. Use a mask when needed to stay comfortable in windy sections and keep your vision clear. Listen to advice from instructors and local staff–they spot icy patches and weather shifts that influence your line.
Expert-Recommended Pitfalls for First-Time Skiers
Start with a certified beginner lesson and buy a lift ticket for the beginner area. This builds a solid foundation before tackling longer runs. An instructor shows you how to glide, stop, and turn with control, reducing the risk of a hard fall. Wear lightweight, well-fitting gear and avoid bulky packs that slow you down. A calm, focused start keeps you safe and makes the day feel great.
Prioritize layering: base layer, middle layer, and an outer shell made of breathable fabrics. The base layer wicks moisture, the middle layer adds warmth, and the shell blocks wind and snow. Test the fit by moving and bending; there should be no pinching at the neck. Keep a few essentials in a pocket–lip balm, sunscreen, and a small snack–for quick access. A cozy mid-layer adds warmth without bulk.
Be mindful of exposure to sun and wind on the mountains. Use goggles with 100% UV protection and sunscreen on exposed skin. The glare from the snow can surprise you, so protect your eyes on sunny chair rides and throughout your time on the slopes.
Schedule short rests every hour and drink water to avoid fatigue. Pack a quick snack to sustain energy; for the season-long effort, consistency matters. Take a longer lunch break if you feel tired, but keep moving enough to stay warm and avoid stiffness. Rest helps your form improve faster.
Practice safe lift etiquette: ride with the chair out front and avoid sudden movements while boarding. On the slope, stay in control, focusing on doing slow, deliberate turns and stopping gently to avoid collisions with others. Keep your neck relaxed and your weight centered to reduce neck strain during transitions.
Don’t rush to the middle of the mountain; stay in the beginner area until you can link turns smoothly. Rushing makes it easy to lose balance and go off the trail. Keep shoes, poles, and gear properly fitted and tested before you start moving fast. A cautious pace protects your knees and your confidence.
Respect the culture of ski resorts and the family-friendly vibe on the slopes. Follow posted signs, yield to riders in front, and wait your turn in lines. theres value in clear communication and steady progress, especially when you’re learning with kids or a group. Others will notice your safety habits and respond with patience.
Be prepared for a practical reminder: a beaver-like snug strap around the helmet keeps chin and neck secure. Tie cords and straps neatly so nothing dangles. This simple habit saves you from distractions while you focus on the snow.
theres always room to grow with each session. Build a plan for the rest of the season: pick a few easy runs, gradually build speed, and enjoy family trips to practice common moves. Bring a breathable pocket for snacks, keep exposure minimal on windy days, and celebrate small wins with your crew.
Smart Packing: Avoid Overpacking and Forgetting Key Gear
Pack a single compact daypack that holds a base layer, a mid-layer fleece, a water-resistant outer shell, two pairs of socks, gloves, a hat, goggles, sunscreen, lip balm, a small first-aid kit, a compact multitool, a spare lens, a water bottle, and energy bars.
Choose layering that adapts to conditions: a breathable base layer, a warm mid-layer, and a dry outer shell; each item should compress well and dry fast.
Plan two zones of packing: the daypack holds items needed on the slope; the remaining gear stays in a larger bag stored in the car or a locker at the lodge.
Test the pack at home and trim items until the total weight feels manageable; aim for roughly 6–8 pounds (3–4 kg) in the daypack for a half-day outing.
Choose compact alternatives: foldable water bottle, micro towel, small charging cable, and a spare battery.
If gear is rented, assemble a minimal personal kit and verify it before leaving the house.
Do a final check before leaving the house: confirm you have water, snacks, spare lens, charging cable, and a basic first-aid item; verify that you can access everything during the day.
Smart packing supports a smooth day on snow and reduces stress for all ages and abilities.
Gear Decisions: Rent vs Buy, and When to Bring Your Own Boots
Rent boots for your first ski trip. If you already own a well-fitting pair, bring them, but start with rentals to test fit early and feel how your body responds on easy runs. Book a fitting with a boot specialist to compare options, and decide which path feels best for you. This approach saves time and keeps the adventure enjoyable from day one.
Typical boot rentals run about 15–35 per day, with weekly bundles that save a bit. For a 3–4 day trip, expect roughly 60–140; a 7 day plan can reach 100–250. Always wear thin ski socks and test two sizes if needed to ensure heel hold and toe clearance; the right pair should stay down when you flex, and you should feel no numbness after a few minutes. If anything feels off, switch to a different width or a larger shell, and they can help you adjust quickly at the shop. Find a setup somewhere in your plan, and stay hydrated with water or a warm drink during breaks.
The biggest benefit of owning boots is consistent control, which translates to better safety on icy patches and longer fatigue-free sessions. If you ski 8–12 days per season, or you have feet that need a custom insole or wider/narrower volume, buying makes sense. Schedule a final fit with a certified boot fitter to dial in shell size, liner, and footbeds, and test the setup on easy runs before moving to more challenging terrain. The time you invest now pays off on longer days and faster transitions on steeper sections.
Bring your own boots when you travel often, especially for longer stays or multi-stop trips such as Thanksgiving weeks or trips to places like Japan, where you’ll want the same feel across days. Personal boots reduce sizing quirks at the shop and help you stay cozy on cold days; they support orthotics and high-arch feet when needed. If you do bring them, check airline rules for skis and boots, pack them in a sturdy boot bag, and run them through a boot dryer when you return to keep them in shape. On the hill, they help you stay onto the slope and set you up for the next adventure.
Final tips: If you rent, reserve ahead and verify width options; if you buy, plan a 2–3 hour fitting with a pro and bring your own socks, insole inserts, and a boot bag. A quick check on a gentle slope after a short break will reveal if you’ve found the right setup; while you wait, sip a hot drink and keep mittens handy. If anything doesnt feel right, adjust immediately; they wont fix themselves.
Layering Strategy: Base Layers, Insulation, and Outerwear for Cold Days
Start with a snug, moisture-wicking base layer made from merino wool or a high-performance synthetic blend. This first layer sits close to the skin and moves moisture away through the whole day, keeping you dry and warm while skiing. Some runners prefer cotton shirts, but cotton traps moisture and fails when exposure matters, so avoid it at the base. After you secure the base, add a mid-layer that is thick enough to trap heat but breathable, so you stay comfortable on long climbs through changing conditions.
Mid-layer options include thick fleece or light down. Strongly consider pieces that compress well for easy packing and fit under your shell. For what you will experience across a resort town, choose a mid-layer that can adapt to bright sun and chilly wind; on bright days you want warmth without overheating, and on windy, cold days you still need protection. In many cases, the right mid-layer keeps you enjoying the day and reduces fatigue. Also, this layer supports the culture of practical, all-weather clothing that works here and across town centers.
Finish with a weatherproof outer shell that blocks wind and sheds moisture. Look for a waterproof membrane with good breathability, taped seams, and adjustable cuffs. Outerwear offers protection on exposed sections of the trail and on chairlifts, and it should be able to vent when you heat up during a long run. Mittens or insulated gloves, a hat, and a neck gaiter complete the setup so your exposure to cold stays limited here in town or at the resort, and you stay comfortable from first chair to last run. This clothing system is safe and flexible for big days.
Testing at home helps. When you pack for a first ski trip, this whole layering strategy pays off across many destinations. It works in small town hills and in large, bright resort complexes. The biggest payoff comes from a simple rule: adjust layers as conditions change through the day. What matters most is warmth with breathability, protection with mobility, and readiness for weather shifts on snow. This approach keeps you comfortable during experiences you enjoy with friends and family.
| Layer | Material Options | Hauptvorteil | Praktische Tipps |
|---|---|---|---|
| Base Layer | Merino wool, synthetic blends (polyester, polypropylene) | Moisture wicking; fast drying | Choose snug fit; avoid cotton |
| Insulation (Mid-layer) | Thick fleece, light down, synthetic fill | Wärmerückhaltung; Atmungsaktivität | Entscheiden Sie sich für eine kompakte Option, wenn Sie viel unterwegs sind. |
| Outerwear | Wasserdichte/atmungsaktive Shell; isolierte Optionen | Winddicht; Feuchtigkeitsschutz | Achte auf verklebte Nähte, verstellbare Ärmelbündchen, Belüftungsreißverschlüsse |
Fit für die Piste: Buche eine Unterrichtsstunde, bevor du dich auf die Piste wagst
Buche eine Unterrichtsstunde, bevor du auf die Piste gehst. Ein Profi-Coach optimiert deine Haltung und zeigt dir eine sichere, wiederholbare Technik, sodass sich deine ersten Abfahrten kontrolliert und nicht riskant anfühlen. Die Tipps sind auf dein Niveau zugeschnitten, geben sofortiges Feedback und helfen dir, den ganzen Vormittag über stetige Fortschritte zu erzielen, z. B. beim Erlernen einer einfachen Kurve. Wenn du mit einer Einweisung beginnst, gewinnst du Selbstvertrauen und reduzierst schlechte Angewohnheiten. Besonders für Anfänger macht diese Anleitung dich mit den Grundlagen vertraut. Sie lehren eine wiederholbare Sequenz, die du auf jeder Piste anwenden kannst.
Während der Session lernst du Sturzsicherung, Gewichtsverlagerung und wie man einen sauberen Rhythmus in Kurven bringt. Der Coach verwendet Übungen, die du in echte Abfahrten übernehmen kannst, und passt sich deinem Tempo an, sodass die Fahrt eher ermutigend als überwältigend bleibt. Einige Anfänger finden den ersten Gleitflug schwierig, und du wirst mit Anleitung ein paar herausfordernde Momente meistern und sie in stetigen, angenehmen Fortschritt verwandeln. Es gibt eine Tyroler-Seilbahn auf einem sanften Hang, um Exposition ohne Druck aufzubauen.
Bevor du losfährst, bestätige bitte das gewünschte Paket: eine Einzelstunde, eine Privatstunde oder ein Gruppenkurs. Viele Shops bieten Ausrüstungs-Bundles an, sodass du dir Schuhe, Helm und Stöcke leihen kannst, falls du sie nicht besitzt. Trage bequeme Kleidung im Zwiebellook und einen Helm; bringe Handschuhe, Sonnencreme und eine Flasche mit. Wenn du bereits ein Ticket hast, kannst du es mit deiner Unterrichtsstunde verknüpfen und so Zeit im gesamten Resort sparen. Einige Veranstaltungsorte ermöglichen es dir auch, Startnummern zu reservieren, um Gedränge am Verleihschalter zu vermeiden. Wenn du etwas anderes möchtest, frage einfach das Personal am Schalter.
Logistik und Sicherheit: Planung von Liftpässen, Tagesabläufen und Ausrüstungsprüfungen
Buchen Sie Ihre Liftkarten online mindestens 7 Tage im Voraus und wählen Sie ein Zeitfenster am Morgen, um Warteschlangen zu minimieren und einen reibungslosen Start am Berg zu gewährleisten, insbesondere für Anfänger.
- Planung von Skipässen und Gruppenlogistik
- Online kaufen: 7–14 Tage im Voraus; digitale Pässe beschleunigen den Einlass und reduzieren Kontaktpunkte.
- Für eine Gruppe die Anzahl für Erwachsene und Kinder berechnen und ein teilnehmendes Mitglied mit der Verwaltung der Tickets und dem Zusammenhalten aller beauftragen.
- Bewahren Sie Ihre Pässe an einem Ort auf, der auf Ihrem Telefon oder in gedruckter Form zugänglich ist, und wissen Sie, wo Sie sie abholen können – die Hotelrezeption oder der Informationsschalter des Resorts können Ihnen dabei helfen.
- Habe immer einen Notfallplan: Wenn ein Zeitfenster verpasst wird, weiche auf einen späteren Termin aus; verpasse den ersten Lift auf keinen Fall, indem du zu spät ankommst, besonders nicht bei erstmaligen Teilnehmern.
- Anfängertipp: Plane deinen Tag zuerst rund um einfache Pisten; das hilft dir, Selbstvertrauen aufzubauen und reduziert das Risiko von Fehlern aufgrund von Erschöpfung.
- Tageszeiten und Rhythmus am Berg
- Plane, zwischen 08:30 und 09:00 Uhr am Berg zu sein; die meisten Lifte öffnen in diesem Zeitraum, und frühes Ankommen hilft dir, dich allmählich aufzuwärmen, wie ein sanftes Aufwärmen.
- Plane eine Mittagspause an einem sonnigen Ort ein, um Überanstrengung zu vermeiden; führe Energienahrung und eine Flasche Wasser für stetigen Nachschub mit, besonders an langen, längeren Tagen.
- Nutzen Sie eine einfache Runde am Berg: Warmlaufen, dann ein paar leichte Abfahrten, und steigern Sie sich dann zu steileren Abschnitten, je besser Ihr Level wird.
- Das Wetter kann sich schnell ändern; Sonnenschutz ist wichtig – Sonnencreme erneut auftragen, einen Hut tragen und freiliegende Haut bedecken, um Sonnenbrand zu vermeiden; Schichtsystem hält dich bei wechselnden Temperaturen angenehm warm.
- Lies hier den Resort-Guide und die Karten, um zu bestätigen, wo sich anfängerfreundliches Gelände befindet und wo du dich mit deinem Guide wiedertreffen kannst.
- Ausrüstungsüberprüfung und Vorbereitung vor dem Lauf
- Mache einen kurzen Ausrüstungscheck vor dem Tag: Überprüfe Bindungen, Schrauben, Bremsen und die Passform der Schuhe; stelle sicher, dass der Helm sicher sitzt und die Skibrille klar ist.
- Kanten schleifen und Ski oder Board wachsen; ein einfaches Tuning verbessert die Kontrolle und reduziert die Ermüdung auf längeren Pisten.
- Kleiden Sie sich in Schichten: Basisschicht, Zwischenschicht und Außenschicht; passen Sie die Isolierung unter der Jacke an, um warm zu bleiben, ohne zu überhitzen.
- Wesentliche Ausrüstung: Trinkflasche, Energieriegel, Lippenbalsam, Sonnencreme, ein kleiner Werkzeugsatz, Ersatzteile und ein kompaktes Reparaturset; die Tasche an einem gut zugänglichen Ort aufbewahren.
- Eine kurze Überprüfung jetzt spart Zeit am Berg und hilft Ihnen, später verpasste Anpassungen zu vermeiden.
- Plane, die Ausrüstung nach dem Tag zu waschen und gründlich zu trocknen; lagere die Ausrüstung ordnungsgemäß im Hotel, um Rost oder Steifheit zu vermeiden.
- Sicherheit und Disziplin am Berg
- Befolgen Sie die Pistenregeln: Anfängerzonen bleiben rechts, nehmen Sie Rücksicht auf schnellere Skifahrer und bleiben Sie von gesperrten Pisten fern.
- Kenne dein Können und bleibe in geeignetem Gelände. Wenn du müde wirst, wechsle zu kürzeren, leichteren Läufen und ruhe dich aus, um Fehler zu vermeiden.
- Behalten Sie das Wetter und den Liftstatus im Auge; wenn die Sicht nachlässt, verkürzen Sie Ihre Abfahrtslänge und begeben Sie sich zurück in Sicherheitszonen.
- Führen Sie stets die Kontaktinformationen des Hotel- und Resortpersonals mit sich; Versammeln Sie sich im Falle einer Trennung am vereinbarten Treffpunkt und lesen Sie die Aushänge, um sich schnell wieder Ihrer Gruppe anzuschließen.
- Ein Teil der Sicherheit besteht darin, einen Plan zu haben, den Sie mit Ihrem Guide und dem Hotelpersonal geübt haben.
- Routine nach dem Angeln und Fehler, die es zu vermeiden gilt
- Zurück im Hotel Sonnencreme abwaschen, Ausrüstung trocknen und Equipment in einem trockenen, belüfteten Bereich lagern.
- Überprüfe, was gut gelaufen ist und was du am nächsten Tag anpassen solltest; das hilft dir, die gleichen Fehler zu vermeiden und verbessert deine allgemeine Sicherheit.
- Trinken Sie ausreichend und nehmen Sie eine ausgewogene Mahlzeit zu sich, um sich zu erholen; eine längere Abkühlungsphase am Nachmittag kann verhindern, dass Müdigkeit und Sonneneinstrahlung bis in den Abend hinein anhalten.
- Führe ein einfaches Protokoll darüber, was für dein Level funktioniert, und erstelle einen Plan für die morgige Route auf dem Berg sowie Ausrüstungskontrollen.