

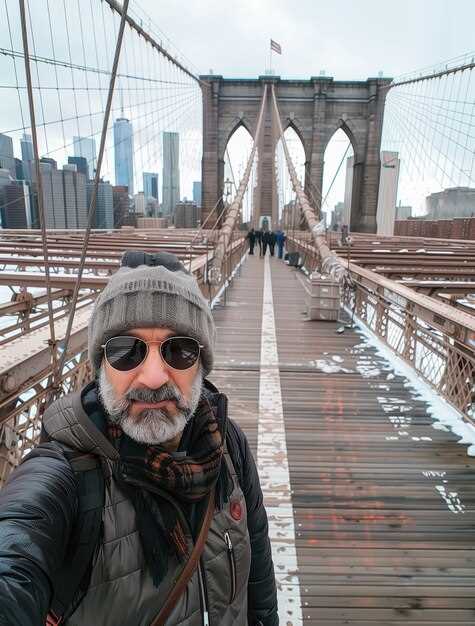
Kick off with a sunrise over Brooklyn Bridge. Stand on the Manhattan-side pedestrian path just before dawn, then frame the arches with the skyline as light spills across the East River. This shot anchors your feeds and gives your readers a confident narrative from the start.
From there, swing to DUMBO for the iconic view where the Manhattan Bridge frames brick walls and cobblestones. For a vertical skyline, climb to Top of the Rock or One World Observatory after 5 p.m. on clear days, when the glass towers glow. Stroll the High Line around 14th Street for elevated perspectives, and catch Central Park’s Bow Bridge or the Bethesda Terrace with a wide-angle lens in the morning mist.
Backpackersglobe tells you to bring imagination and destination focus. You can improve by putting your best foot forward, crafting a concise narrative and choosing moments that fit your style. louis doesnt chase filters; his posts highlight textures that feel real, with a touch of local flavor. getyourguide tips help you lock in timed entries, while united communities of travelers share tricks with other creators, influencers, and a storyteller to shape your own narrative on the feeds.
Prepare a compact kit and a single-strap bag to keep your approach efficient. A light bag, spare battery, and a lens or two will serve across all ten spots. The article that follows dives into each location with concrete, practical advice so you can move from one shot to the next without friction, putting your imagination to work for every frame. Treat yourself as a storyteller.
Top 10 Instagram Spots in New York City, USA
Visit Central Park at sunrise for your most vibrant landscape shot. Start at Bethesda Terrace for symmetry, then move toward Bow Bridge to catch reflections on the lake. Visiting early minimizes crowds, making posting cleaner and more engaging. Your planning should include a versatile lens and a few ready captions for posting, turning photo adventures into memorable content.
The Top of the Rock offers a high vantage with the city unfolding in layers. For the best angles, arrive about 30 minutes before golden hour and switch between wide and telephoto shots. Which spot aligns with your vibe will guide your planning–the terrace view for a broad skyline, or closer street-level street photography for a human-scale feel. This approach helps both solo creators and teams rate spots by impact and ease of shooting.
The High Line delivers elevated textures of architecture and nature. Walk from Gansevoort to Chelsea Market to capture planting details against skyscrapers, then switch to street-level angles near the staircases. This setting invites microgender-aware planning, welcoming creators and humans alike to try quiet, editorial framing without crowds.
Times Square at Night: Capture Neon Lights and Crowds
Shoot at 9:15 PM from the corner of Broadway and 46th Street to capture neon reflections on glass and the steady flow of people along the road.
Use a fast lens (24-70mm) and a lightweight tripod to stabilize longer exposures. Start with ISO 800, f/4, and 1/15–1/30 s to blend motion with sharp signage, then adjust based on crowd density and brightness.
Carry a lightweight camera bag, sip teas between takes, and keep your gear secure as you explore. This moment invites exploring journeys, and the view changes with every passersby along the neon highway of NYC.
For your blog, craft a tight narrative around the experience, because real stories resonate with followers. Include a brief profile of your route, a note on demographics you observe, and a microgender-aware caption that respects privacy while highlighting urban diversity.
Foto and video ideas to capture the highlight:
- Wide shot from the TKTS steps facing Times Square to show the scale of signs and crowds, then switch to a close-up of a street performer or a vendor to tell a grounded story.
- Long exposure clips (2–4 s) of moving buses and pedestrians to create light trails that weave with the signs.
- Slow-motion sequences of people crossing the street while the skyline flashes in the background for a freestyle vibe.
- Interview-style microsegments with locals or tourists, focusing on their journeys and impressions of the night view.
- Overlay data such as typical ticket costs for nearby shows and a quick note on safety tips for first-time visitors from different states, including readers from Florida or other parts of the based state.
Tips for framing and composition: frame a clean foreground against a sea of signs, let silhouettes create depth, and avoid clutter by isolating a single neon character within the chaos. Use a layered approach: foreground sign, mid-ground crowd, background skyline for a strong sense of place.
Captions and storytelling: pair visuals with concise bites about demographics and culture, then invite engagement with a question to your audience to grow following and encourage sharing.
Practical reminders: check street-level angles early, respect private spaces, and be mindful of ticketed attractions nearby. If you’re documenting from a city like York or a New York state itinerary, note the contrast between daytime touring and nighttime energy to help readers plan their own routes.
With consistent posts, your blog can become a go-to guide for nocturnal city photography, helping viewers see how Laura and other followers layer style, energy, and data into memorable visual journeys.
Brooklyn Bridge Park: Classic Skyline Shots from Brooklyn
Begin at Pier 1's western edge during golden hour to secure a clean frame of the bridge with Manhattan in the distance. This strategic starting point sets you up to shoot multiple angles as light shifts, making it easy for audiences to follow your narrative as you go.
From there, progress along the riverfront to Pier 2 and the grassy esplanade for eye-level views, then step onto the elevated boardwalk near the War Memorial for a high vantage that emphasizes the bridge's span. If you want a dramatic silhouette, time the blue hour so the city lights glow behind the arches. Check weather forecasts and light forecasts from Forbes before you go to plan wind, humidity, and haze. Airwaves above the river add subtle motion to longer exposures, and this space invites you to go wide or zoom in for details. The approach involves scouting and testing light across the day to determine the best window for your crew and your own going pace.
Gear and technique: carry a 16-35mm or 24-70mm lens, a sturdy tripod, and a remote shutter if possible. Shoot RAW, bracket exposures to protect highlights on water glare, and keep ISO 100–200 for clean tones. Use a polarizer when glare is strong, and shoot at f/8 to keep foreground details crisp while the skyline stays sharp. A fast memory card helps you capture multiple angles without losing momentum. This advice helps you become a consistent shooter who can satisfy audiences with a curated set of frames. If you plan a caption, try a line from tanyas to set a mood; you can also invite followers to vote on their preferred angle by including a call-to-action in the caption. Some tours offer a ticket option; if you join a guided walk, you gain access to vantage spots still crowded on weekends. The process involves balancing crowd flow with timing to keep the shots clean and the composition tight.
Storytelling approach: go beyond a single frame by establishing a small sequence: wide shot, mid-ground with the bridge, tight detail on stonework, and a long exposure of traffic trails. This keeps scrolling on social feeds moving and helps both new visitors and longtime followers connect with your work. The space between water and sky is where color blocks merge; tell viewers how you curated the set, from location scouting to exposure choices and captions, to attract more comments and shares. For audiences with diverse demographics, show the same shot in two aspect ratios to maximize how it appears in feeds and stories. Use a caption that highlights the city’s fortune of architecture and water textures; a caption like 'Brooklyn light, city rhythm' resonates with many followers. The following audience will appreciate a clear narrative arc across the sequence, so keep captions concise and linked to each frame.
| Vantage Point | Best Time | What to Shoot | Notes |
|---|---|---|---|
| Pier 1 Overlook | Golden hour to blue hour | Bridge towers, reflections on water, clean skyline line | Place tripod on railing; watch crowds |
| War Memorial Steps | Blue hour | Wide arc of skyline with memorial stones in foreground | Use wide lens; compact crowds can frame scale |
| DUMBO Waterfront (north of park) | Sunset | Bridge framed with Empire State Building; leading lines | Long lens 70–200mm helps compression |
| Grassy Esplanade by Pier 6 | Late afternoon | Long horizon shot across river; light on water | Great for patient, mapped compositions |
Central Park Bow Bridge: Reflections and Romantic Vistas
Go there at golden hour to capture Bow Bridge’s arches mirrored in the lake and the skyline across. Bow Bridge doesnt disappoint at sunset. That hour invites a striking photo.
Where to stand matters: choose the east-side pedestrian path near the bridge’s southern end to frame the curve against the water, and include the sign on the railing to anchor the macrolocation in your shot. Use a 24-70mm lens for flexibility, and if light allows, a slower shutter smooths the surface for a glassy look. A quick note about balance and reflection can guide your setup. If you’re going for a classic shot, this setup supports photography.
thomas, a local passer, shares a short pass along the path: shoot wide to capture the full bridge, then switch to tighter frames of the bronze railing to reveal texture and imagination. Photography benefits from mixing perspectives, and capturing the moment adds personal depth to your collection.
This macrolocation is a regular feature in the america photography guide, and data from dozens of shoots shows late afternoon into blue hour yields the best reflections. Find nearby dining options and entertainment to extend the visit; this combination showcases romance in the city and makes your capture personal and successful, america.
High Line at Golden Hour: Elevated Perspectives and Urban Texture
Go to the southern entrance at Gansevoort Street about 45 minutes before sunset to catch the golden hour wash across the High Line. The light hugs the rails, pavers, and planting beds, creating rich textures that translate well in both colour and monochrome. There are no entry rates, so you can stay long enough to experiment with angles and timing. There, you’ll notice the rhythm of the city shifting as people pass and the skyline breathes with the fading light.
Plan a focused route and log your favourite angles in a simple spreadsheet. This helps you compare the hour and the window of light, and it tracks how the steel, timber, and greenery interact on different days. Sharing your shots online, you’ll see how the same spot can feel entirely different from hour to hour–and creators often rate those moments as great material for posts.
Three dependable vantage points along the route that consistently yield strong results:
- Southern end (Gansevoort to 14th Street): shoot north toward the Meatpacking District and the river. Use the low sun to carve long shadows along the rails, and watch the repeating lines guide the eye. Great for wide compositions and window reflections from surrounding towers.
- Mid-block (16th to 23rd Street): switch to a mid-range lens to capture a mix of pedestrians, textures, and skyscrapers in the distance, including rockefeller center glimpses. This zone is favourite with creators because it balances texture, color, and motion. Times here can vary with crowds, so be patient for a clear moment of stillness.
- Hudson Yards end (30th to 34th Street): end with a broad river view and the Midtown skyline. The light often turns golden over the water, and reflections on the glass create dynamic patterns on the walkway. If you shoot from the edge near the railing, you’ll capture a strong sense of height.
Inspiration comes from nytimestravel and other guides. If you’re inspired by exploring city spaces, you’ll enjoy comparing this route with explorecharleston or other elevated walks. Whether you shoot for your favourite memory or a project for sharing with a community, the High Line invites humor and experimentation. Experiencing this space involves timing, composition, and patience. The worlds of street energy and elevated calm converge here, and the window light shifts as the hour changes. For york travelers, this route often becomes a go-to sequence in city explorations. If you want to coordinate plans, some creators include a gmailcom handle in profiles; it’s optional, but it happens online.
SoHo Street Art and Architectural Corners: Colorful Backdrops for Styling Shots
Begin your styling session at a hidden mural along the SoHo corridor, then glide to a sharp architectural corner where brick meets glass. Let the wall's color blocks invite the subject to live in the frame, while the texture enriches the photo. The kallmeyer-curated palette on nearby surfaces can guide your outfit choices without overpowering the shot, and you can curate a mini rotation of backdrops to keep the look fresh.
Choose light sources strategically: daylight on a second-floor-facing wall sets the mood, while a small portable light can bounce off a nearby surface to fill shadows without flattening texture. Shoot in the second window of prime daylight, then bring in a few lights to add depth to the imagery and avoid flat results.
Scale the styling with a freestyle approach: lean against an architectural column, capture a candid moment, then pivot to a quiet corner with hidden metal railings or a boathouse-style doorway for a nautical twist. This mix delivers inviting imagery that resonates on your pages and in getaways features, with imagery designed to feel deliberate rather than staged.
Coordinate with your team to move between scenes efficiently, keeping the crowd under control while preserving energy. A focused power dynamic–clear roles, quick changes, and a shared eye for style–lets you judge the moment and lock in the best frame. Let the team curate a rotating set of backdrops to maintain momentum across a single shoot.
Use SoHo destinations as your backdrop for content that resonates on travel pages: tag destinations, getaways, and styles in captions, and link imagery with real-world getaways. For collaborations, share shot ideas with partners via gmailcom, and reference airline experiences or cruise vibes–airways, latina-inspired accents, or glimpses of a norwegiancruiseline voyage–to enrich your catalog of imagery.