

 10 המקומות הטובים ביותר באינסטגרם בניו יורק, ארה"ב – מקומות הצילום הטובים ביותר בניו יורק">
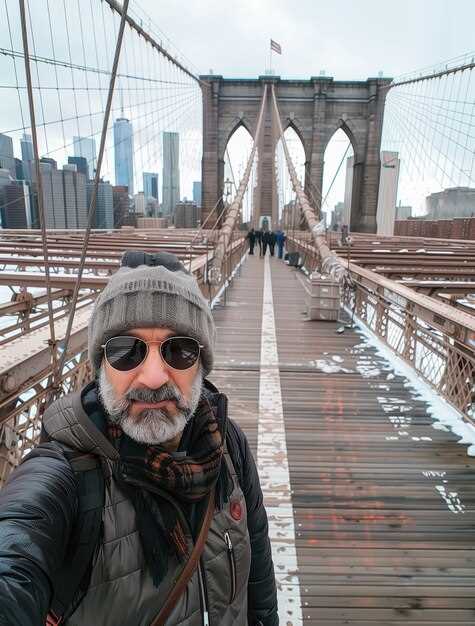
Kick off with a sunrise over Brooklyn Bridge. Stand on the Manhattan-side pedestrian path just before dawn, then frame the arches with the skyline as light spills across the East River. This shot anchors your feeds and gives your readers a confident narrative from the start.
From there, swing to DUMBO for the iconic view where the Manhattan Bridge frames brick walls and cobblestones. For a vertical skyline, climb to Top of the Rock or One World Observatory after 5 p.m. on clear days, when the glass towers glow. Stroll the High Line around 14th Street for elevated perspectives, and catch Central Park’s Bow Bridge or the Bethesda Terrace with a wide-angle lens in the morning mist.
Backpackersglobe tells you to bring imagination and destination focus. You can improve by putting your best foot forward, crafting a concise narrative and choosing moments that fit your style. louis doesnt chase filters; his posts highlight textures that feel real, with a touch of local flavor. getyourguide tips help you lock in timed entries, while united communities of travelers share tricks with other creators, influencers, and a storyteller to shape your own narrative on the feeds.
Prepare a compact kit and a single-strap bag to keep your approach efficient. A light bag, spare battery, and a lens or two will serve across all ten spots. The article that follows dives into each location with concrete, practical advice so you can move from one shot to the next without friction, putting your imagination to work for every frame. Treat yourself as a storyteller.
Top 10 Instagram Spots in New York City, USA
Visit Central Park at sunrise for your most vibrant landscape shot. Start at Bethesda Terrace for symmetry, then move toward Bow Bridge to catch reflections on the lake. Visiting early minimizes crowds, making posting cleaner and more engaging. Your planning should include a versatile lens and a few ready captions for posting, turning photo adventures into memorable content.
The Top of the Rock offers a high vantage with the city unfolding in layers. For the best angles, arrive about 30 minutes before golden hour and switch between wide and telephoto shots. Which spot aligns with your vibe will guide your planning–the terrace view for a broad skyline, or closer street-level street photography for a human-scale feel. This approach helps both solo creators and teams rate spots by impact and ease of shooting.
The High Line delivers elevated textures of architecture and nature. Walk from Gansevoort to Chelsea Market to capture planting details against skyscrapers, then switch to street-level angles near the staircases. This setting invites microgender-aware planning, welcoming creators and humans alike to try quiet, editorial framing without crowds.
<pDUMBO and Brooklyn Bridge Park form a two-for-one look: the Manhattan skyline framed by brick arches and a dramatic bridgeline. Shoot from the waterfront at Washington Street for the classic photo, or move to the riverside paths for low-angle shots that emphasize the high towers. Plan a sunset session here to balance warm light and the cool blue of the East River, a perfect getaways option for your weekend lineup. <pTimes Square bursts with bustling energy and neon. Shoot from the north side of 7th Avenue after dusk when the signs glow, then capture street performers, taxi streaks, and crowds of humans moving in rhythm. Broadway shows nearby add context to your caption, and you can frame close-up faces or wide-angle panoramas to convey the scale of this urban stage. For posting, a mixture of wide and tight frames works wonders, especially when you want to show the rate of constant motion in the city. <pEmpire State Building stands tall, offering a halo of city lights and a classic silhouette. If you can time it for dusk or after sunset, you’ll catch the city’s high-rise chorus blinking alive. Use a 24–70mm range to capture both the tower and surrounding streets, and consider a vertical composition to emphasize its height in your feed. For visiting planners, the observation deck opens earlier on weekdays, helping avoid the long weekend lines. <pGrand Central Terminal dazzles with a celestial ceiling and grand concourses. Arrive during late morning or early afternoon when daylight streams through the windows, then frame the main concourse with travelers as natural motion. Christina from local guides notes that interior shots thrive on symmetry and reflections in the marble floors, giving you a polished, editorial look for your posted feeds. <pFlatiron Building’s wedge silhouette stands out against the city grid. Stand across Madison Square Park for a bold, clean street shot, or move a few steps closer to frame the building with Fifth Avenue traffic trails. Use a mid-range lens to emphasize geometry, and try a perspective that puts the triangle against a clear sky or a busy street for contrast. This spot pairs well with a quick walking adventure through nearby SoHo. <pOne World Observatory provides sweeping, 360-degree views of the skyline. Shoot during twilight when the city glows, then switch to nighttime shots capturing the gridwork of lights. This spot suits long exposure cityscapes and intimate portraits with the river and skyline in the background, perfect for a creator’s portfolio and for planning multi-location adventures when visiting NYC. <pFinish at The Oculus for interior geometry and glass reflections. The symmetry here makes for striking close-ups or wide interior panoramas, with the transit hub vibe offering authentic urban energy. It’s a great closing chapter for your posting, especially when you want architectural precision and a sense of movement that mirrors your day’s adventures and getaways around the World Trade Center complex.Times Square at Night: Capture Neon Lights and Crowds
Shoot at 9:15 PM from the corner of Broadway and 46th Street to capture neon reflections on glass and the steady flow of people along the road.
Use a fast lens (24-70mm) and a lightweight tripod to stabilize longer exposures. Start with ISO 800, f/4, and 1/15–1/30 s to blend motion with sharp signage, then adjust based on crowd density and brightness.
Carry a lightweight camera bag, sip teas between takes, and keep your gear secure as you explore. This moment invites exploring journeys, and the view changes with every passersby along the neon highway of NYC.
For your blog, craft a tight narrative around the experience, because real stories resonate with followers. Include a brief profile of your route, a note on demographics you observe, and a microgender-aware caption that respects privacy while highlighting urban diversity.
Foto and video ideas to capture the highlight:
- Wide shot from the TKTS steps facing Times Square to show the scale of signs and crowds, then switch to a close-up of a street performer or a vendor to tell a grounded story.
- Long exposure clips (2–4 s) of moving buses and pedestrians to create light trails that weave with the signs.
- Slow-motion sequences of people crossing the street while the skyline flashes in the background for a freestyle vibe.
- Interview-style microsegments with locals or tourists, focusing on their journeys and impressions of the night view.
- Overlay data such as typical ticket costs for nearby shows and a quick note on safety tips for first-time visitors from different states, including readers from Florida or other parts of the based state.
Tips for framing and composition: frame a clean foreground against a sea of signs, let silhouettes create depth, and avoid clutter by isolating a single neon character within the chaos. Use a layered approach: foreground sign, mid-ground crowd, background skyline for a strong sense of place.
Captions and storytelling: pair visuals with concise bites about demographics and culture, then invite engagement with a question to your audience to grow following and encourage sharing.
Practical reminders: check street-level angles early, respect private spaces, and be mindful of ticketed attractions nearby. If you’re documenting from a city like York or a New York state itinerary, note the contrast between daytime touring and nighttime energy to help readers plan their own routes.
With consistent posts, your blog can become a go-to guide for nocturnal city photography, helping viewers see how Laura and other followers layer style, energy, and data into memorable visual journeys.
Brooklyn Bridge Park: Classic Skyline Shots from Brooklyn
Begin at Pier 1’s western edge during golden hour to secure a clean frame of the bridge with Manhattan in the distance. This strategic starting point sets you up to shoot multiple angles as light shifts, making it easy for audiences to follow your narrative as you go.
From there, progress along the riverfront to Pier 2 and the grassy esplanade for eye-level views, then step onto the elevated boardwalk near the War Memorial for a high vantage that emphasizes the bridge’s span. If you want a dramatic silhouette, time the blue hour so the city lights glow behind the arches. Check weather forecasts and light forecasts from Forbes before you go to plan wind, humidity, and haze. Airwaves above the river add subtle motion to longer exposures, and this space invites you to go wide or zoom in for details. The approach involves scouting and testing light across the day to determine the best window for your crew and your own going pace.
Gear and technique: carry a 16-35mm or 24-70mm lens, a sturdy tripod, and a remote shutter if possible. Shoot RAW, bracket exposures to protect highlights on water glare, and keep ISO 100–200 for clean tones. Use a polarizer when glare is strong, and shoot at f/8 to keep foreground details crisp while the skyline stays sharp. A fast memory card helps you capture multiple angles without losing momentum. This advice helps you become a consistent shooter who can satisfy audiences with a curated set of frames. If you plan a caption, try a line from tanyas to set a mood; you can also invite followers to vote on their preferred angle by including a call-to-action in the caption. Some tours offer a ticket option; if you join a guided walk, you gain access to vantage spots still crowded on weekends. The process involves balancing crowd flow with timing to keep the shots clean and the composition tight.
Storytelling approach: go beyond a single frame by establishing a small sequence: wide shot, mid-ground with the bridge, tight detail on stonework, and a long exposure of traffic trails. This keeps scrolling on social feeds moving and helps both new visitors and longtime followers connect with your work. The space between water and sky is where color blocks merge; tell viewers how you curated the set, from location scouting to exposure choices and captions, to attract more comments and shares. For audiences with diverse demographics, show the same shot in two aspect ratios to maximize how it appears in feeds and stories. Use a caption that highlights the city’s fortune of architecture and water textures; a caption like ‘Brooklyn light, city rhythm’ resonates with many followers. The following audience will appreciate a clear narrative arc across the sequence, so keep captions concise and linked to each frame.
| Vantage Point | Best Time | What to Shoot | הערות |
|---|---|---|---|
| Pier 1 Overlook | Golden hour to blue hour | Bridge towers, reflections on water, clean skyline line | Place tripod on railing; watch crowds |
| War Memorial Steps | שעה כחולה | Wide arc of skyline with memorial stones in foreground | Use wide lens; compact crowds can frame scale |
| DUMBO Waterfront (north of park) | שקיעה | Bridge framed with Empire State Building; leading lines | Long lens 70–200mm helps compression |
| Grassy Esplanade by Pier 6 | Late afternoon | Long horizon shot across river; light on water | Great for patient, mapped compositions |
גשר הקשת בסנטרל פארק: השתקפויות ונקודות תצפית רומנטיות
לכו לשם בשעת הזהב כדי לתפוס את קשתות גשר בו משתקפות באגם ואת קו הרקיע ממול. גשר בו לא מאכזב בשקיעה. שעה זו מזמינה צילום מדהים.
היכן לעמוד משנה: בחרו בשביל הולכי הרגל בצד המזרחי ליד הקצה הדרומי של הגשר כדי למסגר את הקימור על רקע המים, וכללו את השלט על המעקה כדי לעגן את מיקום המאקרו בצילום שלכם. השתמשו בעדשת 24-70 מ"מ לגמישות, ואם האור מאפשר, צמצם איטי יותר מחליק את פני השטח למראה חלק. הערה קצרה לגבי איזון והשתקפות יכולה להנחות את ההגדרה שלכם. אם אתם מכוונים לצילום קלאסי, ההגדרה הזו תומכת בצילום.
תומאס, עובר אורח מקומי, משתף מסירה קצרה לאורך השביל: צלם רחב כדי לתפוס את כל הגשר, ואז עבור למסגרות צמודות יותר של מעקה הברונזה כדי לחשוף מרקם ודמיון. צילום מרוויח משילוב נקודות מבט, ולכידת הרגע מוסיפה עומק אישי לאוסף שלך.
מיקום מקרו זה הוא מאפיין קבוע במדריך לצילום אמריקה, ונתונים מעשרות צילומים מראים שאחר הצהריים המאוחרים עד לשעה הכחולה מניבים את ההשתקפויות הטובות ביותר. מצא אפשרויות לסעודה ובידור בקרבת מקום כדי להאריך את הביקור; שילוב זה מציג רומנטיקה בעיר והופך את הצילום שלך לאישי ומוצלח, אמריקה.
ההיי ליין בשעת הזהב: פרספקטיבות מוגבהות ומרקם אורבני
לכו לכניסה הדרומית ברחוב גנספורט כ-45 דקות לפני השקיעה כדי לתפוס את שעת הזהב השוטפת את ההיי ליין. האור מחבק את המסילות, הריצוף ואדניות השתילה, ויוצר מרקמים עשירים המשתקפים היטב בצבע ובשחור-לבן. אין דמי כניסה, כך שתוכלו להישאר מספיק זמן כדי להתנסות בזוויות ובתזמון. שם, תבחינו בקצב העיר משתנה כשאנשים חולפים על פניכם וקו הרקיע נושם עם האור הדועך.
תכננו מסלול ממוקד ותעדו את הזוויות האהובות עליכם בגיליון אלקטרוני פשוט. זה עוזר לכם להשוות את השעה ואת חלון האור, ועוקב אחר האופן שבו הפלדה, העץ והצמחייה מקיימים אינטראקציה בימים שונים. כאשר תשתפו את התמונות שלכם ברשת, תראו כיצד אותה נקודה יכולה להרגיש שונה לחלוטין משעה לשעה – ויוצרים לעתים קרובות מדרגים את הרגעים האלה כחומר נהדר לפוסטים.
:שלוש נקודות תצפית אמינות לאורך המסלול שמניבות תוצאות חזקות באופן עקבי
- קצה דרומי (Gansevoort עד רחוב 14): צלמו צפונה לכיוון אזור ה-Meatpacking והנהר. השתמשו בשמש הנמוכה כדי לחרוט צללים ארוכים לאורך המסילות, ועקבו אחר הקווים החוזרים שמנחים את העין. נהדר לקומפוזיציות רחבות ולהשתקפויות חלונות מהמגדלים הסובבים.
- אמצע הבלוק (רחובות 16 עד 23): עברו לעדשת ביניים כדי לתפוס שילוב של הולכי רגל, מרקמים ומבני ענק ברקע, כולל הצצות למרכז רוקפלר. אזור זה מועדף על יוצרים מכיוון שהוא מאזן בין מרקם, צבע ותנועה. הזמנים כאן יכולים להשתנות בהתאם לקהל, אז היו סבלניים לרגע ברור של דממה.
- קצה האדסון יארדס (רחובות 30 עד 34): הסתיים בנוף רחב של הנהר וקו הרקיע של מרכז העיר. האור הופך לעתים קרובות לזהוב מעל המים, וההשתקפויות על הזכוכית יוצרות דפוסים דינמיים על המדרכה. אם מצלמים מהקצה ליד המעקה, אפשר לתפוס תחושה חזקה של גובה.
ההשראה מגיעה מ-nytimes.com וממדריכים אחרים. אם אתם שואבים השראה ממחקר של מרחבים עירוניים, תיהנו להשוות את המסלול הזה עם explorecharleston או עם מסלולים מוגבהים אחרים. בין אם תצלמו את הזיכרון האהוב עליכם או פרויקט לשיתוף עם קהילה, ההיי ליין מזמין הומור וניסויים. החוויה במרחב הזה כרוכה בתזמון, קומפוזיציה וסבלנות. עולמות של אנרגיית רחוב ורוגע מוגבה נפגשים כאן, ואור החלון משתנה כשעוברת שעה. עבור מטיילים בניו יורק, המסלול הזה הופך לעתים קרובות לרצף מועדף בסקירות של העיר. אם ברצונכם לתאם תוכניות, יוצרים מסוימים כוללים כתובת gmail.com בפרופילים; זה לא חובה, אבל זה קורה באינטרנט.
פינות אמנות רחוב ואדריכלות בסוהו: רקעים צבעוניים לצילומי סטיילינג
התחילו את סשן הסטיילינג שלכם בציור קיר נסתר לאורך מסדרון סוהו, ואז החליקו לפינה אדריכלית חדה שבה לבנים פוגשות זכוכית. תנו לקוביות הצבע של הקיר להזמין את הנושא לחיות בתוך המסגרת, בעוד שהמרקם מעשיר את התמונה. הפלטה שאצרה קלמאייר על משטחים סמוכים יכולה להנחות את בחירת התלבושת שלכם מבלי להכביד על הצילום, ותוכלו לאצור מיני-רוטציה של רקעים כדי לשמור על המראה רענן.
בחרו מקורות אור באופן אסטרטגי: אור יום על קיר הפונה לקומה שנייה יוצר את מצב הרוח, בעוד שאור נייד קטן יכול להקפיץ ממשטח סמוך כדי למלא צללים מבלי לשטח את המרקם. צלמו בחלון השני של אור יום מרכזי, ואז הביאו כמה אורות כדי להוסיף עומק לתמונות ולהימנע מתוצאות שטוחות.
צור תמונות מסוגננות בסגנון חופשי: הִשען על עמוד אדריכלי, תפוס רגע ספונטני, ואז פנה לפינה שקטה עם מעקות מתכת נסתרים או פתח בסגנון בית סירות למגע ימי. השילוב הזה מספק תמונות מזמינות המהדהדות בדפים שלך ובכתבות על חופשות, עם תמונות שנועדו להרגיש מכוונות ולא מבוימות.
תאמו עם הצוות שלכם כדי לעבור בין סצנות ביעילות, לשמור על הקהל בשליטה תוך שימור אנרגיה. דינמיקת כוח ממוקדת – תפקידים ברורים, חילופים מהירים ומבט משותף לסגנון – מאפשרת לכם לשפוט את הרגע ולנעול את הפריים הטוב ביותר. תנו לצוות לאצור סט מסתובב של רקעים כדי לשמור על המומנטום לאורך צילום בודד.
השתמשו ביעדי סוהו כרקע שלכם לתכנים המהדהדים בדפי תיירות: תייגו יעדים, חופשות וסגנונות בכיתובים, וקשרו תמונות עם חופשות בעולם האמיתי. עבור שיתופי פעולה, שתפו רעיונות לצילומים עם שותפים באמצעות gmailcom, והתייחסו לחוויות תעופה או לאווירת שיט תענוגות – נתיבי אוויר, מבטאים בהשראה לטינית או הצצות למסע של norwegiancruiseline – כדי להעשיר את קטלוג התמונות שלכם.