

 Top 10 Instagram Spots in New York City, USA – Beste Foto-Locations in NYC">
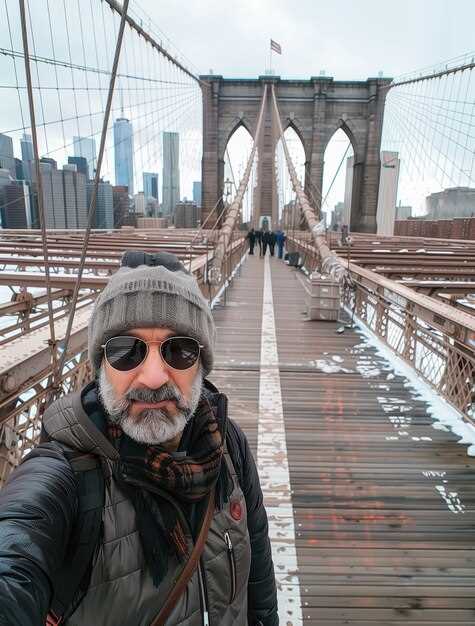
Kick off with a sunrise over Brooklyn Bridge. Stand on the Manhattan-side pedestrian path just before dawn, then frame the arches with the skyline as light spills across the East River. This shot anchors your feeds and gives your readers a confident narrative from the start.
From there, swing to DUMBO for the iconic view where the Manhattan Bridge frames brick walls and cobblestones. For a vertical skyline, climb to Top of the Rock or One World Observatory after 5 p.m. on clear days, when the glass towers glow. Stroll the High Line around 14th Street for elevated perspectives, and catch Central Park’s Bow Bridge or the Bethesda Terrace with a wide-angle lens in the morning mist.
Backpackersglobe tells you to bring imagination and destination focus. You can improve by putting your best foot forward, crafting a concise narrative and choosing moments that fit your style. louis doesnt chase filters; his posts highlight textures that feel real, with a touch of local flavor. getyourguide tips help you lock in timed entries, while united communities of travelers share tricks with other creators, influencers, and a storyteller to shape your own narrative on the feeds.
Prepare a compact kit and a single-strap bag to keep your approach efficient. A light bag, spare battery, and a lens or two will serve across all ten spots. The article that follows dives into each location with concrete, practical advice so you can move from one shot to the next without friction, putting your imagination to work for every frame. Treat yourself as a storyteller.
Top 10 Instagram Spots in New York City, USA
Visit Central Park at sunrise for your most vibrant landscape shot. Start at Bethesda Terrace for symmetry, then move toward Bow Bridge to catch reflections on the lake. Visiting early minimizes crowds, making posting cleaner and more engaging. Your planning should include a versatile lens and a few ready captions for posting, turning photo adventures into memorable content.
The Top of the Rock offers a high vantage with the city unfolding in layers. For the best angles, arrive about 30 minutes before golden hour and switch between wide and telephoto shots. Which spot aligns with your vibe will guide your planning–the terrace view for a broad skyline, or closer street-level street photography for a human-scale feel. This approach helps both solo creators and teams rate spots by impact and ease of shooting.
The High Line delivers elevated textures of architecture and nature. Walk from Gansevoort to Chelsea Market to capture planting details against skyscrapers, then switch to street-level angles near the staircases. This setting invites microgender-aware planning, welcoming creators and humans alike to try quiet, editorial framing without crowds.
<pDUMBO and Brooklyn Bridge Park form a two-for-one look: the Manhattan skyline framed by brick arches and a dramatic bridgeline. Shoot from the waterfront at Washington Street for the classic photo, or move to the riverside paths for low-angle shots that emphasize the high towers. Plan a sunset session here to balance warm light and the cool blue of the East River, a perfect getaways option for your weekend lineup. <pTimes Square bursts with bustling energy and neon. Shoot from the north side of 7th Avenue after dusk when the signs glow, then capture street performers, taxi streaks, and crowds of humans moving in rhythm. Broadway shows nearby add context to your caption, and you can frame close-up faces or wide-angle panoramas to convey the scale of this urban stage. For posting, a mixture of wide and tight frames works wonders, especially when you want to show the rate of constant motion in the city. <pEmpire State Building stands tall, offering a halo of city lights and a classic silhouette. If you can time it for dusk or after sunset, you’ll catch the city’s high-rise chorus blinking alive. Use a 24–70mm range to capture both the tower and surrounding streets, and consider a vertical composition to emphasize its height in your feed. For visiting planners, the observation deck opens earlier on weekdays, helping avoid the long weekend lines. <pGrand Central Terminal dazzles with a celestial ceiling and grand concourses. Arrive during late morning or early afternoon when daylight streams through the windows, then frame the main concourse with travelers as natural motion. Christina from local guides notes that interior shots thrive on symmetry and reflections in the marble floors, giving you a polished, editorial look for your posted feeds. <pFlatiron Building’s wedge silhouette stands out against the city grid. Stand across Madison Square Park for a bold, clean street shot, or move a few steps closer to frame the building with Fifth Avenue traffic trails. Use a mid-range lens to emphasize geometry, and try a perspective that puts the triangle against a clear sky or a busy street for contrast. This spot pairs well with a quick walking adventure through nearby SoHo. <pOne World Observatory provides sweeping, 360-degree views of the skyline. Shoot during twilight when the city glows, then switch to nighttime shots capturing the gridwork of lights. This spot suits long exposure cityscapes and intimate portraits with the river and skyline in the background, perfect for a creator’s portfolio and for planning multi-location adventures when visiting NYC. <pFinish at The Oculus for interior geometry and glass reflections. The symmetry here makes for striking close-ups or wide interior panoramas, with the transit hub vibe offering authentic urban energy. It’s a great closing chapter for your posting, especially when you want architectural precision and a sense of movement that mirrors your day’s adventures and getaways around the World Trade Center complex.Times Square at Night: Capture Neon Lights and Crowds
Shoot at 9:15 PM from the corner of Broadway and 46th Street to capture neon reflections on glass and the steady flow of people along the road.
Use a fast lens (24-70mm) and a lightweight tripod to stabilize longer exposures. Start with ISO 800, f/4, and 1/15–1/30 s to blend motion with sharp signage, then adjust based on crowd density and brightness.
Carry a lightweight camera bag, sip teas between takes, and keep your gear secure as you explore. This moment invites exploring journeys, and the view changes with every passersby along the neon highway of NYC.
For your blog, craft a tight narrative around the experience, because real stories resonate with followers. Include a brief profile of your route, a note on demographics you observe, and a microgender-aware caption that respects privacy while highlighting urban diversity.
Foto and video ideas to capture the highlight:
- Wide shot from the TKTS steps facing Times Square to show the scale of signs and crowds, then switch to a close-up of a street performer or a vendor to tell a grounded story.
- Long exposure clips (2–4 s) of moving buses and pedestrians to create light trails that weave with the signs.
- Slow-motion sequences of people crossing the street while the skyline flashes in the background for a freestyle vibe.
- Interview-style microsegments with locals or tourists, focusing on their journeys and impressions of the night view.
- Overlay data such as typical ticket costs for nearby shows and a quick note on safety tips for first-time visitors from different states, including readers from Florida or other parts of the based state.
Tips for framing and composition: frame a clean foreground against a sea of signs, let silhouettes create depth, and avoid clutter by isolating a single neon character within the chaos. Use a layered approach: foreground sign, mid-ground crowd, background skyline for a strong sense of place.
Captions and storytelling: pair visuals with concise bites about demographics and culture, then invite engagement with a question to your audience to grow following and encourage sharing.
Practical reminders: check street-level angles early, respect private spaces, and be mindful of ticketed attractions nearby. If you’re documenting from a city like York or a New York state itinerary, note the contrast between daytime touring and nighttime energy to help readers plan their own routes.
With consistent posts, your blog can become a go-to guide for nocturnal city photography, helping viewers see how Laura and other followers layer style, energy, and data into memorable visual journeys.
Brooklyn Bridge Park: Classic Skyline Shots from Brooklyn
Begin at Pier 1’s western edge during golden hour to secure a clean frame of the bridge with Manhattan in the distance. This strategic starting point sets you up to shoot multiple angles as light shifts, making it easy for audiences to follow your narrative as you go.
From there, progress along the riverfront to Pier 2 and the grassy esplanade for eye-level views, then step onto the elevated boardwalk near the War Memorial for a high vantage that emphasizes the bridge’s span. If you want a dramatic silhouette, time the blue hour so the city lights glow behind the arches. Check weather forecasts and light forecasts from Forbes before you go to plan wind, humidity, and haze. Airwaves above the river add subtle motion to longer exposures, and this space invites you to go wide or zoom in for details. The approach involves scouting and testing light across the day to determine the best window for your crew and your own going pace.
Gear and technique: carry a 16-35mm or 24-70mm lens, a sturdy tripod, and a remote shutter if possible. Shoot RAW, bracket exposures to protect highlights on water glare, and keep ISO 100–200 for clean tones. Use a polarizer when glare is strong, and shoot at f/8 to keep foreground details crisp while the skyline stays sharp. A fast memory card helps you capture multiple angles without losing momentum. This advice helps you become a consistent shooter who can satisfy audiences with a curated set of frames. If you plan a caption, try a line from tanyas to set a mood; you can also invite followers to vote on their preferred angle by including a call-to-action in the caption. Some tours offer a ticket option; if you join a guided walk, you gain access to vantage spots still crowded on weekends. The process involves balancing crowd flow with timing to keep the shots clean and the composition tight.
Storytelling approach: go beyond a single frame by establishing a small sequence: wide shot, mid-ground with the bridge, tight detail on stonework, and a long exposure of traffic trails. This keeps scrolling on social feeds moving and helps both new visitors and longtime followers connect with your work. The space between water and sky is where color blocks merge; tell viewers how you curated the set, from location scouting to exposure choices and captions, to attract more comments and shares. For audiences with diverse demographics, show the same shot in two aspect ratios to maximize how it appears in feeds and stories. Use a caption that highlights the city’s fortune of architecture and water textures; a caption like ‘Brooklyn light, city rhythm’ resonates with many followers. The following audience will appreciate a clear narrative arc across the sequence, so keep captions concise and linked to each frame.
| Vantage Point | Beste Zeit | Was soll ich fotografieren? | Notizen |
|---|---|---|---|
| Pier 1 Overlook | Golden hour to blue hour | Bridge towers, reflections on water, clean skyline line | Place tripod on railing; watch crowds |
| War Memorial Steps | Blaue Stunde | Wide arc of skyline with memorial stones in foreground | Use wide lens; compact crowds can frame scale |
| DUMBO Waterfront (north of park) | Sonnenuntergang | Bridge framed with Empire State Building; leading lines | Long lens 70–200mm helps compression |
| Grassy Esplanade by Pier 6 | Spätnachmittag | Long horizon shot across river; light on water | Great for patient, mapped compositions |
Central Park Bow Bridge: Reflections and Romantic Vistas
Geh bei der Goldenen Stunde dorthin, um die im See gespiegelten Bögen der Bow Bridge und die Skyline auf der anderen Seite einzufangen. Die Bow Bridge enttäuscht bei Sonnenuntergang nicht. Diese Stunde lädt zu einem beeindruckenden Foto ein.
Wo man steht, ist wichtig: Wähle den Fußweg an der Ostseite in der Nähe des südlichen Endes der Brücke, um die Kurve vor dem Wasser einzufangen und das Schild am Geländer einzubeziehen, um die Makrolage in deiner Aufnahme zu verankern. Verwende ein 24-70mm-Objektiv für Flexibilität, und wenn das Licht es zulässt, sorgt eine langsamere Verschlusszeit für eine glatte Oberfläche mit einem glasigen Aussehen. Ein kurzer Hinweis zu Balance und Reflexion kann dir beim Aufbau helfen. Wenn du eine klassische Aufnahme machen möchtest, unterstützt dieses Setup die Fotografie.
Thomas, ein lokaler Passant, teilt einen kurzen Pass entlang des Weges: Weitwinklig aufnehmen, um die gesamte Brücke zu erfassen, dann zu engeren Aufnahmen des Bronzegeländers wechseln, um Textur und Fantasie zu enthüllen. Die Fotografie profitiert von der Mischung der Perspektiven, und das Festhalten des Augenblicks verleiht Ihrer Sammlung persönliche Tiefe.
Diese Makrolage ist ein fester Bestandteil des Amerika-Fotografie-Leitfadens, und Daten von Dutzenden von Aufnahmen zeigen, dass der späte Nachmittag bis zur blauen Stunde die besten Reflexionen liefert. Finden Sie in der Nähe gelegene Restaurants und Unterhaltungsmöglichkeiten, um den Besuch zu verlängern; diese Kombination unterstreicht die Romantik in der Stadt und macht Ihre Aufnahme persönlich und erfolgreich, Amerika.
High Line zur Goldenen Stunde: Erhöhte Perspektiven und urbane Textur
Gehen Sie etwa 45 Minuten vor Sonnenuntergang zum südlichen Eingang an der Gansevoort Street, um die goldene Stunde auf der High Line einzufangen. Das Licht schmiegt sich an die Schienen, Pflastersteine und Pflanzbeete und erzeugt reiche Texturen, die sowohl in Farbe als auch in Schwarzweiß gut zur Geltung kommen. Es gibt keine Eintrittsgebühren, sodass Sie lange genug bleiben können, um mit Winkeln und Timing zu experimentieren. Dort werden Sie feststellen, wie sich der Rhythmus der Stadt verändert, während Menschen vorbeigehen und die Skyline mit dem schwindenden Licht atmet.
Plane eine gezielte Route und erfasse deine Lieblingsperspektiven in einer einfachen Tabelle. So kannst du die Stunde und das Lichteinfallsfenster vergleichen und verfolgen, wie Stahl, Holz und Grün an verschiedenen Tagen interagieren. Wenn du deine Aufnahmen online teilst, wirst du sehen, wie sich derselbe Ort von Stunde zu Stunde völlig anders anfühlen kann – und Urheber bewerten diese Momente oft als grossartiges Material für Beiträge.
Drei verlässliche Standpunkte entlang der Strecke, die durchweg starke Ergebnisse liefern:
- Südliches Ende (Gansevoort bis 14th Street): Fotografieren Sie in Richtung Norden, auf den Meatpacking District und den Fluss zu. Nutzen Sie die tiefstehende Sonne, um lange Schatten entlang der Gleise zu erzeugen, und beobachten Sie, wie die sich wiederholenden Linien den Blick lenken. Ideal für breite Kompositionen und Fensterreflexionen der umliegenden Türme.
- Blockmitte (16. bis 23. Straße): Wechseln Sie zu einem mittleren Objektiv, um eine Mischung aus Fußgängern, Texturen und Wolkenkratzern in der Ferne einzufangen, einschließlich flüchtiger Blicke auf das Rockefeller Center. Diese Zone ist bei Kreativen beliebt, weil sie Textur, Farbe und Bewegung ausbalanciert. Die Zeiten hier können je nach Menschenmenge variieren. Seien Sie also geduldig und warten Sie auf einen klaren Moment der Stille.
- Hudson Yards Ende (30th bis 34th Street): Das Ende bietet einen weiten Flussblick und die Skyline von Midtown. Das Licht färbt sich oft golden über dem Wasser, und Reflexionen auf dem Glas erzeugen dynamische Muster auf dem Gehweg. Wenn Sie vom Rand in der Nähe des Geländers fotografieren, erfassen Sie ein starkes Gefühl von Höhe.
Inspiration kommt von nytimestravel und anderen Reiseführern. Wenn Sie sich gerne von der Erkundung städtischer Räume inspirieren lassen, werden Sie es genießen, diese Route mit explorecharleston oder anderen erhöhten Spaziergängen zu vergleichen. Ob Sie Ihre Lieblingserinnerung festhalten oder ein Projekt zur Weitergabe an eine Community erstellen, die High Line lädt zu Humor und Experimenten ein. Das Erleben dieses Raums erfordert Timing, Komposition und Geduld. Die Welten der Straßenenergie und der erhabenen Ruhe treffen hier aufeinander, und das Fensterlicht verändert sich mit jeder Stunde. Für York-Reisende wird diese Route oft zu einer beliebten Sequenz bei Stadterkundungen. Wenn Sie Pläne koordinieren möchten, geben einige Kreative ein gmailcom-Handle in ihren Profilen an; dies ist optional, kommt aber online vor.
SoHo Street Art und Architektonische Ecken: Farbenfrohe Hintergründe für Styling-Aufnahmen
Beginnen Sie Ihr Styling-Session an einem versteckten Wandgemälde entlang des SoHo-Korridors und gleiten Sie dann zu einer scharfen architektonischen Ecke, wo Backstein auf Glas trifft. Lassen Sie die Farbblöcke der Wand das Motiv einladen, im Rahmen zu leben, während die Textur das Foto bereichert. Die von kallmeyer kuratierte Farbpalette auf den umliegenden Oberflächen kann Ihre Outfit-Wahl leiten, ohne die Aufnahme zu überwältigen, und Sie können eine Mini-Rotation von Hintergründen zusammenstellen, um den Look frisch zu halten.
Wählen Sie Lichtquellen strategisch: Tageslicht an einer Wand im ersten Stock setzt die Stimmung, während ein kleines, tragbares Licht von einer nahegelegenen Oberfläche reflektiert werden kann, um Schatten zu füllen, ohne die Textur zu glätten. Fotografieren Sie im zweiten Fenster des besten Tageslichts und bringen Sie dann ein paar Lampen hinzu, um die Bilder tiefer wirken zu lassen und flache Ergebnisse zu vermeiden.
Skaliere das Styling mit einem Freestyle-Ansatz: Lehnen Sie sich an eine architektonische Säule, fangen Sie einen ungestellten Moment ein und schwenken Sie dann zu einer ruhigen Ecke mit versteckten Metallgeländern oder einem Türrahmen im Bootshausstil für eine nautische Note. Dieser Mix liefert einladende Bilder, die auf Ihren Seiten und in Urlaubsartikeln Anklang finden, wobei die Bilder so gestaltet sind, dass sie eher bewusst als inszeniert wirken.
Koordiniere dich mit deinem Team, um effizient zwischen den Szenen zu wechseln, die Menge unter Kontrolle zu halten und gleichzeitig Energie zu sparen. Eine fokussierte Machtdynamik – klare Rollen, schnelle Wechsel und ein gemeinsames Auge für Stil – ermöglicht es dir, den Moment einzuschätzen und den besten Frame festzuhalten. Lass das Team eine wechselnde Kulisse zusammenstellen, um die Dynamik während einer einzigen Aufnahme aufrechtzuerhalten.
Nutzen Sie SoHo-Destinationen als Kulisse für Inhalte, die auf Reiseseiten Anklang finden: Taggen Sie Destinationen, Kurztrips und Stile in Bildunterschriften und verlinken Sie Bildmaterial mit realen Ausflügen. Teilen Sie bei Kooperationen Ideen für Aufnahmen mit Partnern über gmailcom und beziehen Sie sich auf Flugerlebnisse oder Kreuzfahrt-Vibes – Fluggesellschaften, lateinamerikanisch inspirierte Akzente oder Einblicke in eine norwegiancruiseline-Reise –, um Ihren Bildkatalog zu bereichern.