


Začněte s a private, hands-on session to master a trio of Italian classics in one evening. You’ll craft a silky, long flat pasta from freshly milled flour, shape delicate stuffed pockets, and finish with a coffee-kissed mascarpone dessert. however, this format is welcoming for cooks of all levels, with měkký coaching that helps you replicate each step at home, inside a central studio designed for comfort and focus, encouraging beginners and experienced cooks alike. The approach underscores the value of practical technique as the fastest path to confident results, Počínaje from your first roll.
Duration: 2 hours 45 minutes; four parts: dough preparation and resting; rolling and shaping; filling and sealing pockets; dessert layering. Each part is timed to keep momentum. Each participant uses a stát at a private workstation inside the studio, with two instructors guiding the group. For traveling guests, convenient transportation options and a central location reduce travel time and make it easy to arrive on time for the warm-up.
Tips for success: arrive 10 minutes early to settle in; the studio provides čerstvý aprons and sanitized tools; wear non-slip shoes. The group stays small–up to eight kuchaři–so feedback is highly personalized. For traveling attendees, central transport links and nearby parking simplify the day. The session ends with a tasting and a quick Q&A, so you can start planning how to bring these techniques into your private meals or traveling dinners.
Step-by-step class outline for hands-on pasta and dessert creation
Begin with a focused kneading and roll drill to establish the best dough texture, keeping hands comfortable and ready for precise forming.
Step 1 – central setup and safety. Create three stations: dough work, filling prep, and dessert assembly. This designed layout helps knowledgeable chefs orchestrate activity while students stay within view, while noting where towels, water, and tools live. Hide clutter behind the stow shelves to keep the central work area clean.
Step 2 – dough creation details. Combine flour (a mix of fine and standard varieties) with eggs, salt, and a splash of water as needed. Rest the dough 15 minutes, then knead 7–9 minutes until smooth and elastic. Roll sheets to 2–2.5 mm thickness; dust lightly to prevent sticking. This creates a reliable base for creating delicate ribbons and pockets.
Step 3 – shaping pasta ribbons and stuffed parcels. Cut sheets into wide and narrow strips, then roll gently to shape. For filled pieces, pipe or place a teaspoon of filling and seal edges with a light press. Use a touch of water on the seam to help adhesion. The hand control and expert tips keep tearing to a minimum and ensure even thickness, which is essential for consistent cooking.
Step 4 – filling ideas and sealing technique. Options include herb-ricotta, spinach–feta, or mushroom fillings. Keep fillings cool, not too wet, and portion evenly to avoid leaks. Pinch edges firmly and test seal by a gentle twist. This creates a positive eating experience and builds your ability to choose the best balance of flavors.
Step 5 – cooking and finishing. Bring salted water to a rolling boil where the pasta sheets or shapes are dropped in batches; cook until al dente, typically 2–4 minutes depending on thickness. Remove with a slotted spoon, drizzle with olive oil or sauce, and toss lightly. This step often serves as the central test for texture and flavor, with ticks of timing guiding the final result.
Step 6 – dessert construction. Build a coffee-cream layered dessert using a mascarpone-like filling, espresso-soaked layers or sponge, and a dusting of cocoa. Alternate layers to create contrast in density and taste, then chill for at least 2–4 hours. Creating this dish teaches you to balance sweetness and bitterness, and to understand how textures interact with each bite.
Step 7 – tasting, noting, and review. Conduct guided tasting of dough, fresh pasta, and dessert in sequence. Note where flavors align with texture, where salt and acidity improve balance, and where the finish lands. Gather positive traveler feedback if participants are visitors, then document overall impressions and concrete details for improvement. This teaching approach emphasizes learning, sharing knowledge, and gaining confidence.
Step 8 – follow-up materials and gaining confidence. Provide a concise reference sheet, a shopping list, and a simple practice timeline for home use. The plan is designed to be repeatable, with a central emphasis on touch, guidance from expert chefs, and opportunities to gain hands-on mastery in comfortable settings.
Fettuccine Dough Mastery: flour-to-egg ratios, resting, and rolling thin sheets
Recommendation: Start with 100 g flour per 1 large egg, preferably tipo 00 for a silky dough. If the dough is stiff, add 1–2 tsp water; if it’s too wet, dust with a pinch more flour. Knead 5–8 minutes until smooth and just tacky. Rest 20–30 minutes, wrapped, to relax gluten. This ratio is super true for pasta lovers who chase Italian traditions and homemade, prepared sheets. Availability of flour and egg quality matters, so choose seasonally fresh ingredients when you can find them; the move toward a consistent dough improves eating and results you can replicate. This approach is a great highlight in cookbook guides and is well suited to relaxed sessions that accompany a workshop or restaurant-style workflow.
- Step 1 – Mix and knead: Weigh 100 g flour and 1 large egg; form a well, drop the egg in, and bring flour in with a fork. Knead 5–8 minutes until a smooth, non-sticky ball forms. If the dough feels stiff, whisk in a teaspoon at a time; if too soft, dust with a little flour. This base supports a real, reliable pasta as part of a homemade choice for cooks and lovers alike.
- Step 2 – Rest and relax: Wrap dough and rest 20–30 minutes at room temperature; for longer storage, refrigerate up to 24 hours. Resting lets gluten align so the sheets roll thinner with less effort, a relaxed process that many chefs treat as an important tradition and a core part of Italian eating experiences. The rested dough is accompanied by aroma and texture that elevate contents and flavor.
- Step 3 – Roll to sheets: Divide into 4 portions; flatten each with the palm. If using a machine, start at the thickest setting and pass through several times, then reduce to a thin setting around 0.25–0.3 mm. If rolling by hand, use steady, long strokes with a pin. Keep surfaces lightly floured or dusted with semolina to prevent sticking; a steady hand and cool workspace help you move toward consistent thickness.
- Step 4 – Thin sheets with control: Aim for sheets that are translucent enough to read print behind them but strong enough not to tear. Run extra passes as needed, allowing a short rest between passes if the dough stiffens. The result should be a uniform, pliable sheet that can be handled without cracking, ideal for long ribbons or sheet-based shapes. This step is a reliable highlight for beginners and seasoned cooks alike, and it helps you replicate restaurant quality at home.
- Step 5 – Cut into long ribbons: lay sheets flat and cut into strips about 6–8 mm wide for classic, generous ribbons. Dust lightly with flour and lay on a rack or clean towel to dry briefly before cooking. This width pairs beautifully with simple sauces and lets flavors come through, a great choice for lovers seeking authentic Italian dining at home.
- Step 6 – Cook and finish: Boil salted water; drop sheets and cook 2–3 minutes until al dente. Reserve ¼ cup starchy water to adjust sauce consistency, then toss gently so ribbons shine. Serve immediately or keep warm briefly; prepared pasta like this elevates weeknight meals and can be a centerpiece in a home menu or a restaurant-style tasting.
Notes: seasonal fluctuation in flour protein or egg size can affect hydration; check availability and adapt. The contents of your cookbook or guides offer additional tips, but the core method remains a reliable source (источник) supported by cesarine insights. For those new to pasta making, a relaxed mindset and encouraging practice help you find your rhythm, increase confidence, and gradually replicate restaurant-quality sheets that accompany simple olive oil, garlic, or mushroom sauces as a satisfying, real experience.
Ravioli Essentials: dough, 3 filling options, and proper sealing to prevent leaks
Start with a dough formula that offers flexibility: 250 g00 flour, 2 large eggs, and 1–2 tbsp water. Knead 8–10 minutes until smooth, then rest, covered, for 30 minutes inside a cool place. This process yields elastic sheets that won’t tear and keeps the filling inside; moisture balance is mentioned as a critical factor for clean edges and a relaxed handling experience.
Roll the dough to about 2 mm thickness; dust lightly with flour to prevent sticking. If the sheet sticks, fold and reroll. A well-organized class benefits from a dedicated pasta machine or a long rolling pin. Start on the widest setting and gradually move to thinner settings; keep sheets flat and covered between steps to stay relaxed. Instructors guide the sequence so each participant feels confident, whether cooking at home or in a public class, and the place remains well-structured.
Three filling options balance flavor and moisture: Option one is ricotta with spinach and Parmesan; mix 250 g ricotta, 120 g chopped spinach, 60 g grated Parm, a pinch of nutmeg, salt, and pepper; squeeze any excess moisture from the spinach and chill the mixture 15 minutes before filling. Option two is mushroom and herb with a dairy-friendly or dairy-free binding; sauté 200 g mushrooms with a shallot and garlic, cool, then blend with 60 g cream cheese or a dairy-free equivalent and 1 tbsp chopped parsley; season to taste. Option three is roasted squash with amaretti crumbs and sage; mash 250 g squash, fold in 40 g grated cheese or nutritional yeast for dairy-free, add 15 g crushed amaretti and a pinch of sage; let cool and bind with 1 egg yolk or a splash of water. These fillings accommodate allergies by swapping binders and dairy as needed and are worth trying for home meals or city tours in the city, whether you cook solo or with a group.
To seal, brush the edges with a light wash of egg or water. Place a second dough sheet over the filling, align edges, and press firmly to remove air pockets; seal by pinching along the edges with fingers or using a crimp wheel; after sealing, press around each pocket to ensure the seam ends are tight. Cut between pockets and transfer onto a lightly floured tray; to prevent leaks, leave a small gap between pockets and avoid overfilling. In city classes or public sessions, this step is repeatedly mentioned as the key point that keeps leaks from forming.
Cook in salted boiling water for 2–4 minutes; they are ready when they float to the surface. Remove with a slotted spoon and serve with your preferred sauce. If not cooking immediately, freeze on a tray, then transfer to a bag; this home technique suits extra practice at home. Following these best practices, the process ends with confident participants leaving a well-organized kitchen feeling capable, whether you’re on tours or teaching in a city center, and the knowledgeable instructors are often mentioned as a reason the session feels enjoyable and worth the time.
Ravioli Technique Drills: shaping, cutting, and drying without sticking
Dust the work surface with a light veil of semolina and flour to prevent sticking. Roll sheets to about 1/16 inch thickness; this ensures uniform thickness and easy sealing, a core pasta-making rule. Before starting, cover the dough and let it rest 15 minutes to relax; this step improves elasticity and handling.
Where you place the filling, use small mounds about 1/2 teaspoon each; brush edges with water; fold to form a pocket, and press firmly to seal; avoid air pockets by squeezing from the center outward; trim rough edges with a knife.
Sušení: taštičky rozložte na pečicí papír na mřížce nebo plochém plechu; rozestupy 1,5 cm; poprašte moukou nebo krupicí; nechte 15–30 minut uschnout na vzduchu, dokud okraje neztuhnou; ve vlhkém stavu nestohujte; po usušení volně zakryjte nebo odložte stranou, dokud nebudou připravené omáčky.
Odstraňování problémů: Pokud dochází k přilepení, podeberte širokou čepelí a povrch poprašte větším množstvím mouky; oddělujte jemně, abyste zabránili roztržení; nikdy neškrábejte těsto ostrými předměty; ujistěte se, že v místnosti není příliš vlhko; naplánujte si 3hodinový blok výuky, abyste dokončili cvičení.
Kontext a co si odnesete: tato třída vám oživí vzpomínky. friends a milenci, počínaje základy tvarování a utěsňování. Pro each účastník, tato praxe se promítá do domácích kuchyní, kde se čerstvé taštičky snoubí s omáčky. Rutina se rozvíjí throughout sezení a poznámky lze uložit do kuchařka jako odkaz. Poklona vůči colosseum nastavení udržuje vysokou energii a vytváří eating působí jako sdílená událost spíše než sólový úkol. Můžete fotografovat vzpomínky na obálka z vašich poznámek a plánu dessert párování a non-alcoholic možnosti k dokončení. Parking blízkosti místa konání pomáhá vyhnout se cancellation, a tato metoda bude most lidé začínají s důvěrou a položí pevný základ pro budoucnost eating adventures.
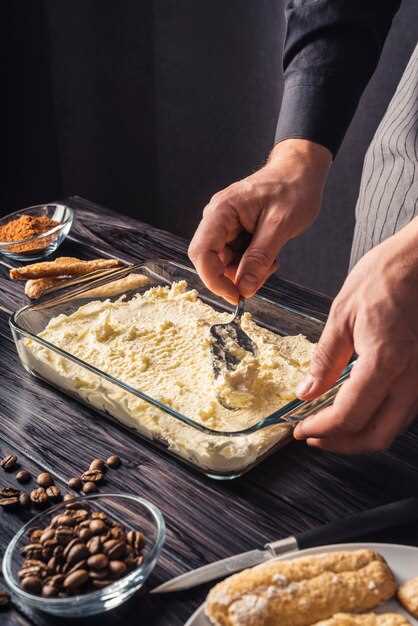
Sestavení tiramisu: namáčení v espressu, stabilita mascarpone krému a precizní vrstvení
Doporučení: Uvařte 180 ml silného espressa, rozpusťte 2 lžíce krystalového cukru a nechte vychladnout na 15–18 °C. Volitelně přidejte 1 lžíci kávového likéru. Každý piškot namáčejte 1–2 sekundy z každé strany; uspořádejte do jedné těsné vrstvy v misce o rozměrech 20 × 20 cm. Tyto kroky vytvoří pevný základ, který odolává rozmáčení a zároveň zajišťuje rovnoměrné pokrytí pro každé sousto. Tyto pokyny, uvedené výše, budou viditelné po celou dobu montáže.
Stabilita mascarponového krému: Vyšlehejte 250 g mascarpone s 50 g moučkového cukru a 1 lžičkou vanilky do hladka. Vyšlehejte 200 ml smetany ke šlehání do tuhých špiček a ve dvou dávkách vmíchejte do mascarpone. Pokud se vám zdá směs příliš řídká, nebojte se – otestujte stabilitu zašleháním 1–2 lžiček vody nebo malého škrobového zákalu; pokud se vám textura nezdá stabilní, přidejte podle potřeby. Výsledkem by měl být lesklý krém, který si po vychlazení udrží tvar.
-
Namočení a sušenky: Použijte mělkou misku; udržujte namáčecí tekutinu čistou. Nejprve otestujte jednu sušenku, abyste posoudili absorpci. Ti, kteří dodržují pravidlo, zůstávají konzistentní v průběhu celého procesu.
-
Přesnost vrstvení: Rozetřete silnou, rovnoměrnou vrstvu mascarpone směsi na první nasáklou vrstvu. Přidejte druhou nasáklou vrstvu, jemně přitlačte, abyste odstranili vzduch, a poté navrch naneste další vrstvu krému. Opakujte, dokud není pokrm pokrytý, a zakončete finální vrstvou krému. Každá vrstva by měla mít stejnou tloušťku; škrabka nebo zadní strana lžíce pomáhá dosáhnout rovnováhy ve středu.
-
Nechte vychladit a dokončete: Dejte alespoň na 4 hodiny do chladničky; uložení přes noc zajistí soudržnější plátky. Těsně před podáváním poprašte kakaovým práškem a případně přidejte hoblinky čokolády pro texturu. Pro elegantnější vzhled obtáhněte okraj tenkou linkou kakaa.
Poznámky z workshopu: Tyto dobře organizované lekce přitahují páry i jednotlivce, kteří chtějí zlepšit své kulinářské dovednosti. Zákazníci se často ptali na dobu máčení a stabilizaci; extra lekce se těmito tématy do hloubky zabývá. Některé komentáře zdůrazňují velké uspokojení ze sdílení techniky s ostatními a možnost replikovat tento dezert doma díky dostupnému tištěnému průvodci zdarma. Tato ústřední, spolehlivá technika, zasazená do menu inspirovaných Římem, si získává nadšení a chválu od strávníků, kteří si dopřávají sladké, vyvážené sousto. Praktické tipy sdílené během lekce pomáhají každému účastníkovi zlepšit dovednosti a cítit se jistě, a ti, kteří si to procvičí, se mohou o tento přístup podělit s přáteli a proměnit jednoduchý dezert v nezapomenutelné finále. Praktické rady pro ty, kteří se chtějí podělit o znalosti v kuchyni, udržují zážitek poutavý pro ty, kteří hledají skvělý, všestranný výsledek.
Párování nápojů a servírování: káva, dezertní víno a nealkoholické varianty ke každému chodu
Začněte s výrazným domácím espressem po předkrmu, abyste probudili chuťové pohárky; tento plán zahajuje degustaci svěžím tónem pro účastníky, labužníky i cestovatele.
Pro hlavní těstovinový chod nabídněte kávu střední praženosti, která doplní omáčku, dezertní víno, které odráží náplň nebo sýrové akcenty, a nealkoholickou variantu, která očistí patro mezi sousty. Zpět, tato sekvence buduje energii a usnadňuje vašim průvodcům a přátelům sdílení zpětné vazby.
| Kurz | Párování kávy | Dezertní víno | Nealkoholická varianta |
|---|---|---|---|
| Předkrm (lehké těstoviny s bylinkovou omáčkou) | Espresso střední pražení nebo macchiato s náznakem citrusové kůry | Vin Santo nebo Moscato d’Asti | Šumivý citronovo-zázvorový shrub |
| Druhý chod (bohatší plněné těstoviny) | Espresso z tmavšího pražení, podávané jako lungo pro vyvážení bohatosti | Brachetto d’Acqui nebo Recioto | Bylinný ledový čaj s pomerančovou kůrou |
| Dezert (sladká vrstvená pochoutka) | Malé espresso cortado na pročištění chuti | Moscato ve stylu Dolce nebo Vin Santo | Heřmánkový čaj s vanilkou nebo vanilkovo-růžová limonáda |
Plánování s ohledem na náklady podporuje skutečný 3hodinový zážitek, který zůstává úžasný pro gurmány i průvodce; italské tradice jsou zdůrazněny a komentáře účastníků pomáhají přizpůsobit budoucí setkání. Toto nastavení vám pomůže sdílet techniku, energii a učení se svými přáteli a spolucestujícími.