


Start with a private, hands-on session to master a trio of Italian classics in one evening. You’ll craft a silky, long flat pasta from freshly milled flour, shape delicate stuffed pockets, and finish with a coffee-kissed mascarpone dessert. however, this format is Xoş gəldin for cooks of all levels, with yumşaq coaching that helps you replicate each step at home, inside a central studio designed for comfort and focus, encouraging beginners and experienced cooks alike. The approach underscores the value of practical technique as the fastest path to confident results, başlayırıq from your first roll.
Duration: 2 hours 45 minutes; four parts: dough preparation and resting; rolling and shaping; filling and sealing pockets; dessert layering. Each hissə is timed to keep momentum. Each participant uses a stand at a private workstation inside the studio, with two instructors guiding the group. For traveling guests, convenient nəqliyyat seçimlər və a central location reduce travel time and make it easy to arrive on time for the warm-up.
Tips for success: arrive 10 minutes early to settle in; the studio provides fresh aprons and sanitized tools; wear non-slip shoes. The group stays small–up to eight cooks–so feedback is highly personalized. For traveling attendees, central transport links and nearby parking simplify the day. The session Təlimatlar: - Yalnız tərcüməni təqdim edin, izah yoxdur - Orijinal tonu və üslubu qoruyun - Formatlaşdırmanı və sətir fasilələrini saxlayın with a tasting and a quick Q&A, so you can start planning how to bring these techniques into your private meals or traveling dinners.
Step-by-step class outline for hands-on pasta and dessert creation
Begin with a focused kneading and roll drill to establish the best dough texture, keeping hands comfortable and ready for precise forming.
Step 1 – central setup and safety. Create three stations: dough work, filling prep, and dessert assembly. This designed layout helps knowledgeable chefs orchestrate activity while students stay within view, while noting where towels, water, and tools live. Hide clutter behind the stow shelves to keep the central work area clean.
Step 2 – dough creation details. Combine flour (a mix of fine and standard varieties) with eggs, salt, and a splash of water as needed. Rest the dough 15 minutes, then knead 7–9 minutes until smooth and elastic. Roll sheets to 2–2.5 mm thickness; dust lightly to prevent sticking. This creates a reliable base for creating delicate ribbons and pockets.
Step 3 – shaping pasta ribbons and stuffed parcels. Cut sheets into wide and narrow strips, then roll gently to shape. For filled pieces, pipe or place a teaspoon of filling and seal edges with a light press. Use a touch of water on the seam to help adhesion. The hand control and expert tips keep tearing to a minimum and ensure even thickness, which is essential for consistent cooking.
Step 4 – filling ideas and sealing technique. Options include herb-ricotta, spinach–feta, or mushroom fillings. Keep fillings cool, not too wet, and portion evenly to avoid leaks. Pinch edges firmly and test seal by a gentle twist. This creates a positive eating experience and builds your ability to choose the best balance of flavors.
Step 5 – cooking and finishing. Bring salted water to a rolling boil where the pasta sheets or shapes are dropped in batches; cook until al dente, typically 2–4 minutes depending on thickness. Remove with a slotted spoon, drizzle with olive oil or sauce, and toss lightly. This step often serves as the central test for texture and flavor, with ticks of timing guiding the final result.
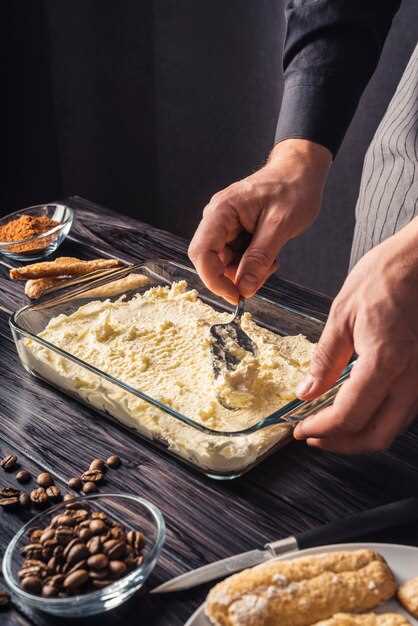
Step 6 – dessert construction. Build a coffee-cream layered dessert using a mascarpone-like filling, espresso-soaked layers or sponge, and a dusting of cocoa. Alternate layers to create contrast in density and taste, then chill for at least 2–4 hours. Creating this dish teaches you to balance sweetness and bitterness, and to understand how textures interact with each bite.
Step 7 – tasting, noting, and review. Conduct guided tasting of dough, fresh pasta, and dessert in sequence. Note where flavors align with texture, where salt and acidity improve balance, and where the finish lands. Gather positive traveler feedback if participants are visitors, then document overall impressions and concrete details for improvement. This teaching approach emphasizes learning, sharing knowledge, and gaining confidence.
Step 8 – follow-up materials and gaining confidence. Provide a concise reference sheet, a shopping list, and a simple practice timeline for home use. The plan is designed to be repeatable, with a central emphasis on touch, guidance from expert chefs, and opportunities to gain hands-on mastery in comfortable settings.
Fettuccine Dough Mastery: flour-to-egg ratios, resting, and rolling thin sheets
Recommendation: Start with 100 g flour per 1 large egg, preferably tipo 00 for a silky dough. If the dough is stiff, add 1–2 tsp water; if it’s too wet, dust with a pinch more flour. Knead 5–8 minutes until smooth and just tacky. Rest 20–30 minutes, wrapped, to relax gluten. This ratio is super true for pasta lovers who chase Italian traditions and homemade, prepared sheets. Availability of flour and egg quality matters, so choose seasonally fresh ingredients when you can find them; the move toward a consistent dough improves eating and results you can replicate. This approach is a great highlight in cookbook guides and is well suited to relaxed sessions that accompany a workshop or restaurant-style workflow.
- Step 1 – Mix and knead: Weigh 100 g flour and 1 large egg; form a well, drop the egg in, and bring flour in with a fork. Knead 5–8 minutes until a smooth, non-sticky ball forms. If the dough feels stiff, whisk in a teaspoon at a time; if too soft, dust with a little flour. This base supports a real, reliable pasta as part of a homemade choice for cooks and lovers alike.
- Step 2 – Rest and relax: Wrap dough and rest 20–30 minutes at room temperature; for longer storage, refrigerate up to 24 hours. Resting lets gluten align so the sheets roll thinner with less effort, a relaxed process that many chefs treat as an important tradition and a core part of Italian eating experiences. The rested dough is accompanied by aroma and texture that elevate contents and flavor.
- Step 3 – Roll to sheets: Divide into 4 portions; flatten each with the palm. If using a machine, start at the thickest setting and pass through several times, then reduce to a thin setting around 0.25–0.3 mm. If rolling by hand, use steady, long strokes with a pin. Keep surfaces lightly floured or dusted with semolina to prevent sticking; a steady hand and cool workspace help you move toward consistent thickness.
- Step 4 – Thin sheets with control: Aim for sheets that are translucent enough to read print behind them but strong enough not to tear. Run extra passes as needed, allowing a short rest between passes if the dough stiffens. The result should be a uniform, pliable sheet that can be handled without cracking, ideal for long ribbons or sheet-based shapes. This step is a reliable highlight for beginners and seasoned cooks alike, and it helps you replicate restaurant quality at home.
- Step 5 – Cut into long ribbons: lay sheets flat and cut into strips about 6–8 mm wide for classic, generous ribbons. Dust lightly with flour and lay on a rack or clean towel to dry briefly before cooking. This width pairs beautifully with simple sauces and lets flavors come through, a great choice for lovers seeking authentic Italian dining at home.
- Step 6 – Cook and finish: Boil salted water; drop sheets and cook 2–3 minutes until al dente. Reserve ¼ cup starchy water to adjust sauce consistency, then toss gently so ribbons shine. Serve immediately or keep warm briefly; prepared pasta like this elevates weeknight meals and can be a centerpiece in a home menu or a restaurant-style tasting.
Notes: seasonal fluctuation in flour protein or egg size can affect hydration; check availability and adapt. The contents of your cookbook or guides offer additional tips, but the core method remains a reliable source (источник) supported by cesarine insights. For those new to pasta making, a relaxed mindset and encouraging practice help you find your rhythm, increase confidence, and gradually replicate restaurant-quality sheets that accompany simple olive oil, garlic, or mushroom sauces as a satisfying, real experience.
Ravioli Essentials: dough, 3 filling options, and proper sealing to prevent leaks
Start with a dough formula that offers flexibility: 250 g00 flour, 2 large eggs, and 1–2 tbsp water. Knead 8–10 minutes until smooth, then rest, covered, for 30 minutes inside a cool place. This process yields elastic sheets that won’t tear and keeps the filling inside; moisture balance is mentioned as a critical factor for clean edges and a relaxed handling experience.
Roll the dough to about 2 mm thickness; dust lightly with flour to prevent sticking. If the sheet sticks, fold and reroll. A well-organized class benefits from a dedicated pasta machine or a long rolling pin. Start on the widest setting and gradually move to thinner settings; keep sheets flat and covered between steps to stay relaxed. Instructors guide the sequence so each participant feels confident, whether cooking at home or in a public class, and the place remains well-structured.
Three filling options balance flavor and moisture: Option one is ricotta with spinach and Parmesan; mix 250 g ricotta, 120 g chopped spinach, 60 g grated Parm, a pinch of nutmeg, salt, and pepper; squeeze any excess moisture from the spinach and chill the mixture 15 minutes before filling. Option two is mushroom and herb with a dairy-friendly or dairy-free binding; sauté 200 g mushrooms with a shallot and garlic, cool, then blend with 60 g cream cheese or a dairy-free equivalent and 1 tbsp chopped parsley; season to taste. Option three is roasted squash with amaretti crumbs and sage; mash 250 g squash, fold in 40 g grated cheese or nutritional yeast for dairy-free, add 15 g crushed amaretti and a pinch of sage; let cool and bind with 1 egg yolk or a splash of water. These fillings accommodate allergies by swapping binders and dairy as needed and are worth trying for home meals or city tours in the city, whether you cook solo or with a group.
To seal, brush the edges with a light wash of egg or water. Place a second dough sheet over the filling, align edges, and press firmly to remove air pockets; seal by pinching along the edges with fingers or using a crimp wheel; after sealing, press around each pocket to ensure the seam ends are tight. Cut between pockets and transfer onto a lightly floured tray; to prevent leaks, leave a small gap between pockets and avoid overfilling. In city classes or public sessions, this step is repeatedly mentioned as the key point that keeps leaks from forming.
Cook in salted boiling water for 2–4 minutes; they are ready when they float to the surface. Remove with a slotted spoon and serve with your preferred sauce. If not cooking immediately, freeze on a tray, then transfer to a bag; this home technique suits extra practice at home. Following these best practices, the process ends with confident participants leaving a well-organized kitchen feeling capable, whether you’re on tours or teaching in a city center, and the knowledgeable instructors are often mentioned as a reason the session feels enjoyable and worth the time.
Ravioli Technique Drills: shaping, cutting, and drying without sticking
Yapışmağın qarşısını almaq üçün iş səthini yüngül manna yarması və un örtüyü ilə örtün. Vərəqləri təxminən 1/16 düym qalınlığında yayın; bu, vahid qalınlığı və asan möhürlənməni təmin edir, bu əsas makaron hazırlama qaydasıdır. Başlamazdan əvvəl xəmiri örtün və rahatlaması üçün 15 dəqiqə dincəlməyə qoyun; bu addım elastikliyi və işləməyi yaxşılaşdırır.
İçliyi yerləşdirdiyiniz yerdə, hər birində təxminən 1/2 çay qaşığı olmaqla kiçik təpəciklər düzəldin; kənarlarını su ilə isladın; cibləri formalaşdıraraq qatlayın və möhkəm sıxın ki, bağlansın; mərkəzdən kənara sıxaraq hava ciblərinə yol verməyin; kobud kənarları bıçaqla kəsin.
Qurutma: ciblərini perqament üzərinə, rəfə və ya düz tepsiyə düzün; aralarında 1,5 sm məsafə saxlayın; üzərinə un və ya manna yarması səpin; kənarları bərkiyənə qədər 15–30 dəqiqə havada qurudun; nəmli ikən üst-üstə yığmayın; quruduqdan sonra üstünü boş örtün və ya souslar hazır olana qədər kənara qoyun.
Nasazlıq aradan qaldırılması: Əgər yapışma baş verərsə, enli bir bıçaqla qaldırın və səthi daha çox unla tozlayın; cırılmanın qarşısını almaq üçün ehtiyatla ayırın; xəmiri heç vaxt iti əşyalarla cızmayın; otağın həddindən artıq rütubətli olmadığından əmin olun; məşqləri bitirmək üçün 3 saatlıq dərs bloku planlaşdırın.
Kontekst və əldə ediləcəklər: bu sinif xatirələri oyandıracaq dostlar və sevgililər, formalaşdırma və möhürləmə əsasları ilə başlayaraq. Üçün each iştirakçı, bu praktika təzə kökləmələrin uyğunlaşdığı ev mətbəxlərinə çevrilir souslar. Prosedur açılır throughout sessiya və qeydlər yadda saxlanıla bilər resept kitabı istinad olaraq. Baş əymək colosseum qayğıkeş enerji səviyyəsini yüksək saxlayır və yaradır yemək özünü təkbaşına görülən işdən daha çox, ortaq bir tədbir kimi hiss edirsən. Yaddaşları şəklə çəkə bilərsən. örtük qeydlərinizi və planınızı desert cütləşmə və alkoqolsuz seçimləri bitirmək üçün. Parking məkanın yaxınlığında olmaq yayınmağa kömək edir cancellation, və bu üsul most insanlar inamla başlayır və gələcək üçün möhkəm zəmin yaradacaqlar yemək macəralar.
Tiramisu Yığılması: espresso islatma, maskarpone kreminin dayanıqlılığı və dəqiq laylanma
Tövsiyə: 180 ml güclü espresso dəmləyin, 2 xörək qaşığı kristal şəkəri həll edin və 15-18°C-yə qədər soyudun. İstəyə görə 1 xörək qaşığı qəhvə likörü əlavə edin. Hər barmaq peçenyesini hər tərəfdən 1-2 saniyə batırın; 20×20 sm ölçülü qabda bir layda, sıx şəkildə düzün. Bu addımlar hər dişləmə üçün bərabər örtük əmələ gətirərək, islanmaya davamlı möhkəm bir əsas yaradır. Yuxarıda qeyd olunan bu təlimatlar bütün montaj prosesi boyunca görünəcəkdir.
Maskarpone kreminin davamlılığı: 250 q maskarponeni 50 q şəkər pudrası və 1 ç.q. vanil ilə hamarlaşana qədər çalın. 200 ml qaymağı bərkiyənə qədər çalın və iki mərhələdə maskarponenin içinə əlavə edin. Qarışıq çox duru görünürsə, narahat olmayın – 1-2 ç.q. su və ya kiçik qarğıdalı nişastası ilə davamlılığı yoxlayın; əgər tekstura davamlı görünmürsə, lazım olduqca əlavə edin. Nəticə parlaq olmalı və soyuducuda saxladıqdan sonra formasını qorumalıdır.
-
Islatma və peçenye: Dayaz qabdan istifadə edin; islatma mayesini təmiz saxlayın. Udma qabiliyyətini qiymətləndirmək üçün əvvəlcə bir peçenye yoxlayın. Bu qaydaya əməl edənlər proses boyunca ardıcıl qalırlar.
-
Layların dəqiqliyi: Birinci isladılmış layın üzərinə qalın, bərabər mascarpone qarışığı layı çəkin. İkinci isladılmış layı əlavə edin, havanı çıxarmaq üçün yüngülcə basın, sonra yenidən krem layı ilə örtün. Qab dolana qədər təkrarlayın, son krem səthi ilə tamamlayın. Hər lay qalınlıqda bərabər olmalıdır; skreper və ya qaşığın arxası mərkəzi balansı əldə etməyə kömək edir.
-
Soyudub bitirin: Ən azı 4 saat soyuducuda saxlayın; bir gecədə daha bütöv dilimlər alınır. Süfrəyə verməzdən əvvəl üzərinə kakao tozu səpin və istəsəniz, tekstura üçün şokolad yonqarları əlavə edin. Daha zərif görünüş üçün kənarlarına nazik bir kakao xətti çəkin.
Seminar qeydləri: Yaxşı təşkil olunmuş bu sessiyalar qida bacarıqlarını artırmaq istəyən cütlükləri və fərdləri cəlb edir. Müştərilər tez-tez islatma müddəti və stabilləşmə haqqında suallar verirdilər; əlavə dərs hissəsi bu mövzuları dərindən əhatə edir. Bəzi şərhlər texnikanı başqaları ilə bölüşməkdən böyük məmnunluq duyğusunu, həmçinin pulsuz çap oluna bilən bələdçi ilə bu deserti evdə təkrarlamaq imkanını vurğulayır. Romadan ilhamlanan menyular ətrafında bu mərkəzi, etibarlı texnika şirin, balanslaşdırılmış bir tikədən həzz alan yemək yeyənlərdən sevinc və tərif qazanır. Sessiya zamanı paylaşılan müdrik məsləhətlər hər bir iştirakçıya bacarıqlarını təkmilləşdirməyə və özünə güvənməyə kömək edir və təcrübə edənlər yanaşmanı dostları ilə bölüşərək sadə bir deserti yaddaqalan bir finala çevirə bilərlər. Mətbəxdə biliklərini bölüşmək istəyənlər üçün müdrik rəhbərlik, əla, hərtərəfli nəticə əldə etmək istəyənlər üçün təcrübəni cəlbedici edir.
İçki Uyğunlaşdırması və Təqdimatı: Hər yeməyə uyğun qəhvə, desert şərabı və alkoqolsuz içkilər
İştah açandan sonra damağı oyandırmaq üçün parlaq, evdə hazırlanmış espresso ilə başlayın; bu plan iştirakçıları, qourmanları, səyahətçiləri eyni dərəcədə parlaq bir notla dequstasiyaya başlayır.
Əsas pasta yeməyi üçün sousu tamamlayan orta dərəcədə qovrulmuş qəhvə, içliyi və ya pendir ləzzətini əks etdirən desert şərabı və hər qəbul arasında damağı təmizləyən alkoqolsuz içki təklif edin. Ardıcıllıq enerjini artırır və bələdçilərinizlə dostlarınızın rəy bildirməsini asanlaşdırır.
| Kurs | Qəhvə uyğunlaşdırması | Desert şərabı | Alkoqolsuz seçim |
|---|---|---|---|
| Başlanğıc yeməyi (ot souslu yüngül pasta) | Orta dərəcədə qovrulmuş espresso və ya sitrus qabığı əlavə edilmiş makiyato | Vin Santo yoxsa Moscato d’Asti | Qığılcım limon-zəncəfil şirəsi |
| İkinci yemək (daha zəngin içlikli makaron) | Tünd qovrulmuş espresso, zənginliyi balanslaşdırmaq üçün lungo kimi servis edilir | Brachetto d’Acqui və ya Recioto | Portağal qabığı ilə bitki tərkibli buzlu çay |
| Desert (şirin laylı desert) | Kiçik espresso kortado damağı təmizləmək üçün | Dolçe üslublu Moskatı və ya Vin Santo | Vanil ilə ромашка чайы, ya da vanilli-gül sodası |
Xərclərə qənaət edən planlaşdırma, həm yemək həvəskarları, həm də bələdçilər üçün əla olaraq qalan, həqiqi 3 saatlıq təcrübəni dəstəkləyir; İtaliya ənənələri vurğulanır və iştirakçıların şərhləri gələcək sessiyaları tənzimləməyə kömək edir. Bu quruluş texnikanı, enerjini və tədrisi dostlarınız və yol yoldaşlarınızla bölüşməyə kömək edir.