


Start by securing lumbar support as soon as you sit: place a slim cushion or rolled towel at the lower back, adjust the seat back to about 100 to 110 degrees, and keep your toes relaxed with feet flat in-seat above the floor. This setup stabilizes your spine and reduces early cramps.
Use a quick sign from your body and a simple score to guide changes. Every hour, rate your back discomfort on a 0–10 scale, log that data, and then adjust height, angle, and support. Keeping a small notebook or notes in your phone helps you spot patterns and avoid repeating mistakes.
Plan for micro-movements to prevent stiffness during počas letu sessions. Rotate your torso and hips every 15–20 minutes, shift weight between sitting bones, and trying small in-seat stretches. Keep extra cushions handy for subtle adjustments, and use a footrest if available to ease leg pressure. Move only when the belt sign allows. You can allow a moment for the shift.
Choose an aisle seat when possible to ease access for stretches without disturbing neighbors, and place essentials like boarding cards in the pocket above so you can reach them without major shifts. Consider using a second cushion if you still feel pressure, and position items within arm’s reach to avoid extra movement.
If cramps threaten, pause to flex your feet, stretch calves, and rotate ankles. Hydration matters: sip water regularly, avoid alcohol, and aim for 2–3 liters for a full flight. For ongoing relief, try trying gentle abdominal breaths and a brief standing stretch when the belt sign allows. Use gentle leg pumps and alternating pressure when you’re allowed to stand, which helps circulation and reduces stiffness. Consider a quick toe tap sequence to keep circulation active.
With secure support, data-driven adjustments, and unlimited small moves, you can travel pain-free on long flights. Start with the first adjustment, heed the sign from your body, and tailor your approach to your needs for future trips.
Practical seating and movement strategies to reduce back strain during air travel
Set your lower back against a lumbar support and sit tall with a neutral spinal alignment, head over shoulders. Place a rolled towel or compact lumbar cushion at the curve, keep both feet flat on the ground, and adjust seat depth so your hips touch the backrest while your knees form about a 90-degree angle.
Maintain a calm, tall posture with shoulders relaxed and the head stacked over the spine. If your lower back feels pressed, move the cushion until the edge of the seat supports you. Keep toes loose to allow blood flow and prevent stiffness in the calves and feet.
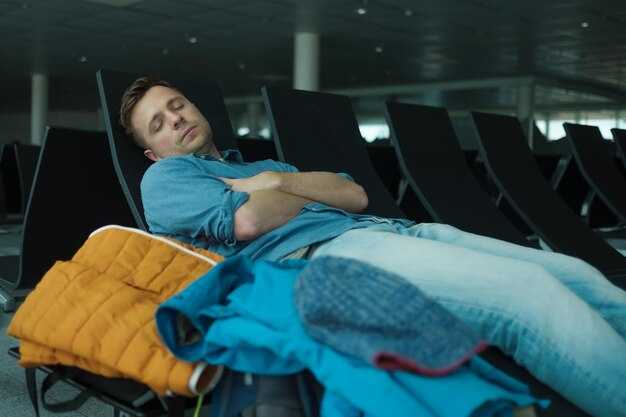
Schedule movement every 60–90 minutes. Stand in the aisle if allowed, or perform seated moves: rotate shoulders, gentle spinal twists, and hip hinges to lean forward and then straighten up. Do 10 ankle pumps and 10 calf raises to pump venous blood and limit swollen ankles. Use a footrest to keep ankles near 90 degrees and reduce pressure on the lower legs. Spending long hours in the air increases risk, so plan micro-breaks accordingly.
When the seat back is slightly reclined, use your hands on the armrests to assist gentle pulling upward on the torso to lengthen the spine, helping you stay upright and maintain good posture.
In the category of seating choices, opt for seats with extra legroom or aisle access to enable unrestricted movement. If you spend a long flight in a compact cabin, book a seat with additional leg support and a footrest; this helps you keep upright posture and reduce pressure on the lower back. From global routes to local locations, plan movement opportunities during layovers and after landing to reestablish comfort.
Active stretches before takeoff and during the flight can reduce tightness: perform 8–12 forward folds from the hips (knees soft), 4 gentle spinal twists to either side, and 6–8 cat-cow motions while seated. Flex and straighten your spine with each set to improve flexibility. For the feet and legs, do toe curls and foot circles to keep veins flowing and avoid swelling.
If you notice swollen ankles after long flights, use compression socks and adjust your posture to maintain good blood flow. Take short breaks and move regularly to stay flexible and ready for the next leg of your trip. From these practices, you get immediate relief during the flight and become more comfortable, becoming a habit that helps with back health across trips, whether you travel weekly or occasionally.
Spending long hours in the air can be painful, but trying small moves done correctly yields more comfort. From a simple posture tune-up to a full stretching set, these steps are becoming a reliable routine with rewards like less stiffness, more energy, and unlimited ability to stay mobile on global trips.
Optimal Seat Setup for Lower Back Support
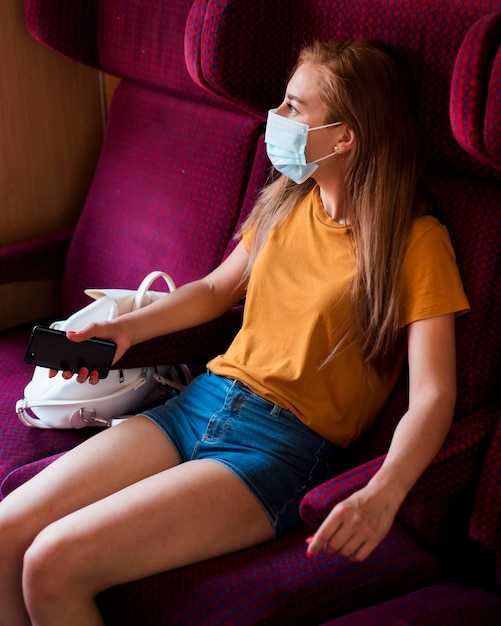
Choose an aisle seat in the middle of the cabin and apply a lumbar support under your bottom to keep the spine aligned from taxi to landing. This setup eases back tension, keeps you comfortable, and makes sleeping more doable in-flight.
These quick adjustments work while sitting and traveling; add a compact lumbar roll or rolled towel and secure it behind your lower back; if you can, slip a thin pillow behind your neck for sleeping comfort, while you stay still and relaxed.
- Seat selection: pick an aisle seat in the middle of the cabin to ease access to the aisle; use a small cushion to fill the gap at the spine and keep your bottom supported so you can get in and out without twisting. If the bottom cushion shifts, secure it with a light strap or the seat edge, then pull your shoulders back and sit straight.
- Padding and posture: place a lumbar roll or rolled towel at the curve of the spine; add a folded jacket behind the pelvis to distribute pressure; sit fully with hips and knees about 90 degrees and keep your chest open to avoid slouching. These adjustments help keep your spine aligned while sleeping or resting.
- Seat back and leg alignment: set the seat back to a gentle recline around 5-15 degrees; use a footrest if available; this keeps the hips stable and reduces pulling on the lower back when you sit or sleep. Then follow the sign for allowed adjustments and stay within those limits.
- Movement cadence: plan micro breaks every 30-45 minutes; walk the aisle, shrug your shoulders, rotate your torso, and perform ankle pumps to ease stiffness and keep circulation active through a full loop of movements.
- Disembark readiness: when it’s time to deplane, stand slowly, stretch the back and legs, and switch to a tall posture as you reach the aisle; partners can assist by hoisting their items safely and guiding you to the exit.
Extra tips for regular travelers: if your airport or airline offers rentals of ergonomic cushions, consider them; these can be a hero addition to your kit and make the whole flight feel more secure. For sleeping, align your spine with a rolled towel along the back and a small pillow behind the knees to relieve pressure; this helps you stay comfortable when the plane hits bumps or chimes. If you travel frequently, adopting this travel10x routine keeps you agile and reduces discomfort across long trips.
Headrest, Lumbar Curve, and Seat Recline Guidelines
Set the headrest so the back of your head rests on the cushion and your ears align with your shoulders, keeping the neck in a neutral position while you sit.
Use a simple lumbar support or cushion for maintaining the healthy natural curve at the base of your spine; position it to fill the gap behind your lower back and support the curve without pushing you forward.
Keep the seat recline within a comfortable range: start near 0-5 degrees when awake, tilt to 10-15 degrees for light rest, and move slowly toward 15-20 degrees only if you must sleep, ensuring you can still see where you are headed and avoid neck strain; use a gentle tilt in a direction that keeps your chest open.
Shift your posture every 15-20 minutes and, if possible, do this simultaneously with gentle torso adjustments: lean toward the front, then settle to the side on both sides to relieve pressure on the lower back while keeping your back muscles engaged, and let your shoulders settle down. Think of the load transfer as a simple transaction between your spine and the seat.
Keep in-seat adjustments within safe limits and coordinate with partners to share the load; ensure the headrest supports your neck while your lumbar area remains aligned with the base of the spine, keeping the overall posture healthy.
What to bring and place: a compact lumbar cushion, a small pillow, or folded blanket; bring your own support if the seat lacks it, place it against your back at the curve, and use the blanket to cover your thighs for extra warmth and flexibility.
For swollen feet or legs, keep blood flow moving by extending your legs gently, using a footrest or a bag; slow movements help veins and reduce discomfort, making frequent repositioning easier to maintain for multiple hours. If you’re trying to stay comfortable, more often small adjustments make a big difference.
Breathing Techniques and Micro-Movements to Prevent Stiffness
Start with a four-second inhale through the nose, a four-second hold, and a four-second exhale through the mouth, repeated for five cycles every hour to maintain full-body flow and reduce tightness.
When done, you should feel the hips and back looser and the shoulders more relaxed. Additional benefits come from pairing this breathing with micro-movements to ease common stiffness and prevent cramps in long flights.
In terms of practicality, apply these steps whether you sit still or shift positions. The most straightforward approach is to keep a steady rhythm and secure your base by sitting tall, with hips slightly above the knees and feet flat on the floor.
- Breathing basics: sit tall, place one hand on your abdomen and the other on your chest, and breathe through your nose for four seconds so both sides of the rib cage rise. This raises the chest gently and creates a smooth flow in the diaphragm while protecting the muscle groups along the spine.
- Exhale and release: exhale for four seconds, feeling the air flow out and the shoulders ease away from the ears. Keep hands relaxed and form supported by the chair, reducing the risk of cramping or tightening.
- Transaction of tension and ease: view each breath as a quick transaction between base tension and release. The four-second cycle becomes a reliable rhythm you can repeat without thinking about it.
- Return to base posture: after each cycle, return to a neutral position with your back aligned and hands resting on the thighs or armrests to maintain secure support.
- Notes on setting: for most settings, this routine takes five to seven minutes. It’s a common, easy practice that can be added to boarding or taxiing without delaying the transaction of traveling.
Micro-movements to complement breathing help maintain circulation and ease stiffness the sides of the body and the legs. These moves are simple, require no equipment, and can be done in seating or with a quick stand at a galley if permitted.
- Foot taps and ankle circles: keep knees soft, tap the toes and circle the ankles for 30–60 seconds to promote flow in the lower legs and reduce swelling. This supports lifting of the leg muscles and protects the joints from cramps.
- Seated hip tilts: gently tilt the pelvis forward and back for 5–8 repetitions to loosen the base of the spine and reduce lower-back tightness; hands can rest on the thighs for stability.
- Knee bends: unlock the knees and perform light bending and straightening for 8–12 reps. This motion keeps the quadriceps and hamstrings active and less prone to cramps when you remain seated for long periods.
- Torso crossovers: with a straight spine, cross the arms or place a hand on the opposite knee, twist slowly to the right for 4 cycles and to the left for 4 cycles. This crossing helps distribute tension across the full-body axis and supports spine mobility.
- Shoulder circles and neck looseners: lift the shoulders toward the ears, roll them back and down, then drop forward for 6–8 cycles; add gentle neck tilts to ease upper-back tightness.
- Side stretches and lifting: raise one arm overhead and lean to the opposite side for a controlled stretch, then switch sides. This improves rib cage expansion and comfort through the chest and sides, continuing the flow of air and blood.
Most travelers benefit from pairing these micro-movements with breathing, creating a steady routine that protects posture during taxi, takeoff, and cruise. The simple form keeps your hands free, reduces tightness, and secures your back and core without requiring extra space.
Shoulder Roll Sequence: 4 Moves to Relieve Neck and Upper Back Tension
Perform the four moves in sequence, 8–12 reps each, and repeat once if needed. Keep your back flat against the seat, feet flat on the floor, and relax the jaw to protect the lower back. Please breathe steadily as you move.
Details below help you adapt the routine on an airplane or during long bookings. Another quick tip: use the sides of the seat as a reference point to keep your shoulders centered, return to neutral between rounds, and keep a free, calm tempo to prevent strain.
| Move | Ako na to | Focus & Benefits | Tipy |
|---|---|---|---|
| Move 1 – Classic Shoulder Roll (4-part) | From a flat seat, sit tall. Inhale, lift shoulders toward ears, roll them back, down, and forward in a smooth circle. Return to start and repeat 8–12 times. | Loosens upper traps, reduces tightness at the base of the skull, supports better posture in the back and neck. | Keep neck relaxed; avoid clenching teeth. If you feel stiffness, pause briefly and slow the tempo. |
| Move 2 – Side-to-Back Circle | Lift shoulders slightly, then roll toward the sides, up, back, and down in a controlled arc. Switch directions after 8–12 reps. | Relieves tension along the sides of the neck and upper back; useful when you’re spending hours in a cramped seat. | Ribcage stays stable; only the shoulders move. Keep the breath calm and steady. |
| Move 3 – Chin-Tuck with Shoulder Squeeze | Tuck chin slightly while pinching the shoulder blades together as if you hold a pencil between them. Hold 2 seconds, release. Perform 8–12 reps. | Engages deep neck flexors, reduces forward head posture, frees upper cervical tension. | Dont overdo; stop if you feel any pinching sensation in the neck. |
| Move 4 – Forward-Backward Breath Roll | Roll shoulders forward on the exhale, then backward on the inhale. Complete 8–12 reps with smooth, coordinated breaths. | Releases anterior neck tightness and traps, improves circulation in the upper body. | Return to neutral between rounds; if needed, repeat once or twice more in a later break. |
If youre new to these moves, start with one round and observe how your back and neck respond. Learn which sequence feels best for your posture, then repeat again as needed. This promotes health on long trips where spending minutes in motion can make a significant difference. On an airplane, keep your feet flat on the floor and your lower back supported by the seat. Please return to the sequence after any pause, and use the details in your entry cards or health notes to track progress. Your earnings of comfort grow with consistent practice, and miles10 of smoother flights aren’t far away.
Hydration, Circulation, and Break Timing for Pain Reduction
Start with a simple rule: sip 200 ml of water every 30 minutes on the airplane after takeoff, aiming for 1.5–2 liters during a typical 6–8 hour flight and avoiding alcohol or heavy caffeine to keep hydration flowing.
Use pale urine as источник of hydration feedback; if color is darker, increase your intake and choose electrolyte-infused options to maintain fluid balance throughout the cabin.
To boost circulation, move every 60–90 minutes. While seated, perform ankle circles, toe taps, knee lifts, and thigh squeezes; when you stand, interlace your fingers behind your back to open the chest and keep the spine aligned; wear graduated compression socks to support legs during long stretches. This circulation routine is more effective than passive sitting.
Break timing matters: schedule breaks roughly every 60–90 minutes; set a reminder and use those minutes for a quick 2–3 minute routine: stand, walk a short arc in the aisle, and return to your seat with a tall, balanced posture, and remind yourself that breaks are part of the plan.
Posture and breathing: sit with your spine long, shoulders relaxed, and hips slightly forward; avoid slouching and let your front stay open to reduce tension along the spine. Simple forward folds or gentle twists can reset alignment without overdoing it.
Your travel partner can help: they can prompt you to stand, stretch, or adjust cushions; together you can create a rhythm that keeps blood flowing, which yields more comfort over the flight.
Data from travelers shows that a steady routine of hydration, movement, and posture yields rewards like reduced stiffness, better sleep, and a smoother ride; this approach offers more control over how you feel mid-flight.