


Plan your winter trip for mid-december and book lodging early near Jackson Hole to catch fresh snow and calmer trails. As a visitor, you might target a 3–5 day stay and lock in lodging with a warm lobby and a reliable menu for dinners. Lodging availability tends to thin after the holidays, and prices can rise on weekends. If you could choose a base with easy access to cross-country routes, you’ll save time and energy for days on snow.
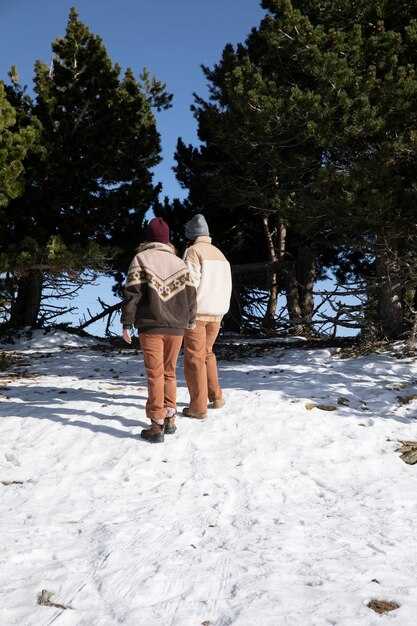
Snow cascades from rugged ranges, turning the Grand Teton’s jagged profiles into a cascade of white sculptures. Although winter can be cold, sunlight on clear days can stretch across the ranges for hours, making cross-country trails glow with frost and pine scent. The quiet can feel surreal, although the wind might bite your cheeks at midday. Solitude invites slower pace.
Wildlife remains active in winter; elk, moose, and coyotes linger in sheltered coves and meadows. Dawn and dusk hours offer the best opportunities, and a single sighting can energize your trip. Always stay at least 100 meters away from wildlife and listen for ranger guidance; the silence in snow is thick, but animals can be startled by noise.
Quiet trails invite snowshoeing and cross-country skiing; in mid-winter, several trail systems are available, with groomed loops for all levels. Some park roads are closed to private vehicles, but guided snow-coach and shuttle services provide access to trailheads and viewpoints. If you want a simple plan, a half-day cross-country session can be followed by a warm drink and a stroll along a frozen lake, just enough to feel immersed without overdoing it.
Lodging options range from cozy lodges to small inns; prices for a midweek winter night often fall between $150 and $300, with weekends higher. The park’s lodging spots usually publish a seasonal menu with hearty meals–think bison chili or trout with potatoes. Availability depends on the month; months like January and February can offer the best bargains, but midweek stays are often easiest to book. If you heard that winter in the Tetons is all crowds, that’s not the case for a single, well-planned visit–quiet days are common and you can tailor a shorter trip to fit your schedule.
Pack warm layers and a windproof shell, because conditions can shift within hours. Most days provide a warm period around midday; bring sunglasses for glare on snow and pack extra batteries for cameras in the cold. Check current road status and park updates before you go, especially mid-December when some routes may close to vehicles. For a self-contained experience, combine scenic overlooks with short, natural strolls along frozen lakes to savor the season without overstretching days.
Winter Visits to Grand Teton National Park: A Practical Guide
Book ranger-led winter trips to Grand Teton for up-to-date trail status, avalanche forecasts, and practical safety tips. Sign boards at trailheads change with storms, so verify closures on arrival. Reserve lodging early in Wyoming, since popular options fill quickly during the cold season. Bring snacks and water for day trips, and keep extra in your vehicle if parking allows.
Using a layered system helps you adapt to shifting temperatures. Start with a moisture-wicking base, add an insulating layer, and top with a windproof shell. Pack a compact emergency blanket, spare gloves, and a headlamp in case you’re caught out after dark. For longer routes, carry a thermos with hot water or tea to stay alert and energized.
Plan around daylight hours: typical winter days offer only a few hours of solid light, and highs and lows can swing quickly. Times vary by month, so consider a shorter loop if you’re new to snow conditions, or join a guided option to make the most of the trails.
Trails feel more serene with fewer crowds, but popular viewpoints still draw people. Choose sunrise or late afternoon windows to see the mountains glow and spot wildlife along the rims; you’ll often have visible views across the inner valley.
Wildlife can be active in winter, but keep a generous distance and never approach. If you see bison, elk, or moose, let them move through their yards and avoid blocking their path. Stay on established routes to protect habitats and reduce avalanche risk in deeper snow.
Road access varies; some park roads close to wheeled traffic in winter. If you plan to drive, verify current conditions, signage, and any snowplow closures–otherwise use guided shuttles or snow coaches. Expect reduced services in lodging areas, and carry cash or credit for inside-park needs where accepted.
Emergency readiness matters: carry a first-aid kit, a charged phone, and a portable charger. If conditions worsen, stay put and call park rangers or return to shelter. Remember that minimum gear for backcountry trips includes beacon, shovel, and probe when venturing beyond groomed paths.
For lodging plans, coordinate with meals and snacks; some visitors opt for a hot meal at the lodge after a day on the snow. Always check weather, delta winds, and inner valley conditions to tailor your course for the next day. If you’re curious about secret viewpoints, ask a ranger Francisco for their best safe overlooks–always respect wildlife and park rules.
Winter Gear Checklist for Grand Teton: Layers, Boots, and Safety
Begin with a three-layer system: a moisture-wicking base, an insulating mid-layer, and a waterproof outer shell. This minimum setup keeps you warm and dry in any place around Grand Teton, where granite peaks rise and the winter ecology shifts quickly. Each layer plays a role: the base wicks moisture, the mid-layer adds warmth, and the shell protects against wind and snow. If conditions were harsher, you adjust by adding an extra inner layer and keeping movement steady as the sun climbs over the landschap.
Boots and traction matter as much as insulation. Choose insulated, waterproof boots with a sturdy lug sole; bring two pairs of socks (one liner, one thick wool) and swap as needed. Add gaiters for snow depth and snowshoeing terrain, and carry microspikes or crampons if you venture beyond maintained roads. Make sure your boots fit over thick socks and that you can lace tight for downhill control, because a stumble on icy roads can ruin a day trip. Practice snowshoeing skills on easy trails before your long ride.
Pack safety gear that operates reliably in winter light. Headlamp with extra batteries, a map and compass, a charged phone with offline maps, and a compact emergency blanket or bivy. Include a small first-aid kit and a fire starter; these items create options if weather shifts or you must shelter for a period. For winter travel, the Jackson Hole tram and other park services operate on limited schedules; you must also verify avalanche forecasts if venturing beyond roads, check available shelter options at visitor centers, and heated rooms if available, and be prepared to shorten your plan if conditions worsen.
Respect the ecology and stay connected with others on your trip. Stay on designated trails to protect inner soils and fragile flora, and watch for wildlife; give animals space and back away slowly if you encounter elk, moose, or bison. Winter driving on roads requires extra caution; check road status, carry traction devices, and plan contingencies for the shorter dagen and potential whiteouts. If you’re camping, ensure permits are secured and pack a lighter load to make each day easier and safer; otherwise a day trip from a nearby base is the better option.
Plan with care and set realistic expectations. For a major mountain area, have a fallback route and an escape plan; a little planning creates confidence and reduces risk. Expect the day to start cold, and expect wind shifts; you must adjust routes when you see fresh snow on stark granite faces. The south-facing slopes often thaw first, offering easier daylight progress, while the north sides can stay icy; use this to pace your trip and protect your gear, since the trip is as important as the destination.
Travelers from francisco often combine a winter Grand Teton visit with a short trip to Jackson or a stay in nearby rooms, then ride the tram or drive along the over roads to scenic overlooks. They learn to create a simple packing list that covers the inner layers, hydration, and safety gear–which makes every major hike in chilly graniet country more manageable and enjoyable for others.
Winter Wildlife Viewing: Where to Spot Animals and How to Observe Safely
Begin your winter wildlife outing with a ranger-led workshop and then head to Oxbow Bend at first light to watch moose against snow-dusted peaks. Pack a thermos, a camera with telephoto lens, and binoculars for daytime viewing.
Moose linger along Willow Flats on the Moose-Wilson Road and near the Jackson Lake area; elk gather in sheltered meadows around Antelope Flats and along the Snake River corridor; bighorn sheep cling to crags above the valley; wolves, coyotes, and foxes move through packed snow along road edges, while eagles perch along open shorelines. Watch for fresh tracks or disturbed snow as signs of animal movement.
Observe safely by keeping a respectful distance, using binoculars or a long telephoto lens, and staying on designated pullouts, trails, or viewing platforms. Never feed wildlife or attempt to approach; back away slowly if an animal approaches, and follow ranger directions. For a deeper experience, join a workshop or guided walk offered by park staff or on-site partners. Guides knew from years of field notes that mornings and late afternoons offer the best activity in winter.
Dress in layers, carry hand warmers, traction devices, and a small first-aid kit. Winter daylight is shorter, so plan daytime outings when visibility is good and allow for sudden weather changes. If you plan to camp, use a four-season tent and follow Leave No Trace principles; winter backpacking demands months of preparation and careful route choice, with sites beneath the snow and potential avalanche considerations. You can also rent gear for snowshoes, microspikes, and winter clothing at nearby lodging properties or rental shops.
There are lodging options inside and near the park, making on-site stays convenient for travelers. Some properties offer a café on site, while others provide quick-service cafés in the area; check signs for current road status and closures. If you want to combine wildlife viewing with other winter activities, nearby ski lifts offer a quick escape to high viewpoints. Consider a single lift ride to gain a different perspective, or ask staff about accessible secret viewpoints that reveal huge panoramas of peaks and the valley below. If fishing adds to your plans, winter trips with local guides can center around frozen lakes with safe access and quiet scenery, complementing days spent watching moose and elk beneath the mountains.
Quiet Snow Trails: Best Snowshoeing and Cross-Country Routes
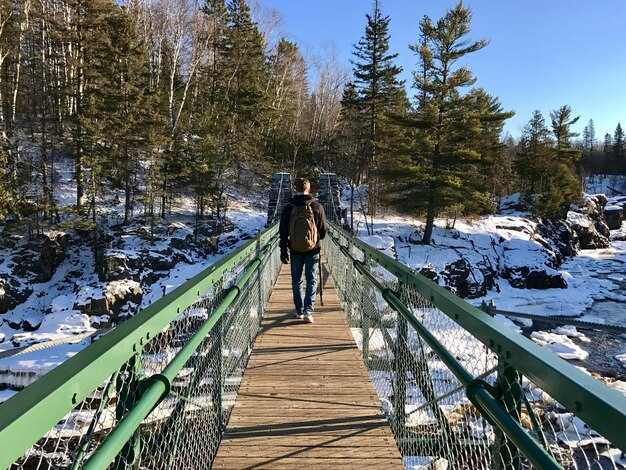
Start with Taggart Lake Trail for a quiet, scenic snowshoe or cross-country loop that stays peaceful well into mid-december and beyond.
- Taggart Lake Trail – about 3.5 miles round trip
A gentle climb through spruce and pine leads to a frozen lake with cathedral-range backdrops. The route stays mostly packed snow in typical winters, so traction devices help on slick sections. Park at the Taggart Lake Trailhead; allow 2–3 hours. Best dates: mid-December through March. Wildlife sightings–elk or foxes–feel intimate, not crowded, perfect for travelers seeking beauty in solitude. - String Lake Loop to Leigh Lake – 5–6 miles round trip
A largely flat to rolling traverse around String Lake, with optional spur toward Leigh Lake if conditions permit. Expect wind-sculpted drifts and occasional icy channels, creating a delta-like texture in the snow. This route balances quiet with scenic payoff, especially on weekday mornings. Best from December through March; 3–4 hours. Great for a snowshoe or cross-country combo, with chances to spot the occasional swimmer tracks in shore ice. - Lupine Meadows to Surprise Lake – about 4.5–6 miles round trip
Start near Moran Junction and climb into a sheltered pine grove toward a meadow basin and a panoramic winter view. Snow is typically well-packed, but gusting wind can pile powder along exposed ribs. Plan 3.5–5 hours; best in mid-December through March. Quiet sections can feel almost ceremonial as you pause for icicle sculptures and reflections on the glassy surface below. Cubs of wildlife tracks occasionally appear, reminding you to move softly. - Death Canyon Shelf – 6–8 miles round trip
A challenging option for experienced skiers and snowshoers. Elevation gains and exposed ridge sections demand careful navigation and avalanche awareness. Use a beacon, probe, and shovel if you venture beyond the saddle. Expect deeper powder after storms; daylight fades quickly, so start early. Best window: December through March; 4–6 hours, depending on conditions. This route delivers sweeping valley views and a sense of remote stillness that few places match. - Granite Canyon Loop – 3.5–4.5 miles round trip
Quiet access from Granite Canyon Trailhead into sunlit bowls and forest pockets. Snow remains relatively even here, with fewer crowds than along river corridors. Pack is usually packed snow, but crusts form after sunny days. January–March offers the best conditions; 2–3 hours. A dependable option when other parts of the park feel crowded.
Three core strategies help you stay comfortable and safe: pace yourself, map the day around mid-December to late March, and keep a low profile in wildlife zones. For a visual shift, look for pockets where wind has carved subtle sculpture-like ridges in the snow and where a lone pine or aspen stands like a quiet sentinel.
Practical planning notes for travelers from farther places, including Chicago: plan to fly into Jackson Hole and rent gear at a local store near the village; most shops offer snowshoes, microspikes, and cross-country skis. Check dates and conditions at the visitor center with the istИсточник; the National Park Service posts current snow conditions and road status. Early starts pay off–you’ll beat crowds and enjoy longer shadows on the mountain. Packed trails endure longer after a light snowfall, but always test the snow at the top of a rise before committing to a longer line. Greater solitude tends to appear on the lesser-known access points from Moran Junction, especially during mid-december and January, when the park staff often puts up quiet signs for backcountry users.
Safety note: carry avalanche gear if you head into Death Canyon Shelf or other backcountry corridors, and watch for signs of wildlife activity, including tracks that may imply wolves or bobcats nearby. Always dress in layers, stay hydrated, and respect closed areas to protect the delicate winter environment and the quiet, special beauty that makes these trails worth revisiting each season. источник: National Park Service
Winter Rock Climbing: Routes, Gear, and Training Tips for Cold Conditions
Start with a concrete plan: pick one protected southern area near the park, keep your window to 4–6 hours, and begin before sunrise to beat cold winds. there, you move efficiently by staging the day in two parts: approach and climb, then retreat if daylight or weather shifts.
Choose routes that hold solid ice or well-formed granite features in the morning shade, where there is less sun‑softened rock. Look for large blocks and clear shapes in the stone, as these offer predictable placements in cold conditions. If you see wildflowers or other summer indicators, remember that winter there would be quiet; focus on ice polish, rock texture, and anchor opportunities. October snow can still be patchy, so assess the area and decide whether a looped route stay within your limits or you should stay off exposed ridges.
Gear readiness dominates safety in cold weather. Pack lightweight, insulating layers, a wind shell, and waterproof outerwear, plus insulated gloves for belaying. Pack snacks and a water bottle with a thermostat or insulated sleeve to keep liquids from freezing. For the climb, bring crampons, two ice axes, a helmet, a dynamic rope, at least four locking carabiners, and several slings or cordelettes. Using a small personal first-aid kit and a quick-draw rack improves efficiency when the temps drop very low.
Training should blend endurance with technique. Prioritize finger strength, forearm conditioning, and gripped friction on small features. Develop a plan to train indoors in october or early november, then transfer to outdoor practice on dry runs with light ice. Practice self-arrest drills, rope management on looped descents, and efficient transitions from crampons to rock shoes on mixed terrain. Those drills build confidence for long, cold trips and help you move smoothly through the toughest sections.
Risk management requires a clear bail plan. Check weather windows for timing, and never push on exposed knife-edged ridges during storms. If conditions worsen, retreat to the main approach area or at the first sign of spindrift. When coming back from a climb, document what worked and what didn’t, then adjust your pack, route choice, and pacing for the next trip. This disciplined approach keeps you moving safely through hours of exposure and helps you stay motivated for the next great ascent.
| Route Type | Difficulty | Typische voorwaarden | Aanbevolen uitrusting | Geschatte tijd |
|---|---|---|---|---|
| Ice Line | Moderate | Cold, shaded mornings; ice polish present | Crampons, ice axes (2), helmet, rope, slings, ice screws | 2–4 hours |
| Mixed Granite Corner | Hard | Windy, crisp air; solid rock with ice pockets | Microcams, nuts, slings, rope, helmet, crampons | 3–5 uur |
| Snow Traverse | Easy–Moderate | Good visibility; packed snow; occasional ice | Ice axe, crampons, rope, slings, belay device | 1.5–3 hours |
Weather, Access, and Park Regulations: Planning for Closures and Shorter Days
Check the park’s road status today and build your trip around winter operations. Grand Teton operates with seasonal access rules, and front-country options are your best bet when backcountry routes close after storms; plan to arrive early and be ready to switch instead of risking a forced route. This approach has been better for staying on schedule, and you’ll still see spectacular scenery with less risk.
December storms bring heavy snow, gusty winds, and reduced daylight, so pack layers and a plan for shorter hikes. Avalanches can affect ranges and couloirs; avoid exposed slopes and keep a safe distance from animal tracks. If you backcountry, carry beacon, shovel, and probe, and check the avalanche forecast before any trip, while staying mindful of your schedule. five factors to consider are weather, access, daylight, wildlife, and road status today.
Driving can take longer than you expect when new snow piles up on the roads. The Jackson Hole Aerial Tram (tram) operates when visibility allows, and an expert guide named dornans leads guided trips for newcomers. If you prefer to stay closer to parking, use passes for the front-country trails and check current closures before arrival.
Winter regulations emphasize safety and resource protection. Backcountry travel requires proper permits and knowledge of hazards; dogs are restricted on most trails and campground use follows posted notices. Not all options are open in winter; read closures and advisories. Minimum stay requirements may exist for some sites, and advertising from partners should be treated as informational only. This part of winter experience depends on rangers and weather, and rangers knew closures could happen after storms. Also, plan for potential avalanche-related closures and have a backup plan.
To maximize your experience, plan for shorter days by starting early and bringing a headlamp. Pack a compact, weather-ready kit and a packed day bag with essentials; December arrival means less daylight and more time for indoor options if needed. theres a chance of closures after storms, so build a flexible itinerary with a mix of easier front-country walks and shorter trips; if a road closes, switch to a nearby trail or use a tram-assisted route and save the rest for another trip today.