


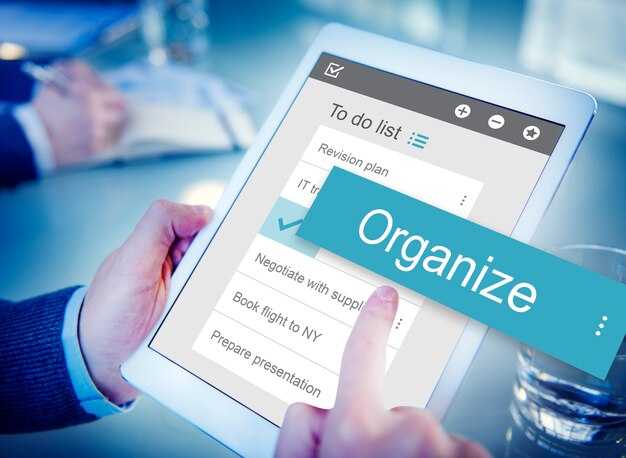
Start with a clearly labeled Open/Close button that stays in a fixed spot and is keyboard accessible. youre aiming for a control you can reach without scrolling, whether youre at a desk or on the move. have the label switch between Open Menu and Close Menu so youre never guessing the state, and keep the focus ring visible for keyboard users. the button should sit above the content, visible at all feet of the page, so users can grab it without hunting through lines of text. you have an option to position the control in a consistent x/y corner so it feels native across layouts.
Design for keyboard first: Enter または Space toggles the menu, Escape closes it, and Arrow keys move between items. Use aria-expanded そして aria-controls to expose state and relationships, but narrate the behavior so users understand what toggles what. If the menu opens, trap focus inside until they close it or move back to the trigger; this keeps navigation reliable on fields, vehicles, and other shared devices where input is noisy and theyre commonly used by many hands.
Responsive behavior matters: start mobile-first and adapt to larger viewports with a consistent pattern. For screens under 768px, consider a compact dropdown or off-canvas panel anchored to the button; above that width, switch to an inline list in the header. Keep lines of content readable, and place a small set of markers near the top so users know where they are in the collection. Think of the eastern markers at sunrise; the lines sit near the top, and the loft sits above the horizon, helping orientation, like a ridge where a hiker notes the peak.
Measurement and iteration: aim for a task success rate of at least 95% for opening the menu and reaching the main destination with keyboard or screen readers. Target initial load under 1.5 seconds on a mid-range device, with essential assets ready by 400 ms. Match WCAG AA on color contrast (text 4.5:1) and ensure focus indicators meet a 3:1 contrast against the background. Include a skip-to-content link at the top and a concise, logical collection of sections; review feedback every month and adjust accordingly. were you able to improve the workflow for hikers, commuters, and users with limited dexterity, or did you notice friction when youre navigating lines of items, especially on small screens? were you already tracking whether the option changes reduced friction for feet on the ground?
Keyboard-first open/close controls with visible focus indicators
Start with a native ボタン as the toggle and reflect state with aria-expanded そして aria-controls. Activate with Enter または Space to open, and use Escape to close. This approach satisfies keyboard users without relying on hover.
On open, move focus to the first interactive item inside the panel. If there isn’t one, return focus to the toggle so users can close it quickly with Escape.
Provide a clearly visible focus indicator for every focusable control. Favor the browser’s default focus ring or a high-contrast outline that remains visible against all backgrounds. Avoid removing focus cues on focusable elements; they must stay visible when navigated by keyboard.
Link the panel to its trigger with aria-controls and connect the label with aria-labelledby. When closed, apply aria-hidden to the panel so assistive tech can skip it; when opened, remove that attribute or set it to false. This keeps the reading order predictable and improves screen-reader feedback. If possible, announce state changes with a brief, non-intrusive update using aria-live.
Test with a keyboard-only flow: Tab to the toggle, press Enter または Space, then use Escape to close. Ensure the focus stays within the panel while open and returns to the toggle after closing. Check on mobile devices by resizing a viewport and ensuring the focus remains quick and logical to navigate.
Keep scripting lean to avoid delays; a snappy toggle reinforces trust. For high-contrast contexts, calibrate colors so the focus ring stays obvious. Add a brief transition so the panel’s appearance feels smooth but remains responsive for users who rely on the keyboard.
ARIA labels and live regions to announce toggle state
Start with a visible, keyboard-friendly toggle button that includes aria-label describing the action, and set aria-expanded to reflect the on/off state. Connect it with aria-controls to the menu region. Add a live region near the menu with aria-live=”polite” and aria-atomic=”true” and update its text to announce changes, for example “Main navigation opened” or “Main navigation closed.” times weve implemented this pattern on a travel-focused website, the feedback from users around Shenandoah and limberlost areas has been consistently clear: the state is obvious and avoids endless confusion. what they want is predictable behavior; this setup helps readers arriving at valleys or along roads understand whether the menu is available without having to infer from icons. note: test with real assistive tech and adjust wording to avoid unnecessary repetition.
To keep announcements natural, avoid duplicating content when the user tabs through items; the live region should update only on state changes, and not on every focus event. Never rely on color or motion to convey state; the live region provides accessible feedback. This is among the best for readability and speed, says experienced testers. If users navigate by keyboard, theyre sure of the state; if content were long, keep messages short. You can customize the message to include the menu name and context, like “Main navigation opened” for the main menu and “Alt menu opened” for the secondary area, so users can orient themselves without extra effort. Consider the needs of heavy pages with long lists; the text should arrive within a single breath and not cause fatigue for screen reader users. Others have found that including a short context helps, such as “fishermen around Shenandoah roads see the menu state.”
Implementation details
Set aria-controls on the toggle button to reference the region. The region should have role=”region” and aria-label describing the content, e.g., “Main navigation.” Add aria-live=”polite” and aria-atomic=”true” to the region. Update the live region text when the toggle changes: show “opened” or “closed” and optionally the name of the section. Use aria-expanded=”true”/”false” on the button to reflect state; you can also apply aria-pressed if the control acts as a toggle. Ensure the update happens synchronously with the click or key press and does not rely on CSS transitions to trigger the announcement. If you need to announce a sub-section, consider a second live region with aria-live=”polite” and a concise label. This pattern works across layouts and helps ensure that important signals reach users who rely on assistive tech. This approach is natural to adopt and scales well as your website grows.
Testing and validation
Test with keyboard navigation and screen readers such as VoiceOver and NVDA. Confirm the live region announces the exact state change and arrives quickly, even on long, heavy pages. Check on mobile devices to ensure touch toggles reliably trigger the state update. If wording is not precise, revise the text to use succinct phrases like “opened” and “closed” and avoid repetition. When you encounter edge cases, adjust as needed and document outcomes. the highest satisfaction comes from consistent, concise messages that arrive at the right moment, not from lengthy narration. others in the team notice that this approach reduces support requests and helps people move through content with confidence.
Responsive breakpoints for menu layout aligned with booking flows
Recommendation: implement a breakpoint at 768px to switch to an accessible off-canvas menu that mirrors the booking steps from search to confirmation.
This trad approach allows users to stay focused on the booking flow without unnecessary scrolling, and it remains permitted by accessibility guidelines when labels stay concise and actions stay visible.
- Define breakpoints and states: 0–767px mobile, 768–1023px tablet, 1024px+ desktop. On mobile, collapse to a vertical list with the front of the booking flow at the top; keep touch targets large and the length of labels tight for quick taps.
- Align ordering with booking steps: Search and regional filters precede site and camping options, followed by dates, guests, extras, and final review/book. On each breakpoint, ensure the user can reach the final action within three taps, going closer to completion with every step reached.
- Keep visual weight balanced: limit heavy icons on small screens; favor text labels and a thinner header to reduce cognitive load while preserving the sense of progress during the booking flow.
- Pattern: Off-canvas panel with a backdrop preserves a clean front area on mobile while serving the booking flow. This keeps the service accessible and avoids crowding the top bar.
- Pattern: Group by function and region: regional sites, popular destinations, and camping options (including sites near meadows and wilderness) to help users filter faster without leaving the flow.
- Pattern: Thematic cues that align with nature-focused trips (nature, warmer climates, falls, and nearby trails) to guide choices without overwhelming the user.
- Pattern: Label length control: cap primary actions at 2–3 words, ensuring buttons stay within a comfortable width so users don’t reach the edge of the screen.
実用的なヒント:ホークスビル地域のサイトと滝の近くでのキャンプを含む実際の予約シナリオでテストしてください。小さな画面ではコンパクトなカードレイアウトで表示され、より大きな画面ではグリッドに展開されるようにし、ユーザーが余分なステップなしでニーズに応じてサービスを受けられるようにします。各ブレイクポイント内で、検索から最終確認への移行が非常に予測可能で到達可能であることを保ち、ユーザーが自信を持って移動できるようにします。.
モバイルのタッチターゲット、タップエリア、ジェスチャーに関する考慮事項
タッチターゲットは、少なくとも48×48 CSSピクセルに設定し、8ピクセルのクリアランスを保ち、親指が伸ばさずに届くように配置してください。これは、多くのデバイスで最も信頼性の高い推奨ベースラインであり、忙しい時期でもしっかりと機能します。.
アイコンの周りのヒットエリアを少し大きくし、コントロールが丸みを帯びた形状を使用する際に画面の縁をカバーしてタップが確実に反応するようにします。ホテル、ロッジ、キャビンを表す地図のピンに対しては、より大きなヒットエリアを提供し、ピーク時の利用でもスムーズなインタラクションを維持します。ハイライトやサービス状態のサイズを調整するために、ヒートキューを使用します。.
ジェスチャー: ナビゲーションにはシンプルなタップと水平スワイプを好む; 小さなデバイスでのマルチフィンガージェスチャーは避ける; 明確な戻るコントロールと可視のフォーカス状態を提供する。ユーザーが1か月の旅行の後に到着した場合、タップ後に明確な確認を表示し、アクティベーションを示すためにローズフォーカスリングを表示する。.
レイアウトは限られたスクリーンの不動産の下で予測可能なまま維持されます:主要なコントロールを下部バンドに配置し、1行に5つのアクション以下を維持します。ホテル、ロッジ、キャビンセクション全体で一貫したヒットエリアを確保します。混雑していない時期には、誤タップを減らすためにターゲットを少し拡大し、ピークシーズンにはサイズを安定させて、ピクニックの計画やキャビンとロッジでのクイックチェック中のエラーを防ぎます。.
メニューの開閉時にフォーカスを管理してドリフトを防ぐ
メニューを開いたときにフォーカスを内部に固定し、最初の項目に留めます。フォーカスは最初のインタラクティブなアイテムに置かれ、背後のスペースには置かれません。トリガーのaria-expanded属性を更新し、目に見えるフォーカスリングを提供します。閉じる際には、フォーカスを開始するコントロールに戻し、予測可能な位置に到達します。広告に気を取られた場合は、フォーカスをそこに移動せず、メニューをアクティブな領域として保持します。先着のコントロールに対しては、毎回同じ流れを強制し、驚きを減らします。これを行うには規律が必要であり、ギミックではありません。経験豊富な開発者であれば、サイドメニューやオーバーレイ全体で機能するシンプルなフォーカストラップを実装できます。メニューがアクティブでない限り、フォーカスは迷ってはいけません。.
Practical steps
ベストプラクティスを探しているガイドは、ドリフトを早期に見つけることを学びます。ロービングタブインデックスを使用します:1つの要素のtabindexを「0」に設定し、他を「-1」に設定します。矢印キーでフォーカスを移動させ、Tab/Shift+Tabでメニュー内を循環させます。このアプローチは、エントリー、アイテム、およびアクションをユーザーが期待するタイトなスペースに保ちます。レイアウトには曲線やスカイランドのようなパネルが含まれることがありますが、フォーカスのアンカーはサイドメニュー内に留まり、さまよいません。今、フローを計画することで、ドリフトが発生しやすいマイルストーンを見つけるのに役立ち、その後ロジックをしっかり落ち着けることができます。テスト中に問題が見つかった場合は、それに応じて調整してください。.
オープン時に最初のエントリーに到達し、クローズ時にトリガーに戻ります。先着順のシナリオでは、最後のフォーカスターゲットを保存し、メニューが閉じた直後にそれを復元します。ユーザーがEscapeキーを押すと、メニューを閉じてフォーカスを戻します。忙しいページはフローを壊す可能性があるため、デバイス間でテストし、タブがラップし、フォーカス可能な要素がシフトする際にもトラップが正常に機能するかを確認してください。ペットのように、フォーカスは期待されるアイテムに留まるべきであり、そこに保ち、移動した場合は戻すように導いてください。計画はテストにおけるマイルポストを設定するのに役立ち、正しい習慣を教えていることがわかります。また、何かが気に障る場合は、経験豊富なチームメイトとインタラクションをレビューし、コントロールを引き締め、次回のドリフトを改善するところを学びましょう。.
Implementation notes
トリガーをaria-controlsを使ってパネルに接続し、aria-expandedで状態を反映させます。パネル内のすべてのインタラクティブなアイテムをフォーカス可能にし、メニューが閉じるまで外部コンテンツを無視します。フォーカストラップまたはローヴィングタブインデックス戦略を使用し、Escキーを押すことで閉じるようにします。パネルが閉じたら、起動したコントロールにフォーカスを戻し、ユーザーがページのなじみのあるポイントに到達できるようにします。.