


دو منصوبوں کے ساتھ شروع کریں۔: ایک مستقل منصوبہ جو اسباق اور لفٹوں کا احاطہ کرتا ہے، اور موسم کے لیے ایک متبادل منصوبہ۔ ایک منتخب کریں۔ ابتدائی-دوستانہ تفریحی مقام میں آسٹریا, ، فیملی لیسن بک کرو، اور حاصل کرو ایک قابلِ تنزیل آف لائن استعمال کے لیے ٹریل میپ۔ یہاں بچوں کے لیے دوستانہ آپشنز موجود ہیں جیسے سالباخ-ہنٹرگلم، زیل ایم سی، اور شلاڈمنگ-داخشٹائن، یہ تمام نرم سبزے اور آسان گونڈولا تک رسائی کے ساتھ ہیں، جو نئے آنے والوں کے لیے منتقلی کو آسان بناتے ہیں۔.
ہلکا پیک کرو، سمجھداری سے پیک کرو: بیس لیئرز یہ ہونے چاہئیں میری نو, درمیانی تہوں کو کمپیکٹ کریں، اور ایک شیل جو واٹر پروف ہو۔ استعمال کریں۔ bags جو سیٹ کے نیچے یا کیبن میں فٹ ہو جائیں اور اس سے بچیں۔ اوور پیکنگ بچوں کے لیے تین جوڑوں کے حساب سے کپڑے اور دو اضافی جرابوں تک محدود رکھیں۔ ایک چھوٹا فرسٹ ایڈ کٹ، ایک اضافی جوڑا دستانے اور سن اسکرین کی چھوٹی بوتل شامل کریں۔ یہ طریقہ کار سفری سامان کو مناسب رکھتا ہے اور رن کے درمیان تبدیلیوں کو تیز کرتا ہے۔.
خوف نہیں، سوالوں میں سوچولکھو: questions آپ کے جانے سے پہلے جن کے جوابات آپ چاہتے ہیں، جیسے کہ کیا؟ پہلے کس کا انتخاب کرنا ہے، جو کہ فیصلے وقت کے بارے میں یا ڈے کیئر کا کام بہترین ہے، اور کیسے اپنی رفتار رکھیں۔ سوچنا مصروف دنوں میں۔ سواری دوست پروگرام کے لیے کسی مقامی سکی سکول سے رابطہ کریں اور ان کے support سازوسامان کے سائز اور پک اپ کے اوقات کی تصدیق کے لئے لائن کریں۔ ایک سادہ سا قاعدہ ہے: تھکاوٹ سے بچنے کے لئے مختصر سیشن اور بار بار وقفوں سے شروعات کریں۔ وہاں سے، آپ ہر بچے کے لئے رفتار کو ایڈجسٹ کر سکتے ہیں۔ بہرحال، اسے سادہ رکھیں۔.
ماہرانہ مدد کے ساتھ سیکھنے کے جادو کو زندہ رکھیں۔: کتاب زندہ بچوں کے لیے ڈھلوان پر کوچنگ، اور ایک مستند انسٹرکٹر کو مشقیں کرانے دیں جو ان کی رفتار کے مطابق ہوں۔ صلاحیت. چھوٹے سکی بازوں کے لیے 45 منٹ کے مختصر سیشن بہترین ہوتے ہیں، اور مصروفیت برقرار رکھنے کے لیے آپ رنز کے درمیان ہلکے پھلکے گیمز پر بھی جا سکتے ہیں۔ اعتماد پیدا کرنے کے لیے آپ ایک چوڑی سبز جگہ سے آغاز کریں۔.
ڈھلوانوں سے پرے علاقے کو دریافت کریں۔: سیشنوں کے درمیان، قریبی قصبوں میں چہل قدمی کریں آسٹریا, ، چاکلیٹ گرم نمونہ، اور بچوں کو بچوں کے لیے موزوں جگہوں پر آرام کرنے دیں۔ کچھ لائیں۔ قابلِ تنزیل سرگرمی کی شیٹس اور ایک جامع خاندانی منصوبہ تاکہ آپ زندہ وقت کا خیال رکھتے ہوئے اس لمحے سے لطف اندوز ہوں۔ Explore مختصر راستے اور محفوظ کھیل کے میدان مہیا کرتا ہے جو ایک ہلکے پھلکے شیڈول میں فٹ ہو جاتے ہیں۔.
اسکی کے دن: گیئر فٹنگ کے لیے جلدی پہنچیں، ڈھلوان کا نقشہ چیک کریں، اور ایک قابل اعتماد انسٹرکٹر کے ساتھ ایک کشادہ سبز رنگ کی ڈھلوان سے شروعات کریں۔ منتقلی کو کم سے کم کرنے کے لیے قریبی کیفے یا پہاڑی جھونپڑی میں دوپہر کا کھانا کھائیں۔ ہائیڈریشن کی سطح برقرار رکھیں اور اسنیکس کے وقفوں کو قابل قیاس رکھیں، تاکہ بچے خوش رہیں۔.
عملی وسائل: استعمال کریں قابلِ تنزیل چیک لسٹ، ایک سادہ پلان ٹیمپلیٹ، اور عام غلطیوں سے بچنے کے لیے سوال و جواب کی شیٹ موجود ہے۔ اگر آپ کے پاس questions, ، ریزورٹ ڈیسک یا سکی اسکول سے رابطہ کریں؛ عملہ خاندانوں کا عادی ہے اور سائز، لفٹ پاس اور بچوں کے لیے موزوں راستوں میں مدد کر سکتا ہے۔ احتیاط سے منصوبہ بندی کرنے سے، آپ کی خاندانی چھٹی پرسکون، یادگار اور تفریحی رہتی ہے۔.
ایک عملی فیملی سکی گائیڈ: تجاویز، گیئر، اور پیکنگ کی ضروری اشیاء
ہر بچے کے لیے ایک کمپیکٹ اضافی لباس پیک کریں اور ڈھلوان کے لیے فوری رسائی والا بیگ؛ پیک شدہ ضروری اشیاء لفٹ پر غصے کو روکتی ہیں اور وقت بچاتی ہیں۔.
پائیدار، واٹر پروف جیکٹس اور پینٹس کا انتخاب اور ایک گرم مڈ لیئر آرام کو بڑھاتا ہے۔ خاندان کے دیگر افراد کے لیے، ایسے سائز کا گیئر منتخب کریں جس میں تھوڑی بڑھوتری کی گنجائش ہو۔ نوجوان سکیئرز کے لیے گیئر کو سنبھالنا آسان ہونا چاہیے۔ جلد کے ساتھ پتلی بیس لیئرز استعمال کریں اور مناسب طریقے سے فٹ ہونے والے ہیلمٹ اور سرد دنوں کے لیے ہاتھ گرم کرنے والے آلات سے سر کی حفاظت کو یقینی بنائیں۔.
بچوں کو تیزی سے ڈھلوانوں پر ڈھونڈنے میں مدد کے لیے نیلے یا سبز رنگ کی اشیاء شامل کریں، اور ہر بچے کو گرمائش اور آسانی سے نظر آنے کے لیے پوم پوم ٹوپی پہنائیں۔ مختلف بچے مختلف لباس پہنتے ہیں، اس لیے تبادلے سے بچنے کے لیے لباس کو رنگ یا نام سے لیبل کریں۔.
سامان کی جانچ پڑتال سے پہلے رات کو گمشدہ سامان کم ہوجاتا ہے۔ ایک سادہ پیکنگ لسٹ بنائیں اور بائیں طرف کے تھیلے میں اضافی جرابیں اور دستانے رکھیں۔ سب سے زیادہ استعمال ہونے والی اشیاء اسی جگہ پر رکھیں جہاں آپ چیئر لفٹ پر پہنچتے ہیں۔.
تین بچوں کے لیے، لیبل لگی جیبوں والا ایک چھوٹا، پائیدار بیگ آپ کو حرکت میں منظم رکھتا ہے اور لاج میں دوبارہ کپڑے پہننے کو آسان بناتا ہے۔ مصروف علاقوں میں ہمیشہ بچے کا ہاتھ پکڑیں۔.
آسٹریا کے سفروں میں ہلکے پھلکے اور ورسٹائل سیٹ اپ سے فائدہ ہوتا ہے: ایک چھوٹی ایمرجنسی ونڈ بریکر، ٹراؤزر کا ایک اضافی جوڑا، اور ایک پتلی مڈ لیئر پیک کریں جسے آپ ضرورت کے مطابق تہہ کر سکیں یا اتار سکیں۔ ظاہر ہے، روانہ ہونے سے پہلے پیش گوئی چیک کریں اور چلتے پھرتے تہوں کو ایڈجسٹ کریں۔.
خریداری کرتے وقت، ضروری لوازمات پر سودے تلاش کریں اور دیر رات کی دوڑ کے لیے ایک ہیڈ لیمپ رکھیں؛ کبھی کبھار ایک سادہ سا اضافی ہیٹ پیک سرد شاموں کے لیے بڑا فرق پیدا کر دیتا ہے۔.
ایک پُرسکون، دہرائی جانے والی روٹین بنائیں تاکہ دن آسانی سے گزرے، اور ہر گھر والا ایک ایسی رفتار برقرار رکھے جو گروپ کے مطابق ہو اور مصروف راستوں پر رش سے بچے۔.
بچوں کے لیے اسکی کے صحیح گیئر کا انتخاب کریں: فٹ ہونے والے بوٹ، بائنڈنگ اور ہیلمٹ
اس طرح کے بوٹ منتخب کریں جو ایڑی پر مضبوطی سے فٹ ہوں اور ٹخنوں کو محفوظ رکھیں، اور جرابیں بھی پہنی ہوئی ہوں۔ دھیان رہے کہ نشوونما تیزی سے ہوتی ہے، اس لیے ایک معیاری بوٹ منتخب کریں جو انگلیوں کے لیے تھوڑی گنجائش فراہم کرے لیکن ایڑی کو مضبوطی سے پکڑے رکھے، جو ڈھلوانوں کے لیے تیار ہو۔.
کھڑے ہو کر، جھک کر اور اپنے بچے کے موزے پہن کر چیک کریں کہ جوتا ٹھیک ہے۔ بچہ انگلیوں کو ہلکا سا ہلا سکے لیکن چلتے وقت ایڑی سے باہر نہ نکلے۔ گھٹنے کو موڑتے ہوئے بھی چیک کریں؛ جوتے کے اوپر انگلی رکھ کر اس بات کی تصدیق کریں کہ کہیں کہیں ہلکا دباؤ ہے اور کسی قسم کی تکلیف کو نوٹ کریں۔ چھوٹے بچوں کے لیے، ایسے سالوپیٹس (Salopettes) پر غور کریں جو آرام سے فٹ ہو جائیں اور دن کے وقت حرکت کرنے کی جگہ چھوڑ دیں؛ آپ کو ایسے آپشنز درکار ہوں گے جو بغیر چبھن کے ان تہوں میں فٹ ہو جائیں۔ آپ کا مقصد ایک محفوظ گرفت ہے جو حرکت کو محدود کیے بغیر کنٹرول کو سپورٹ کرے۔.
بائنڈنگز: بچوں کے لیے ڈیزائن کردہ ایڈجسٹ ایبل بائنڈنگز کا انتخاب کریں، جن کی ڈی آئی این رینج وزن اور قد کے مطابق ہو۔ کسی پیشہ ور سے انہیں لگوائیں اور تصدیق کریں کہ بوٹ سول کی لمبائی بائنڈنگ کے آئی ایس او سٹینڈرڈ سے ملتی ہے۔ یہ سیٹ اپ آپ کے بچے کی نشوونما کے ساتھ اور جب آپ بوٹ تبدیل کرتے ہیں تو فوری ایڈجسٹمنٹ کی اجازت دیتا ہے۔ فٹنگ کے دوران، تصدیق کریں کہ بوٹ بغیر کسی خلا کے بائنڈنگ میں گہرائی تک بیٹھا ہے اور گھماؤ کے ساتھ جانچ کرنے پر ریلیز ہموار محسوس ہوتی ہے۔.
Helmet: select a helmet that fits level on the head, with straps that sit snug under the chin. Measure head circumference and fit with padding; the helmet should sit about 2-3 cm above the eyebrows and not press on the neck. Test wearing it during small head movements to ensure it stays put when gliding. If the helmet is loose, adjust the harness and padding and ensure the chin strap sits onto the chin. It passes safety checks when the fit feels secure.
Options include a range of sizes and fits. In english stores you can compare models; those staff can help you find the best match. For fun, some kids like themed designs with Miko or Elodie prints, which helps them stay ready and engaged. If you shop in ohio, compare sizes across stores; those smaller sizes are often in high demand, so try them on early. Getting the right fit reduces spots of discomfort and makes wearing gear more pleasant. Thanks to a proper setup, your child will spend more time getting ready, on passes to the lift, and less time adjusting. You can also pack a light snack like cereal during long days. If you’ll be traveling, a pool break after skiing can be a nice little swim, giving them something to look forward. For further tips, check each store’s return policy and consider options to increase the room for growth without compromising support; rarely is a larger boot comfortable mid-season, so choose the size that’s right now and plan for the next season.
| گیئر | Key fit checks | Quick tips | Growth notes |
|---|---|---|---|
| بوٹ | Heel lock, ankle support; stand, flex, wear socks, test space | Forefoot space about 1 cm; ensure no spots of pinching; feel secure when walking | Smaller sizes can be used for younger kids; plan for growth with one season of room |
| Bindings | Boot sole length matches binding ISO range; DIN adjusted by weight/height | Have a technician mount; test release with gentle twist; ensure bindings pass inspection | Adjust as they grow; check bolt tightness and ski compatibility |
| Helmets | Correct size; strap under chin; sits level; 2-3 cm above eyebrows | Test head movements in a mirrored setting; strap snug onto the chin | Replace after growth spurts; check CE rating and padding wear |
Layering strategy for variable mountain weather: base, mid, outer layers
In the mountains, start every day with a base layer that wicks moisture and stays warm when damp. Opt for merino wool or a high-quality synthetic; never cotton next to skin. A breathable, snug fit with a zip neck lets you vent, and you can reach for it anytime to keep dry as temperatures swing between sun breaks and shade. This three-layer approach is the answer to variable conditions you’ll face on those alpine days.
Mid layer warmth is the flexible defense. Choose a fleece or light down sweater with a front zip for easy venting and folded cuffs to seal in heat. When wind picks up, grab the warmer piece and wear it over the base; when the sun returns, shed it without losing core warmth. A mid layer that packs down well lets you adapt quickly without adding bulk, and it often feels like a sweet layer that turns snow into sugar on the skis.
Outer protection shields rain, wind, and wild gusts. Pick a waterproof-breathable jacket with taped seams, a reliable front zipper, and a hood you can tuck away when not needed. For the lower body, salopettes or ski pants with gaiters provide reliable coverage. If you’re skiing with a baby, a one-piece suit or compact salopettes combo helps keep front and back protected. The outer layer should stay breathable so you stay comfortable even during longer runs. The best setup makes rain feel manageable rather than ruinous.
Adjusting for plans and conditions is straightforward. On rain-ready or stormy days, keep the outer layer ready and add the mid layer as needed; on calmer, adventurous days, you can start lighter and stay warm by layering as you go. The key is to keep the base dry and the outer shell accessible so you never end up soaked while still moving. Once you get the rhythm, you’ll see how a simple, practical system wins against chilly gusts and gear tangles. Weve learned from many trips that this flexible approach keeps kids and adults comfortable on longer park sessions and family rides alike.
Practical tips to apply on the hill
- Pack a compact extra base layer folded into a small snack bag for quick swaps during shorter breaks.
- Keep a pompom hat and a thin pair of mittens in the front pocket, so you can grab them without digging through gear.
- Use salopettes with waterproof knees and adjustable straps to fit growing kids, including baby stages, without constant readjustment.
- Check the forecast every morning, but be prepared to adapt as clouds roll in or sunshine turns to rain; plans may change, but your warmth stays steady.
Checklist quick reference
- Base: merino or synthetic, breathable, no cotton; check that it stays dry
- Mid: fleece or light down, front zip, folded cuffs for heat control
- Outer: waterproof-breathable jacket with taped seams; front zip; hood; salopettes or insulated pants
- Kid gear: salopettes for those who stay active; baby-friendly one-piece when needed
- Extras: spare base layer, snack, pompom hat, grab-and-go gloves, front-pocket storage
Whether you ski for a wild day or a calm park session, this layered approach stays adaptable, minimizes bulk, and keeps the focus on fun and safety. Shorter breaks become opportunities to adjust, not excuses to quit early, and you’ll stay ready for whatever the mountains throw at you–rain, wind, or sun–every time you head out.
Ski school and safety plan: booking, transfers, and progression goals
Book ski school for your kids at least two weeks ahead and secure transfers that arrive 20–30 minutes before the first lesson. This keeps the day predictable and reduces stress; it’s true and plus, a simple rule that pays off. Choose a layout that fits your family: group lessons suit beginners, while private sessions speed up progress. Typical durations are 60 minutes for groups and 30–60 minutes for private sessions, with a short pre‑lesson exercise in the lodge to wake up bodies.
When booking, select a program with a clear progression plan and a direct contact. The booking page should show the coach’s name, lesson level, and how progress gets tracked; contains a concise checklist and a quick after‑lesson recap. If an affiliate option exists, weigh the value it adds but keep pricing transparent. Ask for a single point of contact to avoid missing updates, and use one link for times, locations, and gear to keep everyone aligned.
Transfers matter as much as the lessons themselves. Pick a transfer that lines up with the lesson start, and confirm the drop‑off point at the meeting area or opt for a door‑to‑door option if you’re short on time. Seek the quietest departure windows to minimize queues, and request assistance with loading and unloading equipment. If a snack break helps, schedule it so nothing gets missed and the ride stays calm for the whole crew.
Progression goals give small wins a real target. Milestone one: control on easy terrain, steady stopping, and confident edging. Milestone two: linked turns on gentle blue runs with consistent speed. Milestone three: independent slides on steeper blue slopes, maintaining balance and awareness of others. The coach should note progress weekly and tailor exercises accordingly; your child is perfectly capable when the plan is clear and paced. Keep comfort and safety central, aiming for perfection without rushing any step, and celebrate each improvement with a quick thumbs‑up or a small reward.
Safety plan keeps momentum steady. Ensure helmets are mandatory for kids, bindings are checked by a qualified tech, and gear fits well. Do a quick on‑snow warm‑up targeting ankles and knees, then apply sunscreen and lip balm to combat sun and wind. Carry a compact first‑aid kit and a simple thinking routine: stop, assess, and proceed only when ready. Staff should tend to the equipment and meeting points, offering clear directions and a calm, supportive tone. The full plan can be shared via a concise link or one short document, with massifs and cimes noted as landmarks to help you orient quickly–confidence grows when the route is well defined, and the experience stays focused on fun, not stress.
What to pack for every day: a kid-focused packing checklist
Pack a simple, planned, kid-focused day bag with a full list of essentials for every day.
Clothes go in folded layers: two jumpers, a warmer mid-layer, a waterproof shell, extra socks, a hat, and gloves. Label outfits by day to save time and reduce frantic morning searches; this detailed system keeps dressing quick and smooth.
Pocket staples include sunscreen, lip balm, a small mirror, a compact snack, and a lightweight first-aid kit. A spare phone battery fits in a pocket for emergencies; realise nothing is forgotten.
Tech and safety gear: helmet with straps, goggles, UV sunglasses for glare, a neck warmer, and a light towel. Keep these near the top so you grab them before a gondola ride.
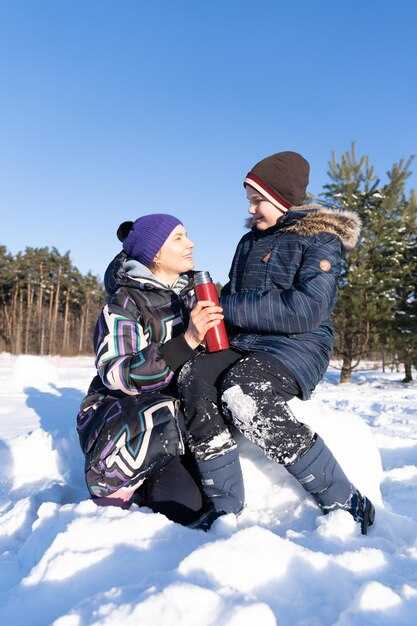
Food and drink: a liter of water per kid, lots of snacks, fruit, and a compact cooking mug for hot drinks at breaks.
Daily plan: choose a destination, and map a minute-by-minute routine. A keen parent keeps the pace gentle and practical; this detailed approach helps everyone stay safe and happy.
Austria resorts tip: pack a separate folded extra layer for the gondola, check straps and buckles, and have a spare pair of gloves ready.
Escape the frantic rush by reviewing your full list each morning; it gives you confidence and more time to enjoy skiing, hikes, warmth, and family moments. Do a first check at the door to confirm every item is in place.
Plan meals and snacks to keep energy up: hydration and easy-to-pack foods
Pack a simple hydration-and-snack kit: 500 ml water bottle, 2 electrolyte tabs, 1 elasticated snack pouch with a 40-50 g snack mix, and 1 cheese stick per person. This keeps energy stable and fits into a pocket so your daughter can carry a portion if needed.
پانی کی کمی سے بچنے کا منصوبہ: چلتے پھرتے ہر 15-20 منٹ میں 200-250 ملی لیٹر گھونٹ بھریں۔ سرد موسم یا بلندی پر بوتل میں الیکٹرولائٹ پاؤڈر شامل کریں۔ پانی کی کمی کی جانچ کرنے کے لیے دوپہر کے وقت فوری معلومات کی جانچ کریں: ہلکا رنگ پانی کی مناسب مقدار کو ظاہر کرتا ہے؛ گہرا رنگ زیادہ سیال مادے کی ضرورت کو ظاہر کرتا ہے۔.
دن بھر میں، سرگرمی اور بھوک کی بنیاد پر اسنیکس کو ایڈجسٹ کریں۔ اسنیکس میں زیادہ لچک تھکاوٹ کو کم کرتی ہے اور مزاج کو بہتر کرتی ہے۔.
منصوبے کے مطابق راستے میں دلکش مقامات پر وقفے لیں؛ یہ لمحات نمکین اور پانی کے گھونٹ کے ساتھ دوبارہ توانائی حاصل کرنے کے لیے بہترین ہیں۔.
- چلتے پھرتے کھانے جو سفر کے لیے موزوں ہوں: ٹریل مکس (گری دار میوے، بیج، خشک میوہ، چند مارل گرے گرینولا بائٹس)، چیز اسٹکس، ہول گرین کریکر، سیب یا کیلے، دہی کی ٹیوبیں اور پروٹین کے لیے جرکی یا ٹوفو بائٹس۔ یہ آپشن پائیدار رہتے ہیں اور دوڑ کے درمیان فوری کھانے کے لیے تیار رہتے ہیں۔.
- حصص کے اہداف: بچوں کے لیے، فوری ناشتے میں 25-30 گرام کاربوہائیڈریٹس کے ساتھ جب ممکن ہو تو 6-12 گرام پروٹین۔ 4-6 گھنٹے کی اسکی سٹریچ کے لیے، 2-3 ناشتے (ہر ایک 150-250 کلو کیلوریز) اور ایک متوازن لنچ کی منصوبہ بندی کریں اگر کیفے کھلے ہوں۔.
- پیکیجنگ کے لیے تجاویز: پائیدار، لچکدار تھیلیاں استعمال کریں جو جیبوں میں سما جائیں؛ ایسی پیکیجنگ کا انتخاب کریں جو برف میں خشک رہے اور دستانے پہنے ہوئے آسانی سے کھولی جا سکے۔ خشک اسنیکس شام کے دوران گندگی کو کم کرتے ہیں اور اگلے رن کے لیے قطار میں لگانا آسان ہے۔.
الپے پر اپنی بیٹی کے ساتھ گزارنے کے دن کا منصوبہ: دیرپا توانائی والا ناشتہ (دلیہ، دودھ، پھل)؛ صبح کے وسط میں ہلکا ناشتہ؛ ایک فیملی فرینڈلی کیفے میں لنچ؛ واپسی سے پہلے سہ پہر کا ناشتہ؛ اور پروٹین سے بھرپور رات کا کھانا۔ اگر آپ ایک چھوٹا انسولیٹیڈ بیگ کرائے پر لیتے ہیں، تو آپ ڈیئری اشیاء کو ٹھنڈا رکھ سکتے ہیں اور پگھلنے سے بچا سکتے ہیں۔ یہ واحد توجہ کھانے کو سادہ رکھتی ہے اور رنز کے درمیان منتقلی کو تیز کرتی ہے، جس سے آپ کو ایک قابل اعتماد معمول ملتا ہے۔.
سامان اور خریداری کے لیے تجاویز: ڈیکاتھلون (Decathlon) پر پائیدار اور ماحول دوست متبادل تلاش کریں۔ اگر زیادہ گنجائش کی ضرورت ہو تو ہلکا پھلکا بوتل کیرئیر کرائے پر حاصل کریں۔ خریداری کرتے وقت، اضافی چینی اور نمک کو محدود کرنے کے لیے سبز نشانات اور غذائیت کے واضح حقائق تلاش کریں۔ ایک لچکدار منصوبہ کے ساتھ، آپ اپنی بیٹی سمیت خاندان کے مختلف افراد کے وزن اور مقدار کو کنٹرول کر سکتے ہیں۔ دن کے سفر کے بعد، اسنیک لائن اپ چیک کریں اور ضرورت کے مطابق دوبارہ پیک کریں تاکہ اگلے دن کے لیے تیار رہیں، اور فوری ایڈجسٹمنٹ کے لیے معلومات کو آسانی سے دستیاب رکھیں۔ یہ آپ کو صحیح راستے پر رہنے میں مدد کرتا ہے اور آپ جو ایندھن فراہم کرتے ہیں اس پر آپ کو کنٹرول دیتا ہے۔.