


Start with two plans: a fixed plan that covers lessons and lifts, and a backup plan for weather. Choose a başlanğıc-friendly resort in austria, book a family lesson, and get a downloadable trail map for offline use. There are kid-friendly options such as Saalbach-Hinterglemm, Zell am See, and Schladming-Dachstein, all with gentle greens and easy gondola access, which makes transitions smooth for newcomers.
Pack light, pack smart: base layers should be merino, mid-layers compact, and a shell that’s waterproof. Use bags that fit under the seat or in the cabin and avoid overpacking by limiting outfits to three sets per child plus two spare socks. Add a compact first-aid kit, a spare pair of gloves, and a small sunscreen bottle. This approach keeps luggage reasonable and speeds up transitions between runs.
Think in questions, not fears: write down suallar you want answered before you go, such as what to choose first, which qərarlar about timing or daycare work best, and how to pace your düşünmək on busy days. Contact a local ski school for a rider-friendly program and use their dəstək line to confirm equipment sizes and pickup times. theres a simple rule: start with short sessions and frequent breaks to avoid fatigue. from there, you can adjust pace for each child. anyway, keep it simple.
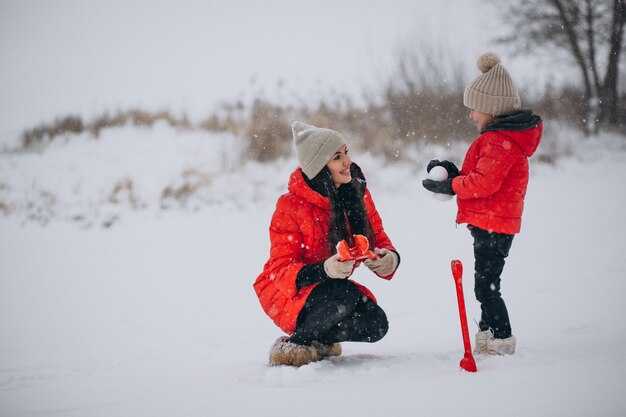
Keep the magic of learning alive with expert help: kitab live coaching on the slope for kids, and let a qualified instructor lead drills at a pace that matches their capacity. Short 45-minute sessions work best for younger skiers, and you can swap to gentle games between runs to maintain engagement. You start from a wide green to build confidence.
Explore the area beyond the slopes: between sessions, stroll through nearby towns in austria, sample hot chocolate, and let kids unwind in kid-friendly zones. Bring a few downloadable activity sheets and a concise family plan so you can live the moment without losing track of time. Explore offers short detours and safe playgrounds that fit into a light schedule.
On the day of skiing: arrive early for gear fitting, check the slope map, and start on a wide green with a trusted instructor. Have lunch in a nearby café or on-mountain hut to minimize transfers. Keep hydration up and snack intervals predictable, so kids stay cheerful throughout.
Practical resources: use a downloadable checklist, a simple plan template, and a Q&A sheet to avoid common mistakes. If you have suallar, reach out to the resort desk or ski school; staff are used to families and can help with sizes, lift passes, and kid-friendly routes. With careful planning, your family holiday stays calm, memorable, and fun.
One Practical Family Ski Guide: Tips, Gear, and Packing Essentials
Pack a compact spare outfit per child and a quick-access bag for the slope; packed essentials prevent tantrums on the lift and save time.
Choosing durable, waterproof jackets and trousers with a warm mid-layer keeps comfort high. For other family members, choose gear size with a little room to grow. For young skiers, gear should be easy to manage. Use thin base layers next to the skin, and ensure head protection with a properly fitted helmet and hand warmers for cold days.
Add blue or green accessories to help spot kids quickly on crowded slopes, and give each youngster a pompom hat for warmth and visibility. Different kids dress differently, so label outfits by color or name to avoid mix-ups.
Checking items the night before reduces missing gear. Make a simple packing list and place spare socks and gloves in a left-side pouch; keep the most-used items in the place you reach on the chairlift.
For three kids, a compact, durable bag with labeled pockets keeps you organized on the move and simplifies re-dressing at the lodge. Always hold a child’s hand in busy areas.
austria trips benefit from a light, versatile setup: pack a small emergency windbreaker, one extra pair of trousers, and a thin mid-layer you can layer or shed as needed. Obviously, check the forecast before you leave and adapt layers on the go.
When shopping, look for deals on essential accessories and keep a headlamp for late runs; sometimes a simple extra heat pack makes a big difference for chilly evenings.
Create a calm, repeatable routine so the day runs smoothly, with each family member holding a pace that fits the group and avoids crowding on busy runs.
Choose the right kids’ ski gear: boots, bindings, and helmets that fit
Get boots that fit the heel snugly and the ankle secure, with ski socks on. realise growth happens fast, so choose a standard boot that offers a bit of room for the toes but holds the heel firmly, ready for the slopes.
Check the fit by standing, bending, and wearing the socks your child will use. The child should be able to wiggle the toes slightly, but not slide out of the heel when walking. Also test while flexing at the knee; press a finger onto the top of the boot to confirm only light pressure in spots, and note any discomfort. For smaller kids, consider salopettes that fit comfortably and leave room for movement during the day; you’ll want options that fit those layers without pinching. Your aim is a secure catch that supports control without restricting movement.
Bindings: choose adjustable bindings designed for kids, with a DIN range that matches weight and height. Have a professional mount them and verify that boot sole length matches the binding’s ISO standard. This setup allows quick adjustments as your child grows and as you switch boots; during the fit, confirm that the boot sits deeply into the binding with no play and that the release feels smooth when tested with a twist.
Helmet: select a helmet that fits level on the head, with straps that sit snug under the chin. Measure head circumference and fit with padding; the helmet should sit about 2-3 cm above the eyebrows and not press on the neck. Test wearing it during small head movements to ensure it stays put when gliding. If the helmet is loose, adjust the harness and padding and ensure the chin strap sits onto the chin. It passes safety checks when the fit feels secure.
Options include a range of sizes and fits. In english stores you can compare models; those staff can help you find the best match. For fun, some kids like themed designs with Miko or Elodie prints, which helps them stay ready and engaged. If you shop in ohio, compare sizes across stores; those smaller sizes are often in high demand, so try them on early. Getting the right fit reduces spots of discomfort and makes wearing gear more pleasant. Thanks to a proper setup, your child will spend more time getting ready, on passes to the lift, and less time adjusting. You can also pack a light snack like cereal during long days. If you’ll be traveling, a pool break after skiing can be a nice little swim, giving them something to look forward. For further tips, check each store’s return policy and consider options to increase the room for growth without compromising support; rarely is a larger boot comfortable mid-season, so choose the size that’s right now and plan for the next season.
| Gear | Key fit checks | Qısa məsləhətlər | Growth notes |
|---|---|---|---|
| Çəkmələr | Heel lock, ankle support; stand, flex, wear socks, test space | Forefoot space about 1 cm; ensure no spots of pinching; feel secure when walking | Smaller sizes can be used for younger kids; plan for growth with one season of room |
| Bindings | Boot sole length matches binding ISO range; DIN adjusted by weight/height | Have a technician mount; test release with gentle twist; ensure bindings pass inspection | Adjust as they grow; check bolt tightness and ski compatibility |
| Helmets | Correct size; strap under chin; sits level; 2-3 cm above eyebrows | Test head movements in a mirrored setting; strap snug onto the chin | Replace after growth spurts; check CE rating and padding wear |
Layering strategy for variable mountain weather: base, mid, outer layers
In the mountains, start every day with a base layer that wicks moisture and stays warm when damp. Opt for merino wool or a high-quality synthetic; never cotton next to skin. A breathable, snug fit with a zip neck lets you vent, and you can reach for it anytime to keep dry as temperatures swing between sun breaks and shade. This three-layer approach is the answer to variable conditions you’ll face on those alpine days.
Mid layer warmth is the flexible defense. Choose a fleece or light down sweater with a front zip for easy venting and folded cuffs to seal in heat. When wind picks up, grab the warmer piece and wear it over the base; when the sun returns, shed it without losing core warmth. A mid layer that packs down well lets you adapt quickly without adding bulk, and it often feels like a sweet layer that turns snow into sugar on the skis.
Outer protection shields rain, wind, and wild gusts. Pick a waterproof-breathable jacket with taped seams, a reliable front zipper, and a hood you can tuck away when not needed. For the lower body, salopettes or ski pants with gaiters provide reliable coverage. If you’re skiing with a baby, a one-piece suit or compact salopettes combo helps keep front and back protected. The outer layer should stay breathable so you stay comfortable even during longer runs. The best setup makes rain feel manageable rather than ruinous.
Adjusting for plans and conditions is straightforward. On rain-ready or stormy days, keep the outer layer ready and add the mid layer as needed; on calmer, adventurous days, you can start lighter and stay warm by layering as you go. The key is to keep the base dry and the outer shell accessible so you never end up soaked while still moving. Once you get the rhythm, you’ll see how a simple, practical system wins against chilly gusts and gear tangles. Weve learned from many trips that this flexible approach keeps kids and adults comfortable on longer park sessions and family rides alike.
Practical tips to apply on the hill
- Pack a compact extra base layer folded into a small snack bag for quick swaps during shorter breaks.
- Keep a pompom hat and a thin pair of mittens in the front pocket, so you can grab them without digging through gear.
- Use salopettes with waterproof knees and adjustable straps to fit growing kids, including baby stages, without constant readjustment.
- Check the forecast every morning, but be prepared to adapt as clouds roll in or sunshine turns to rain; plans may change, but your warmth stays steady.
Checklist quick reference
- Base: merino or synthetic, breathable, no cotton; check that it stays dry
- Mid: fleece or light down, front zip, folded cuffs for heat control
- Outer: waterproof-breathable jacket with taped seams; front zip; hood; salopettes or insulated pants
- Kid gear: salopettes for those who stay active; baby-friendly one-piece when needed
- Extras: spare base layer, snack, pompom hat, grab-and-go gloves, front-pocket storage
Whether you ski for a wild day or a calm park session, this layered approach stays adaptable, minimizes bulk, and keeps the focus on fun and safety. Shorter breaks become opportunities to adjust, not excuses to quit early, and you’ll stay ready for whatever the mountains throw at you–rain, wind, or sun–every time you head out.
Ski school and safety plan: booking, transfers, and progression goals
Book ski school for your kids at least two weeks ahead and secure transfers that arrive 20–30 minutes before the first lesson. This keeps the day predictable and reduces stress; it’s true and plus, a simple rule that pays off. Choose a layout that fits your family: group lessons suit beginners, while private sessions speed up progress. Typical durations are 60 minutes for groups and 30–60 minutes for private sessions, with a short pre‑lesson exercise in the lodge to wake up bodies.
When booking, select a program with a clear progression plan and a direct contact. The booking page should show the coach’s name, lesson level, and how progress gets tracked; contains a concise checklist and a quick after‑lesson recap. If an affiliate option exists, weigh the value it adds but keep pricing transparent. Ask for a single point of contact to avoid missing updates, and use one link for times, locations, and gear to keep everyone aligned.
Transfers matter as much as the lessons themselves. Pick a transfer that lines up with the lesson start, and confirm the drop‑off point at the meeting area or opt for a door‑to‑door option if you’re short on time. Seek the quietest departure windows to minimize queues, and request assistance with loading and unloading equipment. If a snack break helps, schedule it so nothing gets missed and the ride stays calm for the whole crew.
Progression goals give small wins a real target. Milestone one: control on easy terrain, steady stopping, and confident edging. Milestone two: linked turns on gentle blue runs with consistent speed. Milestone three: independent slides on steeper blue slopes, maintaining balance and awareness of others. The coach should note progress weekly and tailor exercises accordingly; your child is perfectly capable when the plan is clear and paced. Keep comfort and safety central, aiming for perfection without rushing any step, and celebrate each improvement with a quick thumbs‑up or a small reward.
Safety plan keeps momentum steady. Ensure helmets are mandatory for kids, bindings are checked by a qualified tech, and gear fits well. Do a quick on‑snow warm‑up targeting ankles and knees, then apply sunscreen and lip balm to combat sun and wind. Carry a compact first‑aid kit and a simple thinking routine: stop, assess, and proceed only when ready. Staff should tend to the equipment and meeting points, offering clear directions and a calm, supportive tone. The full plan can be shared via a concise link or one short document, with massifs and cimes noted as landmarks to help you orient quickly–confidence grows when the route is well defined, and the experience stays focused on fun, not stress.
What to pack for every day: a kid-focused packing checklist
Pack a simple, planned, kid-focused day bag with a full list of essentials for every day.
Clothes go in folded layers: two jumpers, a warmer mid-layer, a waterproof shell, extra socks, a hat, and gloves. Label outfits by day to save time and reduce frantic morning searches; this detailed system keeps dressing quick and smooth.
Pocket staples include sunscreen, lip balm, a small mirror, a compact snack, and a lightweight first-aid kit. A spare phone battery fits in a pocket for emergencies; realise nothing is forgotten.
Tech and safety gear: helmet with straps, goggles, UV sunglasses for glare, a neck warmer, and a light towel. Keep these near the top so you grab them before a gondola ride.
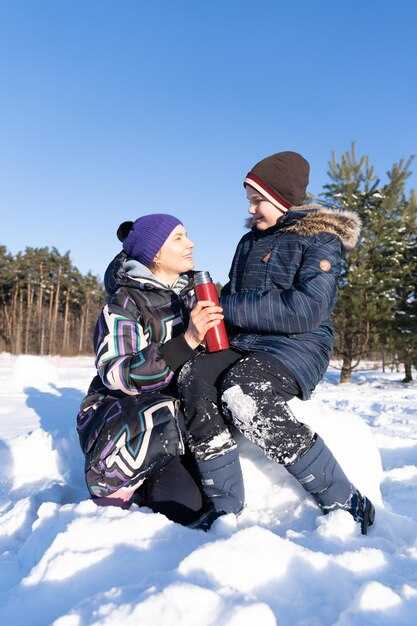
Food and drink: a liter of water per kid, lots of snacks, fruit, and a compact cooking mug for hot drinks at breaks.
Daily plan: choose a destination, and map a minute-by-minute routine. A keen parent keeps the pace gentle and practical; this detailed approach helps everyone stay safe and happy.
Austria resorts tip: pack a separate folded extra layer for the gondola, check straps and buckles, and have a spare pair of gloves ready.
Escape the frantic rush by reviewing your full list each morning; it gives you confidence and more time to enjoy skiing, hikes, warmth, and family moments. Do a first check at the door to confirm every item is in place.
Plan meals and snacks to keep energy up: hydration and easy-to-pack foods
Pack a simple hydration-and-snack kit: 500 ml water bottle, 2 electrolyte tabs, 1 elasticated snack pouch with a 40-50 g snack mix, and 1 cheese stick per person. This keeps energy stable and fits into a pocket so your daughter can carry a portion if needed.
Hydration plan: sip 200-250 ml every 15-20 minutes on the move. In cold weather or at altitude, add electrolyte powder to the bottle. Use a quick information check at mid-day to assess hydration: pale color means good hydration; darker indicates more fluids are needed.
Over the day, adjust snacks based on activity and appetite; more snack flexibility reduces fatigue and improves mood.
Plan breaks at attractions along the route; these moments are great to refuel with a snack and a sip of water.
- On-the-go foods that travel well: trail mix (nuts, seeds, dried fruit, a few Marl-gray granola bites), cheese sticks, whole-grain crackers, apples or bananas, yogurt tubes, and jerky or tofu bites for protein. These options stay durable and ready for fast bites between runs.
- Portion targets: for kids, 25-30 g carbohydrates per quick snack plus 6-12 g protein when possible. For a 4-6 hour ski stretch, plan 2-3 snacks (150-250 kcal each) and one balanced lunch if cafés are open.
- Packaging tips: use durable, elasticated pouches that fit into pockets; choose packaging that stays dry in snow and is easy to open with mittens. Dry snacks reduce mess during evenings and are easy to manage lined up for the next run.
Day plan for the alpe with your daughter: breakfast with long-lasting energy (oats, milk, fruit); mid-morning snack; lunch in a family-friendly cafe; afternoon snack before the return; and a protein-rich dinner. If you hire a small insulated bag, you can keep dairy items cool and prevent melting. This sole focus keeps meals simple and speeds transitions between runs, giving you a reliable routine.
Gear and shopping tips: check durable, eco-conscious options at Decathlon; hire a lightweight bottle carrier if you need more capacity. When shopping, look for green labels and clear nutrition facts to limit added sugar and salt. With a flexible plan, you can manage weight and portions for different family members, including your daughter. After day trips, check the snack lineup and re-pack as needed to stay ready for the next day, and keep information handy for quick adjustments. This really helps you stay on track and gives you control over the fuel you provide.