

 How to Make Fresh Rice Paper – A Step-by-Step DIY Guide">
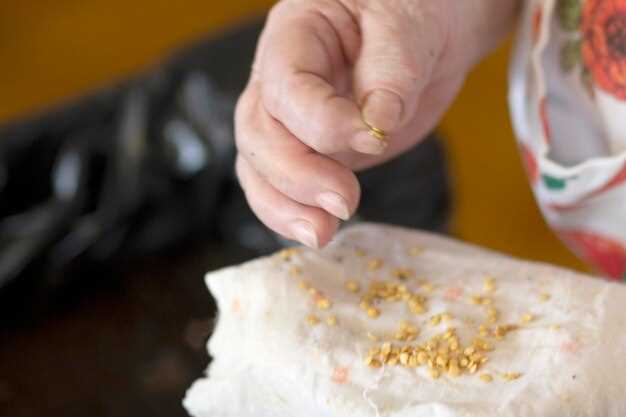
Begin with this concrete method: soak 1 cup white rice for 6-8 hours until soft, then blend with 2 cups water into a smooth slurry. Strain through a fine sieve to remove grit, keeping only the clear liquid. Stir in 1-2 tablespoons tapioca starch to help the sheet hold together, and season with a pinch of salt. The right consistency is thin enough to flow like milk but thick enough to coat a spoon; aim for a pour that forms a translucent film when steamed. The size of the final sheet should be palm-sized for easy handling.
Items you need are: simple and located at most Asian markets or online: rice slurry, tapioca starch, water, salt, a bamboo steamer or flat metal tray, parchment or silicone mat, a clean towel, and a fan to dry sheets. If you’ve ordered rice flour or gluten-free starch, you can substitute and still achieve flexibility. A well-lit east-facing corner creates a calm ambience for exploring together with your family. steven helps with washing and draining, keeping the workflow steady.
Set up a surface for steaming: lightly grease the parchment or use a silicone mat, then keep the steam at a steady simmer. Pour a thin layer of the batter into the centre and tilt the pan to spread into a circle about the size of your palm; this is the right technique. Steam for 2-3 minutes until the sheet turns translucent. Lift carefully onto a clean towel to dry, then place between parchment sheets for the next round. This process is exceedingly forgiving, and with practice you’ll speed up to several sheets in one session.
To use, place fillings on the edge and roll, sealing with a light press. The sheet will take a pale buttercup hue as it steams. If you want a little extra sheen, brush with a tiny amount of peanut oil after sealing. For a stronger wrapper, steam for an additional minute and cool. If something tears, patch with a small strip and steam briefly again. If you’ve seen wrappers like this along the riverside markets, you know the vibe can influence your own kitchen ambiance.
Store cooled sheets between parchment in a dry container and use within 4-7 days, or freeze for up to a month. Fresh rice papers pair beautifully with herbs, prawns, and tofu. Compare with shop-bought wrappers and you’ll notice a milder flavour and silkier texture. Many east-side kitchens cherish this method for family meals, highlights of hands-on cooking, and the way it invites exploration into DIY textures. If you wanted a lighter colour, you can reduce the tapioca slightly or dust with a touch of turmeric for a decorative tint.
Practical Rice Paper Making and Old Town Hoi An Trip Planning
Get yourself a wee rice paper making kit and have a go at your first roll in the hotel before you go gallivanting around the Old Town's lanes.
To make fresh rice paper in a small kitchen, mix 250 g rice flour, 70 g tapioca starch, 1/2 tsp salt, and 550 ml water until smooth. Strain to remove lumps, then ladle a thin layer onto a greased flat pan or silicone sheet. Steam for 60–90 seconds, peel, and lay on a rack to cool. Bend the edges slightly while moving to keep the sheet taut. Let each sheet dry in shade, handling with clean tongs to avoid fingerprints. For consistent results, practice on a single pan and adjust steam height so there are no bubbles; a small water bottle helps maintain moisture during the process.
As your trip unfolds in the Old Town, coordinate visits to must-see landmarks and quiet corners. phuong, a local artisan, offers a hands-on workshop schedule that fits a compact stay; booking with him lets you combine cultural insight with a practical skill. Scooter rides in the early morning deliver a sense of calm, and you can explore lanes without crowds. The neighbourhood market around the riverfront has a rose glow at dusk and hosts a favourite collection of textiles, snacks, and crafts. Reviews from travellers highlight that hands-on crafting deepens cultural understanding and adds a memorable touch to the stay.
Let's outline a practical plan that keeps you focused on both cooking and sightseeing:
- First, set up a morning workshop with Phuong. This session takes about 90 minutes and yields a stack of fresh sheets you can take home.
- Then visit landmarks like the Japanese Covered Bridge and Tan Ky House, followed by a quiet riverside café for a light lunch.
- In the afternoon, stroll the Old Town lantern street, pick up a rose-coloured lantern, and browse the shirts at a local shop for a small collection of souvenirs.
- An evening scooter ride around the moat and market lanes helps you feel the town’s charming vibe without the rush.
- For a next-day option, stay an extra night and explore a nearby craft village where you can observe rice-paper production and chat with makers; if you're considering a Mekong extension, plan it as a separate leg with comfortable transit and a restful stay.
Finally, a few quick tips: bring a lightweight bag for your finished sheets, stick to a favourite route to minimise fatigue, and pack breathable shirts for day trips. This approach suits travellers who want a tangible takeaway from their trip while enjoying cultural immersion and quiet moments in Old Town. I've enjoyed sharing these ideas, and your own exploration can be awesome with a thoughtful plan and careful pacing.
Gather Ingredients and Kitchen Tools for Fresh Rice Paper
Grab these staples today to start making fresh rice paper at home, choosing a location that keeps ingredients fresh and affordable.
- Rice flour: 150–170g (about 1 cup); look for a fine grind
- Tapioca starch: 40–60 g (1/4–1/3 cup); if you found Cham brand, that's fine
- Fine salt: 1/2 tsp
- Warm water: 320–380 ml (adjust to achieve a thin, pourable batter)
- Neutral oil: 1 tbsp (optional, helps sheets stay flexible)
Tools you need to assemble and cook efficiently
- Non-stick frying pan or crêpe pan, about 20–25 cm diameter
- Spatula or spreader to thin the batter evenly
- Whisk or fork for smooth mixing
- Mixing bowls and a measuring cup set
- Silicone mat or flat tray to cool finished sheets
- Bamboo steamer rack or a large pot if you choose steaming
- Muslin fabric or clean tea towels (fabric) to line and drain
- Cling film or a clean cloth to cover batter between batches
- Wooden paddle or ladle for even distribution
Tips to keep the process comfortable and reliable
- Whisk until completely smooth; if lumps persist, sieve, then re-whisk
- If you've bought ready-made rice paper before, this guide shows you how to make a better version, free from additives
- Adding a pinch of salt can balance flavours and help the batter hydrate completely
- Leave the batter to rest for 10–15 minutes to allow the starches to fully hydrate; read the labels if you're using packaged flours.
- Keep the kitchen lively and alive with good lighting and an organised setup.
- For travelling or visiting friends, spread sheets on a cooling rack and store flat in a breathable container
- If you found different options, experiment and compare with your final texture goal.
- This method provides awesome, flexible sheets with a smooth surface that looks glassy.
- Look for sheets that are free of heavy additives, and adjust cooking time for a matte or gloss finish
Destinations and final considerations
- Destinations: use with fresh fillings for Vietnamese-style rolls and spring wraps
- Options: try different thicknesses and wrappings to match your preferred texture
- Comfortable workspace: keep the area tidy to maintain a comfortable pace
Final checklist
- Ingredients measured and verified
- Tools clean and within reach
- Work surface comfortable and uncluttered.
- Completed sheets stored flat in a breathable container
Preparing the Batter: Rice Flour, Tapioca, Water Ratios, and Soaking
Use a reliable base: 100g rice flour, 20g tapioca starch, 280ml cold water, and a pinch of salt. Sift the dry ingredients, then whisk in water gradually until the batter is smooth and the consistency of thin crêpe batter. Let it rest for 15 minutes to hydrate the starch; this soaking reduces lumps and yields silkier sheets.
Adjust for climate and sheet thickness. In a city with high humidity, drop water to 260 ml and raise rice flour to 105 g; for ultra-thin sheets, increase water to 300 ml and reduce tapioca to 15 g. These tweaks create a range of textures – from delicate, floating sheets to more robust wrappers – and they work well with guided classes and market hall demos, plus home practice alike.
Mix again after the rest. If lumps persist, strain through a fine sieve. For extra smoothness, cover and let sit 5–10 minutes more. This buffer helps hydration continue, and you’ll notice a buttercup-yellow tint that signals even hydration and stability.
Cooking test: heat a non-stick pan over medium heat and dress the surface with a light oil. Pour about 60 ml (1/4 cup) batter, tilt to spread into a 20–25 cm circle, and let it set for 15–25 seconds. The edge should peel back and the centre stay pale; the sheet should float easily when you lift the pan. If it looks patchy or thick, adjust thickness for the next sheet and keep mobility high on the pan.
Storage and reuse: for a getaway or trips, refrigerate the batter for up to 24 hours; bring to room temperature, whisk, and use. This method has glory and a long tradition found in vendors and home kitchens across centuries. Thinner sheets yield translucent wrappers, and thicker ones suit rich fillings. There’s no guesswork with the base ratios, and you can tune them to suit these needs.
Kids and beginners: involve kids in measuring and whisking; tailor the thickness for their comfort, using a smaller cup to pace accuracy. If you join a workshop, buying a ticket gives guided feedback. These small steps open up a range of options–from stunning, delicate wrappers for sweet fillings to sturdy sheets for savoury buns–and they fit a night market vibe as well as a quiet kitchen at home.
Final tips: choose rice flour milled finely for a smooth batter; starch quality matters, so use pure tapioca starch. If you encounter lumps, a quick rest and a gentle whisk will usually fix them; if necessary, a quick pass through a sieve keeps the texture pristine. This approach balances lines of texture and helps you achieve consistent results across batches, so you offer perfect rice paper every time.
Steam and Peel: Layering, Steaming Time and Paper Separation
Begin with a clean steamer, line the rack with parchment paper, and keep a damp cloth nearby to maintain even moisture. Briefly soak rice paper in warm water, then lay a thin sheet on the parchment. For ultra-thin sheets, steam for 10–15 seconds; for thicker layers, 18–22 seconds. Open the lid slowly to prevent draughts from disturbing the sheet, and peel while warm for best separation.
Layer sheets like pancakes: edge to edge, offset by 1–2 cm to avoid air pockets. Place the first sheet on parchment, then add the next one with a 0.5–1 cm overlap. Lightly press with a silicone spatula to keep the stack flat. This approach suits lovers of craft and works well for operator setups that supply goods to markets; it also scales if you run a small kitchen today or on a cruise.
Peel while warm using a chamois cloth or a flat spatula. Lift a corner, slide under, and peel in a single smooth motion. If they cling, re-steam the top surface for 2–3 seconds and try again. Keep temperatures steady and avoid tearing by maintaining a thin, even moisture layer; place peeled sheets on a cooling rack to finish setting.
Uneven or missed steps show up as sticking or tearing. Ensure even steam distribution by preheating, avoid crowding the rack, and rest the stack briefly between batches. For a cafe operator who trains staff, a 6–8 sheet batch keeps quality consistent and saves time on a busy cruise day. If you need to adjust, simply reduce sheet count or shorten steam time by 2–3 seconds and test the edge.
For a today guide that doubles as an itineraries add-on, include this: start with 8–12 sheets per batch, yields a neat translucent stack, and keep cost low. Markets across the east province use this as a pleasant showcase; tourists and world travellers enjoy photo moments with the camera. Pair the session with a light drink, and you’ve given visitors something they miss when they leave. Itineraries that include hands-on learning simply travel well, and pancake-like layers demonstrate perfectly how layering works.
Drying, Storing and Shelf Life of Homemade Rice Paper
Dry each sheet until completely stiff and translucent, then cool before stacking. If any edge remains pliable, give it another 5–10 minutes and recheck for uniform dryness.
Choose a drying method: indoors on a screen with a light breeze, sun-dried on a clean surface, or a dehydrator set to 40–50°C (105–120°F). Indoors or in front of a fan, count on 40–60 minutes per side; direct sun reduces time to 20–40 minutes per side but watch for uneven spots. In a dehydrator, 60–90 minutes usually suffices until the sheet snaps when bent.
Allow to cool completely, then store with parchment paper between sheets to prevent sticking. Seal in an airtight container or a zip bag; add a desiccant if available and keep the container in a cool, dark place away from moisture. For easy tracking, print a date on the bag or label and rotate older sheets first.
Shelf life guidance: at room temperature in a dry pantry, expect 2–4 weeks of good quality. Refrigeration extends that to about 2–4 months, while freezing can preserve texture for 6–12 months with minimal flavour loss. When reusing, let sheets warm to room temperature and rehydrate only briefly if needed.
Signs of spoilage include mould growth, a musty or sour odour, sticky or gummy edges, and visible discolouration. If you spot dampness or spots after storage, re-dry the sheet before using.
What you get is consistency. Shopping for ingredients and doing this yourself after reading about authentic specialities from cambodia and thailand helps you build a calm ambiance in the kitchen. Hundreds of cooks stand by these steps to keep textures authentic, and crafts enthusiasts will read about tiny tips that make a big difference. If you want right, delicious lunch ideas, pair the sheets with seafood fillings and a bright dipping sauce. Print a date on each container and maintain a simple journey log, so you know when to re-dry if you spot spots of moisture. This approach keeps the flavour authentic and elevates your head space for cooking, even on boating weekends. You read, you plan, and you taste results that are as delicious as they are practical.
Buying a Ticket to Old Town Hoi An: Booking Tips and Local Advice
Book your Hoi An Ancient Town ticket in advance through a reputable local operator to guarantee entry, a handpicked itinerary, and a smoother day for your family or group.
Where to buy matters: use official counters near the Japanese Covered Bridge or trusted tour desks along the riverfront. Read reviews from fellow travellers and pick an operator that offers flexible options, such as adding kayaking trips or longer trips to Da Nang or the beach.
Prices typically range from £4 to £5 per person, valid for a single day. The hours usually run from 07:00 to 18:00, but verify on your ticket the exact window because some sites close earlier on certain days. This final detail matters for planning your day, so check the printed hours when you arrive.
The pass covers entry to a curated selection of sites within the Old Town, allowing you to explore culture without long queues. You can complement this with a traditional evening stroll through ornate streets, a stop at local clothes shops, and a quick rest in air-conditioned rooms after walking in the heat. Creating a balanced rhythm helps every family member stay full of energy for the next stop.
Booking tips: request a handpicked itinerary that includes a short riverside walk, a family‑friendly option, and a final stop at a local beach viewpoint. If you want more time, ask for a longer plan that includes trips to Da Nang port area or a nearby coastal break. A local member, tamy, can help tailor the day and handle transportation from the port or your hotel, making the experience smoother for you and your party.
What to bring and wear: light clothes, sun cream, comfortable shoes, and a small water bottle. Plan for short rest periods in shaded cafes between sites, and keep the day flexible so you can swap activities if the weather shifts. A clear plan and the right gear let you stay engaged without feeling rushed, turning the day into an unforgettable memory for your family.
Tip: if you're combining this with a Da Nang stay, arrange a morning start in Hoi An and finish with a beach visit or a short boat ride back to the port area. Several operators offer a seamless transfer, reducing wait times and letting you focus on enjoying every moment of the trip.
| Option | Price (£) | Valid Hours | Where to Buy | Нотатки |
|---|---|---|---|---|
| Old Town Day Pass | 120,000–150,000 | 07:00–18:00 | Official counters near bridge; trusted tour desks | Includes entry to a selection of sites; plan around opening hours |
| Combo: Pass + Kayaking | Varies | 07:00–18:00 | Local operator desks; Da Nang/Hoi An port area | Water activity adds variety; ensure safety gear |
| Private Day Trip | From 900,000 | Flexible | Tour operator or hotel concierge | Most customisable; family friendly; faster pacing |