

 How to Make Fresh Rice Paper – A Step-by-Step DIY Guide">
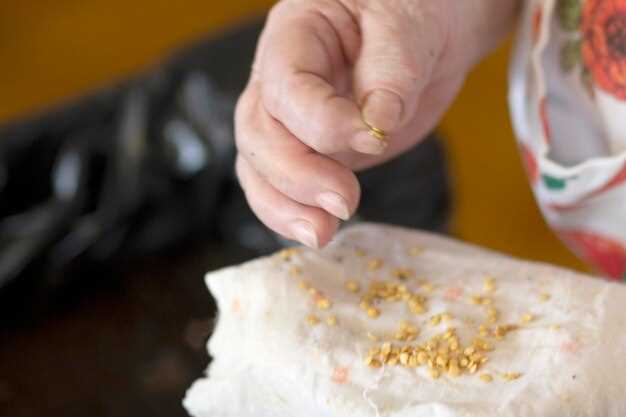
Başlamaq üçün bu konkret metodu tətbiq edin: 1 stəkan ağ düyünü 6-8 saat isladın, yumşalsın, sonra 2 stəkan su ilə qarışdırıb hamar bir məhlul hazırlayın. Xırda hissəcikləri təmizləmək üçün xırda bir ələkdən süzün, yalnız şəffaf mayeni saxlayın. Vərəqin bir arada qalmasına kömək etmək üçün 1-2 xörək qaşığı tapioka nişastası əlavə edin və bir çimdik duzla ədviləndirin. düzgün konsistensiya is Kifayət qədər nazik süd kimi axıcı, lakin qaşığı örtəcək qədər qatı olmalıdır; buxarlanarkən şəffaf bir film əmələ gətirən bir tökülməyə nail olun. Son təbəqənin ölçüsü asan idarə etmək üçün ovuc içi böyüklüyündə olmalıdır.
Sizə lazım olan əşyalar bunlardır sadə və əksər Asiya bazarlarında və ya onlayn tapıla bilər: düyü şirəsi, tapioka nişastası, su, duz, bambuk buxarlayıcısı və ya düz metal qab, perqament və ya silikon döşək, təmiz dəsmal və vərəqləri qurutmaq üçün ventilyator. Əgər düyü unu və ya qlütensiz nişasta sifariş etmisinizsə, əvəz edə bilərsiniz və yenə də elastikliyə nail ola bilərsiniz. Yaxşı işıqlandırılmış şərqə baxan künc ailənizlə birlikdə araşdırmaq üçün sakit bir mühit yaradır. Steven yuma və süzmə işlərində kömək edir, iş prosesini sabit saxlayır.
Buxarlama üçün səth hazırlayın: perqamenti yüngülcə yağlayın və ya silikon matdan istifadə edin, sonra buxarı sabit qaynatmada saxlayın. Xəmiri nazik bir təbəqə şəklində mərkəzə tökün və tavayı əlinizin içi böyüklüyündə bir dairə şəklində yaymaq üçün əyin; bu Düz. texnika. Vərəq şəffaf olana qədər 2-3 dəqiqə buxarlayın. Qurutmaq üçün ehtiyatla təmiz bir dəsmala qaldırın, sonra növbəti mərhələ üçün perqament vərəqləri arasına qoyun. Bu proses yüksək dərəcədə bağışlayan, və təcrübə ilə bir seansda bir neçə vərəqə qədər sürətlənəcəksiniz.
İstifadə etmək üçün içliyi kənarına yerləşdirin və bükün, yüngülcə sıxaraq bağlayın. Vərəq solğun rəng alacaq. qaymaqçiçəyi onu buxarlandıqca rəngini verir. Bir az da parlaqlıq istəyirsinizsə, üzərinə bir az fıstıq möhürlədikdən sonra yağlayın. Daha möhkəm bükmə üçün əlavə bir dəqiqə buxarlayın və soyudun. Əgər nəsə cırılsa, kiçik bir zolaqla yamayın və yenidən qısaca buxarlayın. Əgər çaykənarı bazarlarda bu cür bükmələri görmüsünüzsə, bilirsiniz ki, ab-hava öz mətbəx ab-havanıza təsir edə bilər.
Soyudulmuş vərəqləri quru qabda perqament arasında saxlayın və 4-7 gün ərzində istifadə edin və ya bir aya qədər dondurun. Təzə düyü kağızları göyərti, krevet və tofu ilə gözəl uyğunlaşır. Alınmış bükmələrlə müqayisə etsəniz, daha mülayim bir dad və ipək kimi tekstura görəcəksiniz. Bir çox şərq mətbəxləri bu üsulu ailə yeməkləri, praktik yemək vurğulanması və DIY teksturalarına araşdırma dəvəti üçün sevir. Daha açıq rəng istəsəniz, tapioka miqdarını bir az azalda və ya dekorativ bir rəng üçün bir az zerdeçal səpə bilərsiniz.
Düyü Kağızı İstehsalı Praktikası və Qədim Hoi An Səyahətinin Planlaşdırılması
Kompakt düyü kağızı hazırlama dəsti al və Qədim Şəhər döngələrinə səyahət etməzdən əvvəl ilk rulonu otelində məşq et.
Kiçik mətbəxdə təzə düyü kağızı hazırlamaq üçün 250 q düyü unu, 70 q tapioka nişastası, 1/2 ç.q. duz və 550 ml suyu hamar olana qədər qarışdırın. Kəsəkləri təmizləmək üçün süzün, sonra nazik bir təbəqəni yağlanmış düz tavaya və ya silikon vərəqə tökün. 60–90 saniyə buxarda bişirin, soyun və soyumaq üçün rəfə qoyun. Vərəqi dartmaq üçün hərəkət etdirərkən kənarlarını bir az əyin. Hər vərəqi kölgədə qurudun, barmaq izlərindən qaçmaq üçün təmiz maşa ilə işləyin. Davamlı nəticələr əldə etmək üçün tək bir tavada məşq edin və köpüklər olmaması üçün buxar hündürlüyünü tənzimləyin; kiçik su şüşəsi proses zamanı nəmliyi qorumağa kömək edir.
Səyahətiniz Köhnə Şəhərdə baş verərkən, mütləq görülməli yerləri və sakit guşələri ziyarət etməyi koordinasiya edin. Fərdi sənətkar olan phuong, qısa müddətli qalmağa uyğun əl işləri emalatxanası təklif edir; onunla əlaqə yaratmaq, mədəni anlayışı praktiki bacarıqla birləşdirməyə imkan verir. Səhər tezdən skuterlə gəzinti sakitlik hissi verir və insan izdihamı olmadan küçələri kəşf edə bilərsiniz. Çay sahilindəki məhəllə bazarında gün batarkən qızılgül parıltısı olur və ən sevilən toxuculuq, qəlyanaltı və sənətkarlıq məmulatları kolleksiyasına ev sahibliyi edir. Səyahətçilərin rəyləri göstərir ki, əl işləri mədəni anlayışı dərinləşdirir və qalmağa unudulmaz bir toxunuş əlavə edir.
Gəlin sizi həm yemək bişirmək, həm də görməli yerləri gəzməyə fokusda saxlayan praktik bir plan cızaq:
- Əvvəlcə, Phuong ilə səhər emalatxanası təyin edin. Bu sessiya təxminən 90 dəqiqə çəkir və evə apara biləcəyiniz bir dəstə təzə vərəq əldə edirsiniz.
- Sonra Yaponiyalı Üstüörtülü Körpü və Tan Ki Ev kimi görməli yerləri ziyarət edin, ardınca yüngül bir nahar üçün çay kənarı sakit bir kafeyə baş çəkin.
- Günortadan sonra Köhnə Şəhərin fənər küçəsində gəzişin, qızılgülü rəngli fənər götürün və xatirə toplamaq üçün yerli mağazada köynəklərə baxın.
- Xəndək və bazar zolaqları ətrafında axşam skuteri ilə gəzinti tələsmədən şəhərin cazibədar ab-havasını hiss etməyə kömək edir.
- Növbəti gün üçün seçim etmək istəyirsinizsə, daha bir gecə qalın və yaxınlıqdakı sənətkarlıq kəndini kəşf edin, orada düyü kağızı istehsalını müşahidə edə və istehsalçılarla söhbət edə bilərsiniz; əgər Mekonq uzantısını düşünürsünüzsə, bunu rahat tranzit və dincəlməklə ayrıca bir mərhələ kimi planlaşdırın.
Nəhayət, bir neçə tez məsləhət: bitmiş vərəqləriniz üçün yüngül bir çanta götürün, yorğunluğu minimuma endirmək üçün sevimli bir marşrut seçin və gündüz səfərləri üçün nəfəs ala bilən köynəklər yığın. Bu yanaşma mədəni təcrübədən və Köhnə Şəhərdəki sakit anlardan həzz alaraq səyahətlərindən əyani bir xatirə əldə etmək istəyən səyahətçilər üçün idealdır. Bu fikirləri bölüşməkdən məmnun oldum və düşünülmüş bir plan və diqqətli sürətlənmə ilə öz araşdırmanız möhtəşəm ola bilər.
Təzə Düyü Kağızı üçün Ərzaqları və Mətbəx Ləvazimatlarını toplayın
Təzə düyü kağızı hazırlamağa başlamaq üçün bu əsas məhsulları bu gün əldə edin, inqrediyentləri təzə və sərfəli saxlayan bir yer seçin.
- Düyü unu: 150–170 q (təxminən 1 stəkan); xırda üyüdülmüşünü axtarın
- Tapioka nişastası: 40–60 q (1/4–1/3 stəkan); əgər Cham markasını tapsanız, yaxşıdır
- Xırda duz: 1/2 ç.q.
- Ilıq su: 320–380 ml (nazik, tökülə bilən xəmir əldə etmək üçün tənzimləyin)
- Neytral yağ: 1 x.q. (istəyə bağlıdır, vərəqlərin elastik qalmasına kömək edir)
Effektiv şəkildə yığmaq və bişirmək üçün lazım olan alətlər
- Yapışmayan tava və ya krep tavası, təxminən 20–25 sm diametrli
- Spatula və ya yayqan batonu bərabər şəkildə naziltmək üçün
- Hamınız və ya çəngəl hamar qarışdırmaq üçün
- Qarışdırma qabları və ölçü stəkanı dəsti
- Silikon mat və ya hazır vərəqləri soyutmaq üçün düz qab
- Bambuk buxar qabı və ya buxarlamağı seçsəniz, böyük bir qazan.
- Müslin parça və ya təmiz dəsmallar (parça) süzmək və qurulamaq üçün
- Partiyalar arasında xəmiri örtmək üçün yapışqan film və ya təmiz parça
- Taxta kürək və ya bərabər paylama üçün çömçə
Prosesi rahat və etibarlı saxlamaq üçün məsləhətlər
- Tamamilə hamar olana qədər çalın; əgər topalar qalıbsa, süzün, sonra yenidən çalın.
- Əgər əvvəllər hazır düyü kağızı almısınızsa, bu təlimat daha yaxşı, əlavələrdən azad versiyanı necə hazırlamağı göstərir.
- Adding a pinch of salt can balance flavors and help the batter hydrate completely
- Let the batter rest 10–15 minutes to hydrate starches completely; read labels if you use packaged flours
- Keep the kitchen lively and alive with good lighting and an organized setup
- For travel or visiting friends, spread sheets on a cooling rack and store flat in a breathable container
- If you found different options, experiment and compare with your final texture goal
- This method provides awesome, flexible sheets with a smooth surface that looks glassy
- Look for sheets that are free of heavy additives, and adjust cooking time for a matte or glossy finish
Destinations and final considerations
- Destinations: use with fresh fillings for Vietnamese-style rolls and spring wraps
- Options: try different thicknesses and wrappings to match your preferred texture
- Comfortable workspace: keep the area tidy to maintain a comfortable pace
Final checklist
- Ingredients measured and verified
- Tools clean and within reach
- Work surface comfortable and uncluttered
- Completed sheets stored flat in a breathable container
Prepare the Batter: Rice Flour, Tapioca, Water Ratios, and Soaking
Use a reliable base: 100 g rice flour, 20 g tapioca starch, 280 ml cold water, and a pinch of salt. Sift the dry ingredients, then whisk in water gradually until the batter is smooth and the consistency of thin crepe batter. Let it rest for 15 minutes to hydrate the starch; this soaking reduces lumps and yields silkier sheets.
Adjust for climate and sheet thickness. In a city with high humidity, drop water to 260 ml and raise rice flour to 105 g; for ultra-thin sheets, increase water to 300 ml and reduce tapioca to 15 g. These tweaks create a range of textures–from delicate, floating sheets to more robust wrappers–and they work well with guided classes and market hall demos, plus home practice alike.
Mix again after the rest. If lumps persist, strain through a fine sieve. For extra smoothness, cover and let sit 5–10 minutes more. This buffer helps hydration continue, and you’ll notice a buttercup-yellow tint that signals even hydration and stability.
Cooking test: heat a nonstick pan over medium heat and dress the surface with a light oil. Pour about 60 ml (1/4 cup) batter, tilt to spread into a 20–25 cm circle, and let it set for 15–25 seconds. The edge should peel back and the center stay pale; the sheet should float easily when you lift the pan. If it looks patchy or thick, adjust thickness for the next sheet and keep mobility high on the pan.
Storage and reuse: for a get-away or trips, refrigerate the batter for up to 24 hours; bring to room temperature, whisk, and use. This method has glory and a long tradition found in vendors and home kitchens across centuries. Thinner sheets yield translucent wrappers, and thicker ones suit rich fillings. There’s no guesswork with the base ratios, and you can tune them to suit these needs.
Kids and beginners: involve kids in measuring and whisking; tailor the thickness for their comfort, using a smaller cup to pace accuracy. If you join a workshop, buying a ticket gives guided feedback. These small steps open up a range of options–from stunning, delicate wrappers for sweet fillings to sturdy sheets for savory buns–and they fit a night market vibe as well as a quiet kitchen at home.
Final tips: choose rice flour milled finely for a smooth batter; starch quality matters, so use pure tapioca starch. If you encounter lumps, a quick rest and a gentle whisk will usually fix them; if necessary, a quick pass through a sieve keeps the texture pristine. This approach balances lines of texture and helps you achieve consistent results across batches, so you offer perfect rice paper every time.
Steam and Peel: Layering, Steaming Time, and Paper Separation
Begin with a clean steamer, line the rack with parchment, and keep a damp cloth nearby to maintain even moisture. Soak rice paper briefly in warm water, then lay a thin sheet on the parchment. For ultra-thin sheets, steam 10–15 seconds; for thicker layers, 18–22 seconds. Open the lid slowly to prevent drafts from disturbing the sheet, and peel while warm for best separation.
Layer sheets like pancakes: edge to edge, offset by 1–2 cm to avoid air pockets. Place the first sheet on parchment, then add the next one with a 0.5–1 cm overlap. Lightly press with a silicone spatula to keep the stack flat. This approach suits lovers of craft and works well for operator setups that supply goods to markets; it also scales if you run a small kitchen today or on a cruise.
Peel while warm using a cham cloth or a flat spatula. Lift a corner, slide under, and peel in a single smooth motion. If they cling, re-steam the top surface for 2–3 seconds and try again. Keep temperatures steady and avoid tearing by maintaining a thin, even moisture layer; place peeled sheets on a cooling rack to finish setting.
Missed or uneven steps show up as sticking or tearing. Ensure even steam distribution by preheating, avoid crowding the rack, and rest the stack briefly between batches. For a cafe operator who trains staff, a 6–8 sheet batch keeps quality consistent and saves time on a busy cruise day. If you need to adjust, simply reduce sheet count or shorten steam time by 2–3 seconds and test the edge.
For a today guide that doubles as an itineraries add-on, include this: start with 8–12 sheets per batch, yields a neat translucent stack, and keep cost low. Markets across the east province use this as a pleasant showcase; tourists and world travelers enjoy photo moments with the camera. Pair the session with a light drink, and you’ve given visitors something they miss when they leave. Itineraries that include hands-on learning simply travel well, and pancakes-like layers demonstrate perfectly how layering works.
Drying, Storage, and Shelf Life of Homemade Rice Paper
Dry each sheet until completely stiff and translucent, then cool before stacking. If any edge remains pliable, give it another 5–10 minutes and recheck for uniform dryness.
Choose a drying method: indoors on a screen with a light breeze, sun-dried on a clean surface, or a dehydrator set to 40–50°C (105–120°F). Indoors or in front of a fan, count on 40–60 minutes per side; direct sun reduces time to 20–40 minutes per side but watch for uneven spots. In a dehydrator, 60–90 minutes usually suffices until the sheet snaps when bent.
Cool completely, then store with parchment between sheets to prevent sticking. Seal in an airtight container or a zip bag; add a desiccant if available and keep the container in a cool, dark place away from moisture. For easy tracking, print a date on the bag or label and rotate older sheets first.
Shelf life guidance: at room temperature in a dry pantry, expect 2–4 weeks of good quality. Refrigeration extends that to about 2–4 months, while freezing can preserve texture for 6–12 months with minimal flavor loss. When reusing, let sheets warm to room temperature and rehydrate only briefly if needed.
Signs of spoilage include mold growth, a musty or sour odor, sticky or gummy edges, and visible discoloration. If you spot dampness or spots after storage, re-dry the sheet before using.
What you get is consistency. shopping for ingredients and doing this yourself after reading about authentic specialties from cambodia and thailand helps you build a calm ambiance in the kitchen. Hundreds of cooks stand by these steps to keep textures authentic, and crafts enthusiasts will read about tiny tips that make a big difference. If you want right, delicious lunch ideas, pair the sheets with seafood fillings and a bright dipping sauce. Print a date on each container and maintain a simple journey log, so you know when to re-dry if you spot spots of moisture. This approach keeps the flavor authentic and elevates your head space for cooking, even on boating weekends. You read, you plan, and you taste results that are as delicious as they are practical.
Buying a Ticket to Old Town Hoi An: Booking Tips and Local Advice
Book your Old Town Hoi An ticket in advance through a reputable local operator to guarantee entry, a handpicked itinerary, and a smoother day for your family or group.
Where to buy matters: use official counters near the Japanese Covered Bridge or trusted tour desks along the riverfront. Read reviews from fellow travelers and pick a operator that offers flexible options, such as adding kayaking trips or longer trips to Da Nang or the beach.
Prices typically range 120,000–150,000 VND per person, valid for a single day. The hours usually run from 07:00 to 18:00, but verify on your ticket the exact window because some sites close earlier on certain days. This final detail matters for planning your day, so check the printed hours when you arrive.
The pass covers entry to a curated selection of sites within Old Town, allowing you to explore culture without long waits. You can complement this with a traditional evening stroll through ornate streets, a stop at local clothes shops, and a quick rest at air‑conditioned rooms after walking in the heat. Creating a balanced rhythm helps every family member stay alive with energy for the next stop.
Booking tips: request a handpicked itinerary that includes a short riverside walk, a family‑friendly option, and a final stop at a local beach viewpoint. If you want more time, ask for a longer plan that includes trips to Da Nang port area or a nearby coastal break. A local member, tamy, can help tailor the day and handle transportation from the port or your hotel, making the experience smoother for you and your party.
What to bring and wear: light clothes, sunscreen, comfortable shoes, and a small water bottle. Plan for short rest periods in shaded cafes between sites, and keep the day flexible so you can swap activities if the weather shifts. A clear plan and the right gear let you stay engaged without feeling rushed, turning the day into an unforgettable memory for your family.
Tip: if you’re combining this with a Danang stay, arrange a morning start in Hoi An and finish with a beach visit or a short boat ride back to the port area. Several operators offer a seamless transfer, reducing wait times and letting you focus on enjoying every moment of the trip.
| Seçim | Price (VND) | Valid Hours | Haradan Almaq Olar | Qeydlər |
|---|---|---|---|---|
| Old Town Day Pass | 120,000–150,000 | 07:00–18:00 | Rəsmi sayğaclar körpünün yaxınlığında; etibarlı tur masaları | Saytların seçilmiş bir hissəsinə giriş daxildir; iş saatlarını nəzərə alaraq planlaşdırın |
| Combo: Pass + Kayakinq | Varies | 07:00–18:00 | Yerli operator masaları; Dananq/Hoy An liman ərazisi | Su idmanı fəaliyyətlərə rəng qatır; təhlükəsizlik avadanlıqlarının mövcudluğuna əmin olun |
| Şəxsi Günübirlik Səyahət | 900,000-dən | Çevik | Tur operatoru və ya otel konsyerji | Ən çox tənzimlənən; ailə dostu; daha sürətli templə. |