

Begin with Everest as the baseline for your planning, because it defines higher altitude, main routes, and the logistics that keep climbers safe. As youre preparing, lock in a set of core skills and a flexible itinerary that lets you adapt quickly to weather and terrain.
The list that follows shows the top 10 mountains with their heights and ranges, from the Himalayan peaks to the Karakoram: Everest (8848 m, Himalayas), K2 (8611 m, Karakoram), Kangchenjunga (8586 m, Himalayas), Lhotse (8516 m, Himalayas), Makalu (8485 m, Himalayas), Cho Oyu (8188 m, Himalayas), Dhaulagiri (8167 m, Himalayas), Manaslu (8163 m, Himalayas), Nanga Parbat (8126 m, Himalayas), Annapurna I (8091 m, Himalayas).
For a climber, those figures translate into practical steps: choose a place to train near base camps, develop acclimatization blocks, and practice rope techniques, because every ascent tests your stone resolve and your focus through extreme cold. The ranges of altitude require careful pacing to avoid difficulties and to manage return intervals to assist your body adapt quickly.
Travelers and aspiring climbers often ask what makes these places special. alan, a seasoned guide, explains that the charisma of the tallest summits plays with light–ice, rock, and shadow–yet the real test lies in handling the difficulties you’ll meet at camps on the approach. Some climbers died in the past due to avalanches or sudden storms; their stories shape the content and drive better decision making for teams and solo climbs alike.
Whether you travel as a traveler seeking a new place or as a climber chasing a personal record, approach each ascent with discipline and curiosity. Map routes with partners, keep your notes close, respect local conditions, and note how a valley can flood with clouds and glare off glacial lakes nearby. You can return from a climb stronger in technique and in character, ready to share content with others who read your notes and watch your stories.
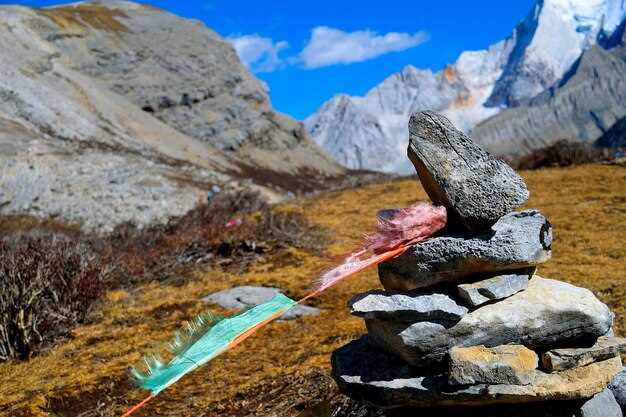
Everest’s rank among the Top 10 and its implications
Rank Everest first and highlight its implications for planning, safety protocols, and tourism management. At a glance, Everest is number one in most sources for the Top 10, a status that informs permits, guide networks, and rescue readiness. Its altezza stands at 8,848 meters, confirmed by statistics from multiple sources, reinforcing its role as the planet’s most prominent peak. Readers who want a realistic view will compare its profile with alpamayo and kamchatka routes to see variance in routes and exposure.
From a practical angle, Everest's rank translates into more training, more gear, and more contingency planning. The cold, thin air and extreme altitude create substantial difficulty for climbers and guides alike. Teams must navigate crowded windows, weather shifts, and logistics, all while balancing risk and opportunity. Desperate decisions sometimes emerge when weather windows close, so on-site discipline and clear emergency procedures matter. In rocky zones near base camps, brakk formations demand careful rope work, and river crossings in remote valleys may require canoe travel to reach staging areas.
Statistics from sources show thousands of attempts each season, with participation peaking in favorable windows and varying by region. Today, policymakers and conservationists link Everest’s prominence to broader planet-level tourism concepts, prompting stricter permit controls and environmental safeguards. The image of Everest at sunset often fuels public interest, yet the data keep the discussion grounded in risk, crowding, and resource use. Prominent narratives arise from field reports and the ongoing dialogue among guides, porters, and climbers about sustaining access for future generations.
Want a concise plan for readers weighing Everest against other peaks? Later comparisons with alpamayo illustrate how different altitudes, weather patterns, and terrain affect difficulty and pace. Use a simple checklist: verify altezza figures from reliable sources, review local conditions, and assess your own fitness and acclimatization timeline. More importantly, map out a realistic march window, reserve flexible dates, and prepare for cold nights and high winds. If you want to explore how Everest’s rank shapes practice, start with a glance at the base camp image, then study the routes, logistics, and safety nets before you commit to a hike or a broader mountain itinerary today.
Ideal climbing windows for Everest and nearby peaks
Plan Everest climbs in two tight windows: mid-April to late May, and late September to mid-October. These periods deliver the most favorable balance of daylight, stable high-altitude air, and lower storm risk, significantly improving your odds on Everest and on nearby peaks such as Lhotse, Nuptse, Pumori, and Cho Oyu. While the summer monsoon reaches the region, the upper routes still offer windows, but visibility can drop and weather can turn in hours. The terrain features dramatic ice walls, and the backdrop of towering peaks adds heart-pounding charisma for climbers who keep to a disciplined schedule.
Weather fundamentals: during these windows, the jet stream shifts away from the summit, storm tracks relax, and high-pressure systems dominate for longer stretches. Expect clear mornings, rising sunshine, and lower cloud cover above 6,000 meters. A typical good day offers 10–14 hours of usable daylight for the summit push. Winds at the summit stay manageable on most days, but a single gust can break a route; watch clouds pull back and reveal the true span of the mountain.
There are three planning sections to calendar management: ascent sequence, acclimatization or rotation, and contingency days. The key factor is time: you need at least 2–3 weeks above base camp to acclimatize, with a window of 7–10 days around the summit push; if you miss rain or wind, you may lose one, two, or four days. The choice of days is narrower than it seems; you may only get 3–5 optimal days in a window.
Risks and mortality: even with good timing, the route carries mortality risk; avalanches, crevasses, and sudden storms have claimed many lives, and their deaths emphasize the need for conservative planning, clear lines of communication, and strict decision-making. Keep a note to adjust pace and retreat if conditions deteriorate.
Nearby peaks share the same lifecycle: Lhotse and Nuptse follow the Everest rhythm, Kala Patthar offers a vantage on the same weather backdrop, and Alpamayo in the Andes demonstrates how different climates shape a window. The principle remains: plan around a stable stretch of days with minimal clouds and favorable wind to maximize success and minimize risk.
Flora and altitude context: base camps host limited alpine flora in the lower zones, while higher camps present fewer plant features and greater exposure to wind and cold. The alpine environment dominates, so climbers rely on instrumentation, acclimatization, and disciplined pace rather than greenery as a signal of good conditions. This is why a well-timed window matters as a practical note for every expedition.
Closing checklist: assemble a collection of forecast sources, monitor satellite updates, and keep your plan flexible. Do not chase an impossible schedule; allow buffer days for weather shifts and clouds that bloom quickly after a clear morning. In summer, rapid changes can shrink a potential day into nothing, so keep sections of your plan ready to activate or cancel as needed.
Gear you need for high-altitude climbs on these mountains
Equip a layered system: a three-layer shell, a warm midlayer, and a compressible insulation layer. Use a shell with a helmet-compatible hood, pit zips, and reinforced cuffs. A puffy or down jacket with approximately 800–900 fill power provides warmth in camps or belays. Pair with windproof gloves, a balaclava, and a warm hat. This setup has been found to improve protection and energy management on trips in the Karakoram, Eiger, and Dolomites, and the result is higher comfort in variable weather. While you plan, you can adjust quickly as conditions shift, without carrying extra bulk.
Technically, the same pieces cover higher altitudes, but you add or drop layers as you ascend. On routes above 5,000 meters, you may need a heavier down layer; in the Dolomites or other alpine areas, you might manage with lighter options. From coaching notes and field data, you’ll want to keep the core warm while maintaining dexterity for hands and feet.
Clothing and warmth
- Boots: insulated, crampon-compatible, 1–2 sizes larger than daily wear to fit thick socks; choose a stiff sole for stability on ice.
- Socks: two pairs per boot, wool or synthetic; use a liner sock to reduce blisters.
- Base layers: lightweight merino or synthetic tops and bottoms; avoid cotton.
- Midlayers: fleece or lightweight down; choose a compressible option to save pack space.
- Shell: three-layer waterproof/breathable jacket and pants; ensure a long cut behind the knees to keep snow out when you crouch or kneel.
- Gloves: a thin liner, a midweight insulated glove, and a heavy-duty hardshell mitten; add hand warmers when stationary at altitude.
- Headwear: balaclava, sun cap, and warm hat; choose high-visibility colors for dawn or dusk.
- Gaiters: knee-high waterproof gaiters to keep snow and scree out of boots.
Climbing and safety gear
- Helmet: lightweight, ice-tool compatible with a secure fit; check certification.
- Harness, rope, carabiners, slings: plan for belays in tougher sections; use a dynamic rope roughly 50–70 meters in length depending on approach.
- Ice axe: long enough to reach the snow when you stand tall; consider a model with an integrated leash.
- Crampons: ensure compatibility with boots and adjust fit before leaving base; keep anti-balling plates or tech spikes on dry days.
- Oxygen system: optional for some routes above 7,000 meters; if you choose it, practice assembly with a guide; carry spare parts and a mouthpiece.
- Navigation and safety: headlamp with extra batteries, map, compass, altimeter; whistle; personal locator beacon if you are off-track.
alan, a local guide frequently mentioned around Eiger routes and in Argentina’s high Andes, emphasizes resting periods and pacing. This approach helps maintain energy–you’ll return with strength to tackle higher sections and improve the overall result. For coastal-influenced weather zones near the Dolomites, carry a compact wind shell and keep hydration steady, since dehydration accelerates fatigue at altitude. If you want to optimize weight, choose multi-use items and test gear on a shorter trip before attempting a longer ascent. Each piece serves a purpose, and the right combination keeps you safer on every area you climb, from the classic granite faces to the glaciated routes atop the Karakoram. Found gear combinations like these consistently perform well, and you’ll notice a unique confidence when you move smoothly through cold air and high wind. Return to camp with gear that held up under pressure, and you’ll be set for the next ascent–whether you’re chasing a new route in Argentina or revisiting familiar lines from the Eiger to the Dolomites.
Acclimatization, safety practices, and risk mitigation
Limit daily altitude gain to 300–500 meters above 3,000 meters and insert a rest day after every 1,000–1,500 meters.
Plan acclimatization cycles into your itinerary. The body adapts mainly during rest at altitude, not while pushing hard, so a patient schedule reduces the risk of AMS and injury. technically, adaptation occurs during rest periods, while climbing can quickly exhaust resources. Before the trip, train your cardio and leg strength; a solid base increases endurance and speeds acclimatization. For example, allocate 10–14 days for exposure above 4,000 meters, and extend by several days for objectives like Makalu. On northern or western routes, you still gain experience with gradual ascents and lower camps first. A seven-step approach helps organize the process: hydrate well, eat regularly, sleep enough, pace climbs, monitor symptoms, check weather and avalanche risk, and keep a clear descent plan. The path toward snow-capped camps yields stunning views and the wonder of the planet's highest peaks, and each acclimatization cycle builds resilience. This approach has a long history among expedition teams. This plan gives climbers confidence to push when the moment is right, ever mindful of limits. It is part of a safety plan that avoids the hype of rush-filled blog posts and keeps the focus on measured progress. It increases the climber's confidence and reduces the risk of overdue challenges. This method works for every place climbers target, from northern icefields to Kamchatka's volcanic zones. It also raises awareness of huge demands on the body and under high altitude stress, fatigue accumulates quickly and pacing becomes critical.
Acclimatization protocol
Base at 2,000–2,600 meters; day trips to 3,000–3,500 meters; sleep at or below 3,000 meters after each trip; repeat once or twice to form a rotation before attempting higher camps. In Makalu’s system you might perform three cycles, then push to higher camps only after a full rest day at the previous height. Track body signals such as fatigue, headache, nausea, and appetite; if AMS symptoms appear, descend immediately and reassess. Hydration stays at about 3–4 liters daily; avoid dehydration by sipping regularly and balancing electrolytes. If you use a pulse oximeter, aim for resting saturation around 88–92% at altitude; use supplemental oxygen only under a medical plan and local guidance. This training and planning increases confidence and reduces the chance of a late-night scramble on a snow-capped ridge. Kamchatka training grounds offer brutal terrain that builds balance and endurance without the crowd pressure of busy routes.
Safety practices and risk mitigation
Establish a buddy system and pre-agreed turnaround times; never press on with unresolved symptoms. Climbs in western ranges or northern camps demand rope discipline, fixed-line checks, and proper harness use; inspect gear daily and replace damaged items. Carry a compact first-aid kit, a reliable communication device, and a clear descent plan; rehearse it with your team before leaving base. In crowded camps, respect space and avoid elbowing others in queues or tight corridors. Weather windows decide success, so check forecasts, monitor wind, precipitation, and temperature swings; do not start a move if a storm is forecast within the next 24–48 hours. For extra safety, choose a plan that includes a contingency for rapid descent and a supported rescue option; this reduces the risk when conditions deteriorate or unforeseen challenges arise.
Budget, permits, and planning tips for a multi-peak trip
Secure permits 6–12 months ahead and budget per-peak fees to roughly 40–60% of your total cost. Pick a regional corridor to minimize border checks and travel time. A picturesque option pairs a peak like blanc with washington to reduce flights and keep the plan cohesive; changes in policy can occur, so verify details before booking. Some routes require special access, and keeping a flexible approach significantly improves your odds of a successful crossing of high passes. The whole itinerary should feel unique, with snowy alpine scenery and lakes at base camps. Some hikes between major ascents help legs recover and views stay fresh. The massif Blanc (often written as blanc in guides) demands attention to seasonal limits and entrance rules; plan around those to avoid last-minute disruptions and ensure exceptional scenery when you reach the summits.
Permits and timing
washington: The region generally allows day-hike access with park rules; no dedicated climbing permit is required for most routes, but conditions vary by season. blanc: The massif Blanc (often written as blanc in guides) requires park entry and car passes during peak season; secure 6–9 months ahead to avoid capacity limits. lhotse: routes in the high Himalaya demand coordination with national authorities and licensed operators; permits are typically arranged 9–12 months ahead, with acclimatization days and buffer dates. brakk: border zones and remote terrain require careful planning and local authorizations; start approvals well in advance to absorb potential delays. maestri: weather windows are narrow and local permissions can shift; plan around storms and long-range forecasts. To reduce elbowing through queues and streamline processing, book guides who handle border procedures and permit filings. Some permits require letters of invitation or visa arrangements; maintain a contact list and confirm changes regularly. Aiming to climb a tenth peak in a sequence is feasible if you prioritize logistics and allow extra days for delays. You should also incorporate some hikes to keep your pace balanced.
| Peak | Permit window (months ahead) | Permit price range (USD) | Notes |
|---|---|---|---|
| washington | 3–6 | 0–75 | No routine climbing permit; check park rules |
| blanc | 6–9 | 0–60 | Parc entry; car passes; peak-season crowding |
| lhotse | 9–12 | 300–1200 | Nepal permissions; licensed operator; acclimatization |
| brakk | 9–12 | 500–1500 | Border logistics; weather risk; expedition setup |
| maestri | 6–12 | 200–600 | Local permissions; weather variability; remote access |
To keep the plan efficient, locate base camps located near lakes and picturesque valleys to maximize rest days and views. Elbowing through busy trailheads becomes avoidable with pre-arranged guides. The tenth peak in the sequence is feasible if you pair a short acclimatization block with a light hiking day beforehand. A plan conducted by experienced maestri teams keeps logistics tight and reduces last-minute changes, making the overall itinerary more manageable. Keeping the approach focused on safety and a few key ascents yields a unique, memorable experience across varied terrains.
Budgeting and logistics
Estimate the baseline cost: permits, guides, porters, flights, gear, and contingency. For a two- to four-peak plan, allocate 15–25% of your budget to contingency and emergency insurance. Book with operators offering bundled permits and guiding to save time and avoid miscommunications. Keep gear lean and modular; a lightweight system improves mobility and reduces hotel and transport costs. Check local transport pricing and shuttle routes a few months in advance to prevent unexpected rises. Build in a 20–30% buffer on overall travel duration to absorb weather delays. In snowy routes, verify avalanche forecasts and carry a compact safety kit; lake crossings can freeze or thaw, so schedule windows with stable conditions.