


Know this: reserve a guided, pre-dawn start to maximize hours of light and minimize exposure on the crest. This is a врло practical choice with universal appeal, and it keeps you well ahead of heat and crowds near apurímac’s foothills.
Trail length typically spans 9–11 km round trip, with 700–900 m of vertical gain, and 5–7 hours of active time including breaks. Summit altitude hovers around 4,000–4,600 m; plan for gradual acclimatization. The panorama from this site is задивљујуће and offers excelentes vistas; the horizon often includes the queswachaka bridge, a reminder of the inca heritage preserved in the apurímac region.
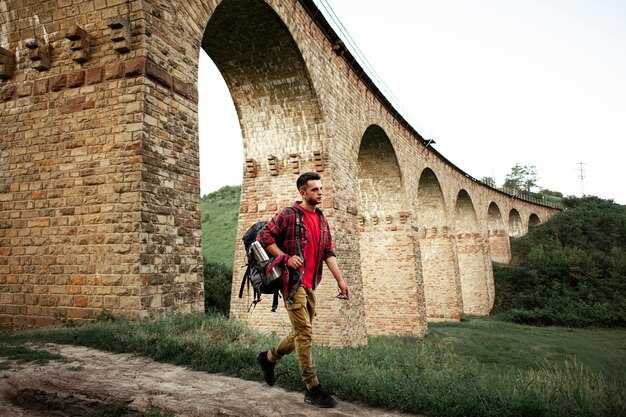
Gear checklist: durable boots, a lightweight shell, warm layer, and gloves; carry 2–3 L of water, energy bars, and a camera to capture rich, high-contrast shots. Guides frequently offer inglés explanations or bilingual support; you can choose the option that suits you. A compact map or offline GPS boosts confidence on the rough segments.
Prices for guided services commonly range from 40 to 85 USD per person, depending on group size and inclusions; most packages include water, snacks, and a full lunch. Porter service to share gear typically costs 15–25 USD per person, which can help you complete the ascent with less fatigue. If you plan to weave queswachaka into your itinerary, factor in roughly 20–30 USD for transport between nearby towns in apurímac.
Best travel window is May–August for dry, clear conditions; shoulder months can bring mist and occasional rain, so pack a light rain shell and a warm layer. Start at first light to maximize visibility and ease on exposed ridges, then descend well before midday. If this is your first high-altitude experience, pasamos through a quick acclimation stop in a nearby town and then proceed; many travelers report rich experiences, with punta viewpoints framing the valley and the apurímac canyon far beyond, and a taste of history that is very different than the coast.
One-Day Itinerary: Start-to-Finish Timeline for Waqrapukara Trek
Begin at first light from the base village; planning with local guides ensures a safe ascent and efficient pacing; carry 2 L water, energy bars, and a light wind shell; keep emergency contacts handy; protect fragile spots; this southern route affords fantastic panoramas and a chance to enjoy wildlife; a condor may glide above the punta; reseña notes from guides help remember key views; sentir the crisp air as you rise; smart planning supports safe steps and memorable vistas.
Timing and milestones
04:30 depart base; 05:15 start ascent; 07:10 reach saddle with broad views; 07:35 crest vantage; 08:00 explore esta punta and collect reseña-inspired notes; 08:25 begin descent; 09:55 back at trailhead; 10:10 cooldown snack; badge-worthy experience for travellers who finish without skipping sections; since pace stays steady, total window runs about 5.5–6 hours; couldnt be significantly faster without sacrificing views; camping gear is optional only if overnighting; local legends about wiraqocha enrich the stroll; perus markets nearby offer snacks and a quick rest before departure.
Oprema, bezbednost i praktični saveti
Classic gear list includes sturdy caminando shoes with cómodos fittings for long walking; layered clothing, sun hat, sunglasses, sunscreen; wind shell and light rain layer; water purification option; compact first-aid kit; headlamp; map and compass; whistle; emergency beacon or satellite messenger where possible; guides hold emergency contacts and know rescue procedures; stay on marked routes to protect surrounding flora and wildlife; walking pace should include short rests every 40–60 minutes; riding options may exist for gear carriage at lower stretches, but the core track relies on walking; sentiment and respect for local culture add value, and esta experiencia can inspire a good reseña from your memory; if weather shifts, rely on guides and emergency planning; camping near base is possible if overnighting; esta zona offers beautiful views and a sense of universal connection to the landscape; since this loop is compact, use every moment to feel the altitude and fine-tune skills for future explorations.
Altitude Profile: Elevation, Climb Pace, and Acclimatization Tips
Recommendation: Begin at first light and maintain a steady, sustainable tempo: target 250–300 m of elevation gain per hour on the easier segments and 150–200 m/hour on the final steep push. The ascent starts around 3,600 m and tops out near 4,150–4,250 m, for a total gain of roughly 550–650 m. Plan 2.5–3.5 hours of climbing, with 2–3 short rests, plus 15–20 minutes for photo opportunities on the snow-capped skyline.
Altitude profile details: the initial stretch climbs through puna grassland, then by 3,800–3,950 m the grade tightens and becomes noticeably steeper with switchbacks; the last 150–200 m require a steep pitch with rocky steps and loose gravel. If you push too hard you risk overexertion and a slower descent in strong winds at the summit. The route runs along a narrow spine with dramatic views of the surrounding snow-capped peaks. An optional wayna detour adds about 10–15 minutes and a new ridge viewpoint.
Climb pace and risk management: a slower cadence reduces the risk of AMS and makes the ascent more manageable for travelers adjusting from lower elevations. Hydration should be 3–4 liters for the day, with electrolytes; eat light, frequent snacks; avoid alcohol the night before. To minimize risk, consider arriving a day earlier to allow partial acclimatization, especially for millions of travelers who plan a tight itinerary. If headaches, dizziness, or nausea appear, pause and descend to a safer altitude; cancel the remaining ascent if symptoms worsen. Weather can trigger cancellation policies, and smart operators build flexible plans to protect everyone’s safety.
Gear and packing: packing includes a waterproof shell, insulating layer, hat, gloves, trekking poles, and sturdy footwear with good traction. Bring 2 L of water (or a hydration system) plus electrolyte tablets, energy bars, nuts, and fruit. A compact rain layer, sunscreen, headlamp, basic first aid, spare batteries, and a small repair kit should be in the todo checklist. For the final push, trekking poles cut knee load on the steep grade, and a professional guide can tailor the tempo; many product options include photo services and a safety briefing, with some offering free or flexible cancellation terms. Packing should be lean yet complete, and everything you carry should stay very organized to move efficiently.
Planning and experiences: this ascent delivers stunning panoramas and unique vistas from snow-capped crests. It passes through zones with plant species adapted to high altitude; an extra photo stop often turns into memorable momentos. If you plan to visitar nearby communities, consider a short cultural sidetrack to deepen understanding of inca heritage. The plan should include todo elements such as weather checks, gear checks, and a backup plan in case of rain or strong winds; the journey can be made increíblely memorable, super safe, and a true adventure for planet-friendly travel, with guidelines from professional operators and a clear cancellation policy to reduce risk.
Gear Checklist: What to Pack for a Day Trek in Peru
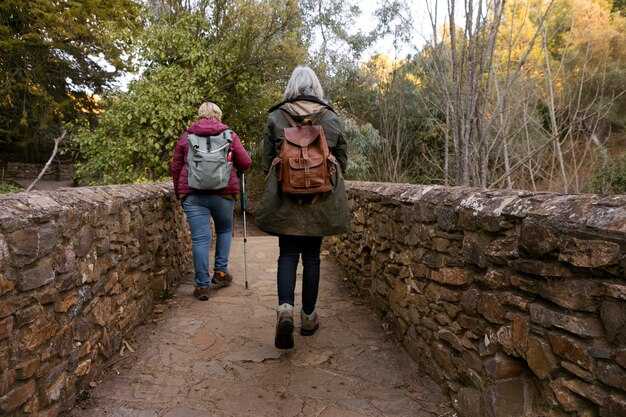
Start with a portable 20–25 L bag, balanced by a snug waist strap, and a compact rain shell; dont overload it; keep essential items in front pockets for when weather changes at times.
What to pack in your kit
Hydration and fuel: 1.5–2 L water, electrolyte packets, and two to three portable snacks like almonds, dried fruit, and a delicious chocolate bar. Include a compact first-aid kit and a small solar charger. Show insignia for door checks during entry. For transport, choose puntuales pickups from cuscos for a reliable round trip.
Navigation and safety: map or offline app, a whistle, and a lightweight headlamp with spare batteries; sunscreen and insect repellent; a small towel. A lightweight rain cover helps when calientes sun becomes intense; pack for both sun and shade. Your bag should include a strong water bottle and a filter or purification tablets if you expect to refill on the way.
Clothing and weather considerations
Layer strategy: base layer moisture-wicking, mid-layer fleece, outer shell windproof and waterproof. For feet, strong boots with good tread and spare socks. Include a sun hat, sunglasses, and, if nights feel chilly, a lightweight beanie. In rocky stretches, ankle support matters. Trailhead located at a marked gate; show insignia during door checks; adjust layers when weather shifts. Times and puntuales start windows vary; be prepared to return on schedule from cuscos. Views shift with altitude; keep your camera ready. Perus routes known to locals for years of practice años of experience vary with seasons; plan for a rounded trip and contingencies because preparation always pays off.
Safety and Health: Preventing Altitude Sickness and Staying Safe on the Trail
Prepare a concise acclimatization plan and carry at least two liters of water per person; sip regularly from the base to reduce altitude symptoms.
In a recent group tuvimos a brief pause at a shaded rest stop to rehydrate, then resumed with a more sustainable pace.
- Pace from the start: use the talk test, rest frequently, and monitor for headache, dizziness, or nausea; if symptoms persist, descend gradually and drink water.
- Maintain energy with electrolyte drinks and delicious snacks; pack packaging that keeps food fresh in changing weather.
- Check the latest guidelines from local authorities before departure; know the district rules and any entry or parking fees; work with a licensed driver or guide and prioritize puntuales service.
- Dress in layers and protect against sun and wind; tiempo variability requires a wind shell, sun cream, hat, and sunglasses to prevent hypothermia and sunburn.
- Crossings and rough terrain require extra care: cruz stable ground, test each step, and use trekking poles if available; stay with the group to avoid loss of contact.
- Post-hike options: visitar nearby communities to learn about culture and turismo; coordinate with a recommended hostel or driver for a safe return, ensuring puntuales pickup times.
- Gear essentials: sturdy boots with good grip, moisture-wicking socks, base and mid-layers, fleece or insulated jacket, wind shell, hat, sunglasses, sunscreen, and headlamp.
- Hydration and nutrition: two to three liters of water, electrolyte powder, energy bars, macchiu snacks; packaging should protect items from rain; delicious choices help sustain effort.
- Safety items: compact first-aid kit, blister care, whistle, thermal blanket, and a copy of emergency numbers.
- Navigation and communication: map or offline GPS, compass, charged phone, and a plan shared with a driver or hostel contact.
- Logistics: organize transport with a licensed driver; know the fees for park access or guided services; confirm times and keep them puntuales.
For final note, the route offers excepcional vistas and natural scenery; consider hiring Wayna, a local guide, to improve safety and context. If you plan to visitar comunidades, coordinate with your driver or hostel to keep everything smooth and puntuales.
Logistics and Booking: Travel, Start Point, Guides, and Group Size
Arrive early and book a door-to-start transfer with a licensed driver from a central plaza to reach starting point without delays.
Travel plan options include a flight into Cusco or a nearby gateway, followed by 60–120 minute road transfer to trailhead; book a package that offers pickup at plaza and driver details to support reaching the trailhead and avoiding delays.
Starting point sits along a winding road where a customer is greeted by a guide; from there, a steady ascent leads toward a high ridge and Humantay lagoon, with three to four kilometers of walking before a shaded break; someone may choose to spend a moment at a lookout.
Guides: private option or small group; bilingual guides enhance learning about fauna and local legends, including fascinating discovery stops to photograph and learn about gods.
Veličina grupe: idealno tri do osam učesnika; za veće grupe potrebna su dva vozila ili dodatni vodiči; vozač treba da ostane sa svakim segmentom grupe; uvek potvrdite kapacitet vozila i bezbednost na putu pre početka.
Oprema i baza: šešir za sunce; slojevita odeća; obuća za pešačenje; jakna otporna na vetar; flaša za vodu; grickalice; odsednite u hostelu blizu trga da biste provodili večeri po povratku; opcije smeštaja uključuju hostele, pansione i hotele.
Reseña potvrđuje sve rezervacije sa detaljima o operateru radi provere vremena polaska, tipa vozila i uključenih aktivnosti; korisničke recenzije često ističu određene vodiče kao što je macchiu; ovo pomaže da se izbegnu iznenađenja.
Praktičnosti: doći ranije; proveriti vremensku prognozu; planirati početak u zoru; deonica puta Kapak otkriva visoke prolaze; videćete faunu, a možda i ljame; držati se na pristojnoj udaljenosti; trgovi, meštani i prodavnice nude opcije ulaza za kratak odmor; ovo područje ima neobičnu mešavinu flore i aroma koje fasciniraju svakog posetioca.
Glavne tačke tvrđave: znamenitosti, slikoviti vidici i mesta za fotografisanje
Препорука: Крените у зору да бисте ухватили праве боје на врховима прекривеним снегом, носите рукавице и прилагодите успон са искусним водичем. Овај трекинг награђује панорамским погледима и историјом богатим окружењем које одјекује милионима година, са флором дуж руте и каменим радовима видљивим у интервалима.
Кључне знаменитости дуж ове руте укључују два роголика узвишења која се уздижу изнад степенастих гребена, централни плато налик плази, и уклесане нише које наговештавају прошли живот у екосистемима долине. Надморска висина се креће од око 3.400 м у подножју до највише тачке близу 4.000 м, нудећи панорамске видике према врховима прекривеним снегом и преко кускошких подручја.
Фото-стопови садрже панорамски поглед где се милиони плавог неба сусрећу са зеленим долинама. На видиковцима, снимајте широким објективом како бисте ухватили размери; предње стене додају дубину, а јутра доносе оштре текстуре на каменим радовима. Који је најбољи угао за широки снимак? Користите водеће линије од степеница или ивица да бисте водили око дуж гребена током успона и застаните на стратешким избочинама да бисте уоквирили терасе уз десни бок удаљених врхова.
Praktične napomene: isplanirajte prevoz od čvorišta u Kusku putem puta ili voza da biste stigli do početne tačke. Avgust obično donosi suvlje staze i niže temperature, pa ponesite slojeve odeće, rukavice i vetrovku; bicikli se mogu koristiti na označenim segmentima gde je to dozvoljeno, inače idite pešice. Ruta signalizacija pomaže u navigaciji; imajte rezervne baterije i kompaktnu mapu. Ako idete sami, osnovne veštine u određivanju tempa i čitanju mapa su dobre; preporučujemo da angažujete vodiča ako nemate iskustva sa velikim visinama; hvala, a preporuka za sve koji planiraju jeste da pripreme rutu sa lokalnim savjetima i sigurnim tempom.
| Значајна знаменитост | Nadmorska visina/Pristup | Савет за фотографију |
| Рогови гребени | База ~3.400 м до највише тачке ~4.000 м | Широки угао при првој светлости; стене у предњем плану ради поређења величине |
| Централна тераса висораван | Међутачка дуж руте | Кадрирајте дугачке низове тераса; користите панорамски режим |
| Камене нише и зидање од камена | Видљиво дуж изрезбарених делова | Крупни планови детаља; ухватите текстуре и сенке |
| Приступна тачка | Путокази; близина саобраћајних веза за Куско | Планирајте унапред; понесите мапу; проверите какво је време у августу |