


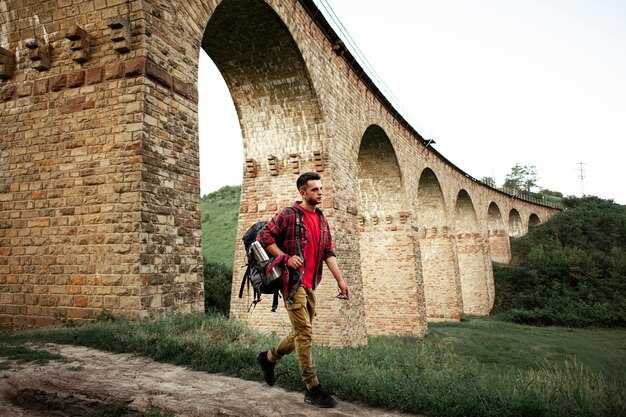
Know this: reserve a guided, pre-dawn start to maximize hours of light and minimize exposure on the crest. This is a מאוד practical choice with universal appeal, and it keeps you well ahead of heat and crowds near apurímac’s foothills.
Trail length typically spans 9–11 km round trip, with 700–900 m of vertical gain, and 5–7 hours of active time including breaks. Summit altitude hovers around 4,000–4,600 m; plan for gradual acclimatization. The panorama from this site is מדהים and offers excelentes vistas; the horizon often includes the queswachaka bridge, a reminder of the inca heritage preserved in the apurímac region.
Gear checklist: durable boots, a lightweight shell, warm layer, and gloves; carry 2–3 L of water, energy bars, and a camera to capture rich, high-contrast shots. Guides frequently offer inglés explanations or bilingual support; you can בחר the option that suits you. A compact map or offline GPS boosts confidence on the rough segments.
Prices for guided services commonly range from 40 to 85 USD per person, depending on group size and inclusions; most packages include water, snacks, and a full lunch. Porter service to share gear typically costs 15–25 USD per person, which can help you complete the ascent with less fatigue. If you plan to weave queswachaka into your itinerary, factor in roughly 20–30 USD for transport between nearby towns in apurímac.
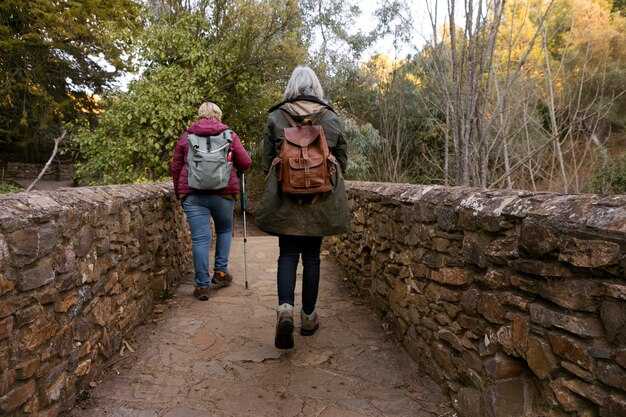
Best travel window is May–August for dry, clear conditions; shoulder months can bring mist and occasional rain, so pack a light rain shell and a warm layer. Start at first light to maximize visibility and ease on exposed ridges, then descend well before midday. If this is your first high-altitude experience, pasamos through a quick acclimation stop in a nearby town and then proceed; many travelers report rich experiences, with punta viewpoints framing the valley and the apurímac canyon far beyond, and a taste of history that is very different than the coast.
One-Day Itinerary: Start-to-Finish Timeline for Waqrapukara Trek
Begin at first light from the base village; planning with local guides ensures a safe ascent and efficient pacing; carry 2 L water, energy bars, and a light wind shell; keep emergency contacts handy; protect fragile spots; this southern route affords fantastic panoramas and a chance to enjoy wildlife; a condor may glide above the punta; reseña notes from guides help remember key views; sentir the crisp air as you rise; smart planning supports safe steps and memorable vistas.
Timing and milestones
04:30 depart base; 05:15 start ascent; 07:10 reach saddle with broad views; 07:35 crest vantage; 08:00 explore esta punta and collect reseña-inspired notes; 08:25 begin descent; 09:55 back at trailhead; 10:10 cooldown snack; badge-worthy experience for travellers who finish without skipping sections; since pace stays steady, total window runs about 5.5–6 hours; couldnt be significantly faster without sacrificing views; camping gear is optional only if overnighting; local legends about wiraqocha enrich the stroll; perus markets nearby offer snacks and a quick rest before departure.
ציוד, בטיחות וטיפים מעשיים
Classic gear list includes sturdy caminando shoes with cómodos fittings for long walking; layered clothing, sun hat, sunglasses, sunscreen; wind shell and light rain layer; water purification option; compact first-aid kit; headlamp; map and compass; whistle; emergency beacon or satellite messenger where possible; guides hold emergency contacts and know rescue procedures; stay on marked routes to protect surrounding flora and wildlife; walking pace should include short rests every 40–60 minutes; riding options may exist for gear carriage at lower stretches, but the core track relies on walking; sentiment and respect for local culture add value, and esta experiencia can inspire a good reseña from your memory; if weather shifts, rely on guides and emergency planning; camping near base is possible if overnighting; esta zona offers beautiful views and a sense of universal connection to the landscape; since this loop is compact, use every moment to feel the altitude and fine-tune skills for future explorations.
Altitude Profile: Elevation, Climb Pace, and Acclimatization Tips
Recommendation: Begin at first light and maintain a steady, sustainable tempo: target 250–300 m of elevation gain per hour on the easier segments and 150–200 m/hour on the final steep push. The ascent starts around 3,600 m and tops out near 4,150–4,250 m, for a total gain of roughly 550–650 m. Plan 2.5–3.5 hours of climbing, with 2–3 short rests, plus 15–20 minutes for photo opportunities on the snow-capped skyline.
Altitude profile details: the initial stretch climbs through puna grassland, then by 3,800–3,950 m the grade tightens and becomes noticeably steeper with switchbacks; the last 150–200 m require a steep pitch with rocky steps and loose gravel. If you push too hard you risk overexertion and a slower descent in strong winds at the summit. The route runs along a narrow spine with dramatic views of the surrounding snow-capped peaks. An optional wayna detour adds about 10–15 minutes and a new ridge viewpoint.
Climb pace and risk management: a slower cadence reduces the risk of AMS and makes the ascent more manageable for travelers adjusting from lower elevations. Hydration should be 3–4 liters for the day, with electrolytes; eat light, frequent snacks; avoid alcohol the night before. To minimize risk, consider arriving a day earlier to allow partial acclimatization, especially for millions of travelers who plan a tight itinerary. If headaches, dizziness, or nausea appear, pause and descend to a safer altitude; cancel the remaining ascent if symptoms worsen. Weather can trigger cancellation policies, and smart operators build flexible plans to protect everyone’s safety.
Gear and packing: packing includes a waterproof shell, insulating layer, hat, gloves, trekking poles, and sturdy footwear with good traction. Bring 2 L of water (or a hydration system) plus electrolyte tablets, energy bars, nuts, and fruit. A compact rain layer, sunscreen, headlamp, basic first aid, spare batteries, and a small repair kit should be in the todo checklist. For the final push, trekking poles cut knee load on the steep grade, and a professional guide can tailor the tempo; many product options include photo services and a safety briefing, with some offering free or flexible cancellation terms. Packing should be lean yet complete, and everything you carry should stay very organized to move efficiently.
Planning and experiences: this ascent delivers stunning panoramas and unique vistas from snow-capped crests. It passes through zones with plant species adapted to high altitude; an extra photo stop often turns into memorable momentos. If you plan to visitar nearby communities, consider a short cultural sidetrack to deepen understanding of inca heritage. The plan should include todo elements such as weather checks, gear checks, and a backup plan in case of rain or strong winds; the journey can be made increíblely memorable, super safe, and a true adventure for planet-friendly travel, with guidelines from professional operators and a clear cancellation policy to reduce risk.
Gear Checklist: What to Pack for a Day Trek in Peru
Start with a portable 20–25 L bag, balanced by a snug waist strap, and a compact rain shell; dont overload it; keep essential items in front pockets for when weather changes at times.
What to pack in your kit
Hydration and fuel: 1.5–2 L water, electrolyte packets, and two to three portable snacks like almonds, dried fruit, and a delicious chocolate bar. Include a compact first-aid kit and a small solar charger. Show insignia for door checks during entry. For transport, choose puntuales pickups from cuscos for a reliable round trip.
Navigation and safety: map or offline app, a whistle, and a lightweight headlamp with spare batteries; sunscreen and insect repellent; a small towel. A lightweight rain cover helps when calientes sun becomes intense; pack for both sun and shade. Your bag should include a strong water bottle and a filter or purification tablets if you expect to refill on the way.
Clothing and weather considerations
Layer strategy: base layer moisture-wicking, mid-layer fleece, outer shell windproof and waterproof. For feet, strong boots with good tread and spare socks. Include a sun hat, sunglasses, and, if nights feel chilly, a lightweight beanie. In rocky stretches, ankle support matters. Trailhead located at a marked gate; show insignia during door checks; adjust layers when weather shifts. Times and puntuales start windows vary; be prepared to return on schedule from cuscos. Views shift with altitude; keep your camera ready. Perus routes known to locals for years of practice años of experience vary with seasons; plan for a rounded trip and contingencies because preparation always pays off.
Safety and Health: Preventing Altitude Sickness and Staying Safe on the Trail
Prepare a concise acclimatization plan and carry at least two liters of water per person; sip regularly from the base to reduce altitude symptoms.
In a recent group tuvimos a brief pause at a shaded rest stop to rehydrate, then resumed with a more sustainable pace.
- Pace from the start: use the talk test, rest frequently, and monitor for headache, dizziness, or nausea; if symptoms persist, descend gradually and drink water.
- Maintain energy with electrolyte drinks and delicious snacks; pack packaging that keeps food fresh in changing weather.
- Check the latest guidelines from local authorities before departure; know the district rules and any entry or parking fees; work with a licensed driver or guide and prioritize puntuales service.
- Dress in layers and protect against sun and wind; tiempo variability requires a wind shell, sun cream, hat, and sunglasses to prevent hypothermia and sunburn.
- Crossings and rough terrain require extra care: cruz stable ground, test each step, and use trekking poles if available; stay with the group to avoid loss of contact.
- Post-hike options: visitar nearby communities to learn about culture and turismo; coordinate with a recommended hostel or driver for a safe return, ensuring puntuales pickup times.
- Gear essentials: sturdy boots with good grip, moisture-wicking socks, base and mid-layers, fleece or insulated jacket, wind shell, hat, sunglasses, sunscreen, and headlamp.
- Hydration and nutrition: two to three liters of water, electrolyte powder, energy bars, macchiu snacks; packaging should protect items from rain; delicious choices help sustain effort.
- Safety items: compact first-aid kit, blister care, whistle, thermal blanket, and a copy of emergency numbers.
- Navigation and communication: map or offline GPS, compass, charged phone, and a plan shared with a driver or hostel contact.
- Logistics: organize transport with a licensed driver; know the fees for park access or guided services; confirm times and keep them puntuales.
For final note, the route offers excepcional vistas and natural scenery; consider hiring Wayna, a local guide, to improve safety and context. If you plan to visitar comunidades, coordinate with your driver or hostel to keep everything smooth and puntuales.
Logistics and Booking: Travel, Start Point, Guides, and Group Size
Arrive early and book a door-to-start transfer with a licensed driver from a central plaza to reach starting point without delays.
Travel plan options include a flight into Cusco or a nearby gateway, followed by 60–120 minute road transfer to trailhead; book a package that offers pickup at plaza and driver details to support reaching the trailhead and avoiding delays.
Starting point sits along a winding road where a customer is greeted by a guide; from there, a steady ascent leads toward a high ridge and Humantay lagoon, with three to four kilometers of walking before a shaded break; someone may choose to spend a moment at a lookout.
מדריכים: אפשרות פרטית או קבוצה קטנה; מדריכים דו-לשוניים משפרים את הלמידה על אודות החי והאגדות המקומיות, כולל תחנות גילוי מרתקות לצילום ולמידה על אלים.
גודל קבוצה: אידיאלי שלושה עד שמונה משתתפים; קבוצות גדולות יותר דורשות שני כלי רכב או מדריכים נוספים; נהג צריך להישאר עם כל פלח קבוצה; יש לאשר תמיד את קיבולת הרכב ובטיחות הדרכים לפני התחלה.
ציוד ובסיס: כובע שמש; שכבות עבות; נעלי הליכה; מעיל חסין רוח; בקבוק מים; חטיפים; לינה באכסניה ליד הפלאזה כדי לבלות בערבים לאחר החזרה; אפשרויות לינה כוללות אכסניות, בתי הארחה ואכסניות דרכים.
Reseña מאשרת את כל ההזמנות עם פרטי המפעיל כדי לוודא זמני יציאה, סוג רכב ופעילויות כלולות; חוות דעת של לקוחות מדגישות לעתים קרובות מדריכים מסוימים כמו macchiu; זה עוזר להימנע מהפתעות.
פרקטיות: להגיע מוקדם; לבדוק את מזג האוויר; לתכנן להתחיל עם שחר; קטע דרך ה"קאפאק ניאן" חושף מעברים גבוהים; תראו חיות בר ואולי גם לאמות; שמרו על מרחק מכבד; כיכרות, מקומיים וחנות מציעים אפשרויות כניסה למנוחה קלה; אזור זה מציע תערובת מוזרה של צמחייה וניחוחות שמקסים כל מבקר.
עיקרי המבצר: נקודות ציון, תצפיות נוף ועצירות צילום
המלצה: התחילו עם אור ראשון כדי לתפוס את הצבעים הנכונים על קירות הפסגה מושלגי הכיפה, לבשו כפפות, והתאימו את קצב העלייה עם מדריך מיומן. מסלול זה מתגמל בתצפיות פנורמיות ובסביבה עשירה בהיסטוריה שהדהדה במשך מיליוני שנים, עם צמחייה לאורך המסלול ועבודות אבן הנראות במרווחי זמן.
נקודות ציון מרכזיות לאורך מסלול זה כוללות שתי בליטות בצורת קרן המתנשאות מעל רכסים מדורגים, רמה מרכזית דמוית רחבה, וגומחות מגולפות המרמזות על חיים בעבר במערכות אקולוגיות של העמק. הגובה נע מבסיס בגובה של כ-3,400 מ' לנקודה גבוהה ליד 4,000 מ', ומציע קווי ראייה פנורמיים לעבר פסגות מושלגות ועל פני אזורי קוסקו.
נקודות עצירה לצילום כוללות נוף פנורמי עצום שבו מיליוני גוונים של תכלת פוגשים עמקים ירוקים. בנקודות תצפית מרהיבות, צלמו עם עדשה רחבה כדי לתפוס את גודל המקום; סלעים בקדמת התמונה יוסיפו עומק, ובבקרים תקבלו מרקמים חדים על עבודות האבן. מהי הזווית הטובה ביותר לצילום רחב? השתמשו בקווים מובילים ממדרגות או קצוות כדי להנחות את העין לאורך הרכס במהלך הטיפוס, ועצרו במדפים אסטרטגיים כדי למסגר טרסות על רקע האגף הימני של פסגות רחוקות.
הערות מעשיות: תכננו תחבורה ממרכזי קוסקו באמצעות כביש או רכבת כדי להגיע לנקודת ההתחלה. אוגוסט מביא בדרך כלל שבילים יבשים יותר וטמפרטורות קרירות יותר, לכן ארזו שכבות, כפפות ומעיל רוח; ניתן להשתמש באופניים בקטעים ייעודיים שבהם מותר, אחרת הישארו ברגל. שילוט Ruta עוזר בניווט; הצטיידו בסוללות רזרביות ובמפה קומפקטית. אם אתם יוצאים לבד, מיומנויות בסיסיות בקצב וקריאת מפות הן טובות; אנו ממליצים לשכור מדריך אם אין לכם ניסיון בגבהים ארוכים; תודה, והמלצה לכל מי שמתכנן היא להכין מסלול עם טיפים מקומיים וקצב בטוח.
| Landmark | גובה/גישה | Photo Tip |
| רכסים משוננים | בסיס ~3,400 מ' לנקודה גבוהה ~4,000 מ' | זווית רחבה באור ראשון; סלעים בחזית התמונה לקנה מידה |
| רמת מרפסת מרכזית | נקודת מבט ביניים לאורך המסלול | מסגור שורות ארוכות של טרסות; השתמש במצב פנורמה |
| נישות אבן ובנייה | גלוי לאורך חלקים מגולפים | צילומי תקריב מפורטים; לתפוס טקסטורות וצללים |
| נקודת גישה | שילוט דרכים; קישורי תחבורה קוסקוסים סמוכים | תכנן מראש; הבא מפה; בדוק את מזג האוויר באוגוסט |