

Start with a 60-minute visit to a nearby playground after school to set a practical, enjoyable rhythm for the week. Bring a small bag with a bottle, a snack, and a simple map of nearby playgrounds to adapt as a family.
After the playground, look for a lovely nearby cafe or a quick arcade game to extend the outing without exhausting the schedule. The sound of laughter and coins in an arcade adds a playful rhythm. They can rate the visit on a simple scale, discuss what they enjoy, and plan the next stop.
Use a loose weekly plan with three easy locations: a park, a museum with kid-friendly corners, and a waterfront area with statues that invite a quick sketch or logbook entry. Add a short challenge, like finding three colors on a mural, to keep it lively.
Spice up the routine with a planet twist: include a planet-themed exhibit or a science center with planets on display for a quick, curious stop.
For cultural variety, mention albertina if you are in Vienna; the museum offers family-friendly programs and quick routes through elegant halls. If rain comes, switch to an indoor option like an art corner or a short gallery visit. In other cities, schweizergarten provides a lovely outdoor option with statues, shaded paths, and a gentle pace.
Keep a light record of these locations in a tiny photo journal. Hope your kids look forward to the next outing, and that each week you discover new ways to enjoy time together. They will remember these simple moments, and the plan will grow with you.
Naschmarkt Family Fun: 5 hands-on activities for busy families with kids
Plan a two-hour Naschmarkt visit in Vienna, Austria, and pick 2–3 activities to keep kids engaged.
1. Scavenger Hunt at Naschmarkt
Provide kids a kid-sized list and carry a small notebook: find a toy elephant, a toy giraffe, leaves on a plant stand, a fountain display, and a stall with a door or gate motif. They walked between aisles, noting fountains nearby, and jotting notes. Let them press buttons on a toy demo to add a tactile moment. They should mark each item when they spot it, then choose one item to purchase and carry home in a small bag. Fully engage with the hunt by asking them to explain what they found. End the hunt near a restaurant stall for a quick snack before moving on.
2. Taste, Rate, and Buy
Let kids try three samples from different stalls and rate them from 1 to 5 using smiles or stars. Instead of grabbing sweets impulsively, they pick one fresh fruit to share. They discuss what they liked and why, then decide to purchase the best available option within the family budget. Keep the receipts to track spending and carry a small bag for the item they chose. After tasting, stroll to a nearby cafe or restaurant to regroup.
3. City Map Collage
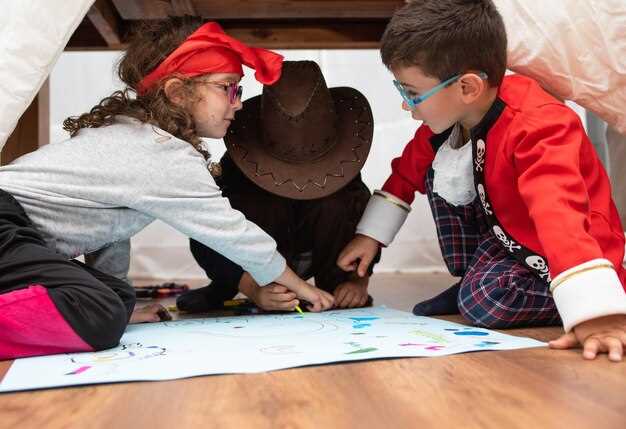
Kids build a quick city map collage using napkin scraps, leaves, and tiny toy figures like elephants and giraffes. They arrange lanes, mark a metro stop, and label a door or gate as a landmark. This complex craft boosts spatial thinking and creativity, and it keeps kids fully engaged while you explain market layouts. Use glue sticks and a protective sheet to avoid mess; you can keep the finished piece as a keepsake. For a crisp result, do this at a wooden table in a restaurant corner or during a short arts break near a shop.
4. Story Cards with Toys
Use small toys to craft a tiny story: elephants and giraffes move through city stalls and end at a family-friendly restaurant. Kids arrange the figures and tell a short tale, using a few gestures to show how they travel from one stall to another by metro; you can show a path with tape on the floor. This activity is fascinating for kids and helps them practice narrative skills. Parents can jot a sentence or two on a card; the kids carry the cards in a little pouch to review later. Ask questions like what would happen if the animals met a gate or a door along the way.
5. Purchase Quest and a Wurstelprater Break
Set a small budget and let kids choose the best available item to purchase at Naschmarkt stalls–perhaps a tiny toy elephant, a wooden giraffe, or a local snack. Talk through why the choice makes sense, and let them carry the item home in a sturdy bag to keep it safe. After the buying moment, walk to the nearby wurstelprater for a quick ride or snack outside the gate; a short break is a fun capstone to the day. If you prefer, take the metro back to the city center and leaves the market with a positive mood. This approach works well in cities across Austria, not just Vienna.
Scavenger Hunt: a printable list of 15 market discoveries kids can track
1. Arrival arch and welcome exhibits The arrival area greets families with a huge, colorful arch and clear signs that point to a few exhibits. Start here to set a sense of direction before wandering the market.
2. alte lanes and a tiny kindermuseum corner Follow alte brick alleys to a tiny kindermuseum corner that offers hands-on activities and short demos, creating charm for curious kids.
3. printable map includes areas and sections A simple, printable map includes areas and a few sections with icons to mark what to find, helping kids stay focused while they explore.
4. austrian stall with authentic exhibits An austrian stall adds authentic exhibits, with sample foods and crafts that show regional charm.
5. animals and natural corners Look for a small animal display or a natural corner where signs describe habitats, encouraging observation and respect for living things.
6. interactive finders station At the finders station, kids tap items on a touchscreen or check off a card by hand, then visited stalls feel more like a game and less like a task.
7. seen items and the sense of active learning Each item you see goes onto your list; you’ll grow a sense of achievement as you mark seen discoveries and learn to think like scientists during the hunt.
8. before you wander the whole market Before you wander far, review your list; a quick check makes the whole experience smoother and keeps the adventure active for kids.
9. therere clues near the signs therere tiny clues beside stall signs prompt kids to compare colors, shapes and patterns, sharpening observation before each visit.
10. areas for hands-on creation In dedicated areas, children can create small crafts using safe natural materials, and you can record what was made for the log. The activity is fully supervised for safety.
11. buildings with huge windows for a peek Look up at the huge buildings and glance through windows to see activity inside; these views reinforce the active sense of market life.
12. seen items and quick tallies For every area, note what you’ve seen and tally counts on your list, then compare notes with siblings to learn more about ourselves and the market.
13. section signs guide an interactive path Handmade section signs point the way and invite an interactive stroll; the charm of small cues makes tracing the route feel natural.
14. animal signs and natural cues at stalls Some stalls use animal icons on signs; follow these to connect observations with real-life animal ideas and natural materials.
15. highly satisfying printable checklist to finish Use the highly accessible, fully printable checklist to finish all 15 discoveries; this leaves kids with a sense of achievement and a finished, whole experience.
Taste Pass: plan affordable samples and kid-friendly bites
Grab a Taste Pass and map a kid-friendly route with bite-sized treats under five euros each. Start at the prater, then hop to nearby museums with kid-friendly exhibitions and quick sampling spots.
Choose a travel-friendly theme and pair bites with small cultural pauses. Visit world-class museums or exhibitions, then catch short films at cinemas that welcome families. Plan entry windows to avoid lines and keep little hands moving between stations.
Bite ideas that travel well: greek yogurt cups with honey, chocolate-dipped fruit, pita with hummus, cheese squares, and fruit skewers. These options satisfy little appetites and travel-friendly budgets, and they’re easy for everyone to share.
Budget tips: most bites cost 2-5 euros. Use grab-and-go counters and machines that offer small samples. With careful planning, you can spend a family Saturday without overspending.
Map the route with finders: a simple sheet that marks entry points, kiosks, and sample sizes. It keeps everyone on track and makes it easy to switch if a stall runs out of a favorite snack.
Sunday pacing helps many families: start early, take short breaks, and let the little ones steer the pace. When the moment comes, you’ll finish with happy kids and coffee-sipping grownups.
End the day near an aquarium and giraffes viewing area. If you’re in a city with alte squares, stroll past a fountain, then grab a final chocolate bite. A short travel between venues ties the theme together and leaves everyone smiling about the world-class experiences behind you.
Keep a napkin in your hand for messy bites and pack a small bag with essentials to ease transitions between venues.
Photo Diary: a 10-minute camera walk to capture colors, smells, and textures
Take a 10-minute photo diary walk now: grab a camera or smartphone and spend the time at an active pace to capture colors, smells, and textures. If you can, set a booking for an early slot to enjoy soft light and fewer crowds. Set a simple goal: 8 to 12 frames, including 2 wide shots and 6 close-ups of detail.
Look for color bursts and scent hints in everyday spaces–porch pots, market stalls, a storefront with a bright awning. Most frames shine when you mix scale with detail: a mural paired with a leaf, a stair rail with texture, bladder-like seed pods on a plant for a playful clue. Include a tiny shark sticker or toy in one shot for a spark of fun. The story lies in the contrasts and textures you capture.
During the walk, press the shutter with intention rather than a flurry. Let kids call out what they notice and assign them small roles–color scout, texture spotter, or scent detective. Walked together, you’ll keep the mood light and curious, and the traditional pace helps everyone enjoy the moment. If you want, you can reference a quick, virtual gallery later to compare what you captured.
Afterward, curate a collection of your best images: 6–8 photos with one-sentence captions. Save them in a shared link or a dedicated folder so family members can browse later. This needn’t be formal–include links to a few favorites and, if you spent time planning, consider a simple booking note for future outings. The stephens family uses this approach on trips to a kindermuseum or parks, including a dedicated section for notes on scents and textures. A nod to technisches education methods used by museums keeps the activity grounded in learning while staying playful.
Market Math: practice estimating prices, adding totals, and making change
Begin with a quick estimate for each item before adding totals, then show the final sum by hand. This exciting start builds quick value intuition and speeds up checkout.
Set up a small market with six clear items: bottles ($1.25), amber bead ($0.75), single chocolate ($1.10), elephants figurine ($4.00), sharks toy ($3.50), climbing rope ($2.00). Kids guess each price and then calculate the adding totals for a pretend basket. Example total: 1.25 + 0.75 + 1.10 + 4.00 + 3.50 + 2.00 = 12.60. Compare estimates to the exact sum to measure accuracy and celebrate progress.
Practice making change by a simple purchase: a shopper pays with a $20 bill for a 12.60 total. The correct change is 7.40. Have kids demonstrate the subtraction on paper, then count coins aloud with you to reinforce counting by 0.10 and 0.25 increments. This hand-on step reinforces impossible precision through repetition, though keep it light and fun to avoid frustration.
Turn it into an outing at local places like museums, belvedere, or donaupark with friendly facilities for families. In a 3-day trainingspark format, rotate roles: one child lists items, another estimates, a third handles sums and change. Use offers to introduce discounts: “15% off the sharks toy” or “buy one, get a second at half price,” which adds interesting variety and teaches percentage math alongside addition and subtraction.
Keep the activity incredible by introducing new items after a quick field trip to a kindermuseum or a quick walk past the museums and donaupark exhibits. Add real-world touches: tall towering price tags, multiple currencies for years of shopping experiences, and a final receipt that shows many line items. Children will notice how hand-written totals and shows of numbers evolve into confident money skills while making shopping feel like an adventure rather than a chore.
Post-Visit Craft: turn wrappers, receipts, and photos into a keepsake collage
Start with a wide poster board and a roll of kraft paper; gather the wrappers, receipts, and printed photos from the day, plus a few small film prints. This centrepiece gives you a beautiful keepsake that you can view for years to come, and it doubles as a quick history of your outing.
- Materials and prep: lay out a clean workspace, then gather a pair of scissors, white glue or Mod Podge, a craft knife, double‑sided tape, and a ruler. Choose a colour palette that lets the items stand out, then run a light pencil line as your starting point on the board. This keeps the layout tight and the visuals down to a pretty, cohesive plan.
- Layout plan: start with a grid or a loose map that runs across the centre of the board. Place photos first to anchor the design, then tuck wrappers and receipts around them. Use the word “history” as a guide: group items by place, event, or feel, so the display tells a little story of the day rather than a random jumble.
- Item prep: trim excess borders on photos so they fit neatly; flatten crinkled wrappers if needed; cut receipts to fit edges without losing important details. When you’re ready, move pieces around a few times to find the best balance, keeping the big elements toward the middle and smaller accents toward the edges.
- Attachment technique: apply glue in small dots or strips to avoid warping paper. Press wrappers down gently to avoid tearing, and secure photos with a light set of tape strips behind each corner. If you have several layers, a thin coat of Mod Podge on top can “seal” without creating a glare on photos.
- Finishing touches: create a simple caption card for each cluster–note the place, date, or a one‑line memory. A short label like “ferry ride,” “exhibits,” or “best snack” helps guests understand the exhibits at a glance. Add a decorative border with a line of washi tape to frame the centre piece beautifully.
- Display and upkeep: mount the collage at the centre of a wall near the door so it’s easy to add new layers after future events. If you want to preserve it, place the completed board behind glass or frame it; the surface will stay flat and the items won’t shift with the weather.
Bonus ideas: incorporate ticket stubs and small maps to extend the timeline, add a tiny “what gave us joy” note for each cluster, or keep a separate mini‑book with later reflections to complement the collage. This approach turns everyday scraps into an appealing, easy‑to‑update keepsake that a family can enjoy for years–and it helps kids connect what they saw with the stories behind them.