


Start at dawn and slip into a swimsuit for a calm, sunlit inlet. On the hawaiian coast, water clarity often reaches 10–15 meters, so visibility is great for snorkeling along a shallow reef edge just beyond the breakers. Pack reef-safe sunscreen, a quick-dry towel, and a hat to stay comfortable as you explore the whole shoreline from the beachfront to the sheltered cove.
On the main beach, lifeguards are on duty 9:00–17:00; follow posted guidelines and stay within the lifeguard-patrolled zone. For newcomers, a licensed guide can display safe routes for snorkeling and kayaking and tailor a plan that works for your whole group and shows them safe routes.
Beyond the shore, you can navigate a sheltered inlet by kayak and pass lava-tube grottos along the beach where light dances on polished rock. Guided tours typically last 2 to 3 hours, include safety briefings, buoyancy tips, and a chance to swap between swims and calm paddles.
What to bring and wear: a swimsuit, water shoes, rash guard; bring a waterproof bag and a bottle of water. A kayak rental on the beachfront makes it easy to combine a paddling session with a snorkeling leg. For families, choose tours that stay close to shore and offer gear for all ages, plus a quick dolphin sighting display.
To protect the habitat for fish and reef life, choose operators with sustainable practices. Respect coral, don’t touch marine life, and rinse gear after trips. This hawaiian haven keeps a thriving underwater world for fish, parrotfish, and wrasse. The future you plan with mindful choices will help these worlds endure, letting you escape the noise of vegas crowds and truly make memories that last a lifetime for the whole family, both on land and in the water.
Magic Island Lagoon: Discover Crystal Waters, Caves & Traveler's Photos
Plan a dawn visit along the oceanfront path for the softest light and the best reflections. Bring sturdy shoes for rocky patches, a hat, water, and a light layer; you’ll find the moment just right for capturing the whole setting and the dramatic lava-block silhouettes.
The area teeming with locals and visitors offers opportunities for adventures for everyone in your family. kekoa village nearby adds a delightful cultural stop, and you’ll probably enjoy sampling hawaiian snacks before or after a beach stroll.
What to do and how to photograph
- Arrive early to beat crowds and to catch glassy water that makes colours pop along the beach and rocky shore.
- Walk or ride the oceanfront boardwalk to reach grottos and lava-tube alcoves; these features feel jurassic in scale and create dramatic frames.
- Place people in the foreground for scale–this helps your display of the whole scene feel more cinematic and scenic.
- Seek lines and reflections that include the setting sun or dawn sky; shoot from slightly low angles to emphasize the blocky lava formations and the gentle waves.
Practical tips for visitors
- Shoes with grip are essential on slick rocks; wear comfortable footwear and bring a spare pair if you plan to wade.
- Weather can shift quickly; however, mornings stay calmer and offer the best light for beach photography.
- Carry water, sunscreen, and a lightweight towel; respect the local space and avoid stepping on fragile areas near the grottos.
- Respect locals and hawaiian culture; ask permission before attempting portraits of people and parts of kekoa offerings shown by vendors.
- Stay within designated areas; the whole shoreline features natural displays that are best enjoyed from the approved paths, not the block edges or unstable ledges.
Whether you’re after the great family photographs or a quiet moment, this setting offers chances for future memories. You’ll probably leave with a delightful portfolio, a sense of passion for the coast, and motivation to plan another visit when the weather aligns for even more stunning light and dynamic scenes along the beach and beyond.
What to pack for a lagoon photography day
Start with a compact, weather-sealed kit: one body, two versatile lenses, three spare batteries, and a fast memory card kept in a dry bag. Add a lightweight tripod or monopod and a polarizing filter to enhance color display and cut glare off shallow water.
Save space by choosing items that cover multiple needs: a cooler for drinks and snacks keeps energy steady, while a microfiber cloth handles salt spray between shots.
- Gear and storage: dry bag for phones and filters, spare charger, and a compact backup lens or two if you want flexibility without carrying a second body. Ensure enough room for three focal options to cover reef edges and gentle shelves.
- Protection and safety: reef-safe sunscreen, a wide-brim hat, water shoes, and a light rain shell. Observe fire restrictions and keep a safe distance from wildlife and restricted areas; always respect shoreline erosion zones and currents near the jungle edge.
- Personal comfort and readiness: quick-dry clothing, a change shirt, lip balm, and insect repellent. Know restrooms near the parking lot or access point to minimize time off the water.
- Hydration and nourishment: abundant water or electrolyte drinks; keep snacks in the cooler for long shooting blocks, and plan for enough breaks to avoid fatigue.
- Logistics and local tips: plan to start from a hotel near the access points, and use three main sites along the coast at Kualoa for varied backgrounds. TripAdvisor reviews providing access tips and named spots can help finalize your day. The area offers a haven of scenery and a display of light at different angles; staying organized helps you maximize sessions and capture more moments.
- Water activity gear: if you’ll be kayaking or roving near shore, bring PFDs, a dry bag for valuables, and a compact towel. Check weather windows and whether wind gusts will affect stability; keep gear secure during wading or board transfers.
Whole-day planning should include easy access to a cooler, a plan for three shoots at distinct reef faces, and pockets for extra memory cards. This activity benefits from a deliberate plan and staying mindful of conditions; if rain appears, switch to sheltered viewpoints and adjust timing to catch the best light without rushing.
Camera settings for vivid turquoise water and shaded caves
Start in Manual, shoot RAW, 1/320s at f/8, ISO 100, WB 5200K. Bracket ±0.3 and ±0.7 EV to cover the whole spectrum from bright sites to shaded caverns; latest mirrorless bodies deliver clean color and low noise, most effective when you stay within ISO 400–800 in bright sun.
Use a wide-angle lens (14-24mm full-frame, 10-17mm on crop) to capture the whole reef scene; fit a polarizer to cut reflections from the glass surface; shoot slightly underexposed (-0.3 EV) to preserve turquoise hue and maximize color depth; youll get more dimension than you expect.
For shaded grottos within lagoons: switch to 1/60–1/80s, f/5.6–8, ISO 400–800; apply +0.3 to +1.0 EV to brighten shadows; enable live view and magnify focus; WB 4800–5200K preserves blue-green tones; consider a second shot with WB 4200K for a warmer mood. This approach works well during morning exploring.
Color and mood: shoot RAW for latitude; in post, boost turquoise hues modestly, avoid oversaturation; adjust hue and saturation for lagoons without shifting reef colors; for the village and waikiki scenes, you can enjoy the transformed light across the year.
Lens and composition: choose a wide 16-35mm or 8-15mm for the whole reef/arch; keep horizon level; frame to include reef edges and rock formations; use a fast, stable platform on land and move slowly to avoid blur; you can enjoy the scene without forced shortcuts.
Gear notes: amagi components and other latest optics stabilize close-up shots; if glare persists, a glass filter helps manage glare on bright mornings; you can soak color by bracketing and blending in post, then compare results to see which version works best for most sites. This approach ensures truly vibrant results.
Morning sessions with granddaughters exploring the coast near lagoons are ideal: transforming the whole experience and giving you a reason to push your camera work; from waikiki to a nearby village, enjoying the moment, soak in the light, and youll produce Hollywood-worthy tones that feel natural and well balanced.
Getting there: best routes, parking, and transit near Magic Island Lagoon
Plan your visit around parking strategy: the east lot behind the shoreline park offers the simplest access, with a short, shade-dappled walk to the gate. This option draws a group and young lovers, especially on vibrant afternoons, so arrive early to secure a spot. If that space is full, on-street meters along the adjacent boulevard provide additional options, including other nearby lots. Bring cans or bottles to the recycling bins, and leave no trace. Something practical to remember: plan a return route in case the first option is full.
Best routes to reach the peninsula allow a straightforward approach from central areas: head toward Ala Moana Park boundary via Kalakaua Ave or Dole St, then follow the signs toward the harbor edge and main promenade. The walk from the gate to the shore is brief, providing a quick window for photos and enjoying the scenery. If you are indulging in a group outing, a single carpool makes parking easier and reduces stress. Street corners may host magicians and buskers, making the stroll something truly memorable and made for fun.
The public transit option is reliable: TheBus ferries lines connecting downtown, Waikiki, and the adjacent marina; alight at the Ala Moana Blvd stops near Atkinson Dr, then stroll along the seawall to the access gate. A short ride saves parking hassles and is friendly for a budget plan. For those traveling with gear for diving or beach days, you can bring equipment on board where allowed. Use a mobile app to track arrival times and reduce waiting in the hot sun. For a dash of color, nearby nights sometimes showcase street acts that echo a vegas vibe, making the return stroll memorable.
Facilities nearby include restrooms, shade trees, and water fountains; there are options for boating and launching small craft from nearby marinas, with dedicated times. If you are indulging in a lazy afternoon, bring a blanket or towel to enjoy the rock outcrops while watching the water. Photographers and film crews often film along the shoreline; obtain required permissions for filming in certain zones; refill water bottles and dispose of waste properly; many visitors plan to stay mid afternoon for the best light. For diving enthusiasts, a nearby cove offers shallow spots for practice in safe conditions, with lifeguards on duty during peak season.
Etiquette tips: keep noise to a minimum, respect wildlife, and avoid fires; there are no designated fire pits; avoid leaving trash; use provided cans and recycling bins; respect signs about currents and diving restrictions; the area is continuously maintained, with ongoing improvements to signage and safety features to keep visitors safe while enjoying the scenery. A reminder: if you are traveling with a group, designate a meeting point and plan a time to regroup, bringing extra water and snacks for the afternoon.
For visitors seeking a famous sunset backdrop, the vantage points along the promenade deliver a truly memorable experience, with rocks and breakers framing the horizon. The site is popular with families, groups, and solo travelers alike; the afternoon light is ideal for filming and photos, and the surroundings invite enjoying the moment with magicians performing on weekends and the feel of a valley nearby. Being near the water, it's a great place for resting in shade, grabbing a snack, and planning your next outing, whether you prefer boat trips or a quiet reading spot. In short, the route and packing plan make it easy to enjoy the scenery again and again, bringing a sense of calm after a busy day in the city; thank you for considering this stop, and see you again soon.
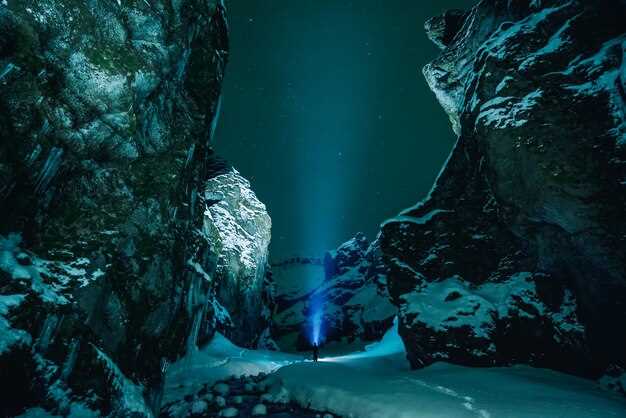
Safety and access guidelines for cave exploration and water zones
Before you enter this lagoon system and adjacent caverns, check weather conditions and tide windows; strong swells or sudden rain can render passages dangerous. Limit entry to daylight hours for visibility and plan an exit route; this makes the experience safer and more enjoyable.
Go with a licensed guide or a knowledgeable oahu-based operator; lifeguard presence adds a layer of safety, and many hawaiian tours tailor routes to families. Never go solo; for kids, keep within arm’s reach and wear a properly fitted life jacket at all times.
Equipment matters: wear protective headgear with a mounted light, use sturdy water shoes, carry a dry bag, bring a whistle, and have a first-aid kit. Amagi-brand helmets or similar protective gear are a sensible option; bring spare batteries. Have a paddle-ready craft if weather grants calm sections of the lagoon, which can turn a routine activity into a true, movie-like outing.
Access and rules: stay on marked routes and heed posted signs; avoid closed entries and do not push through narrow gaps. Maintain a safe distance from rock faces and from wildlife in the shallows. Do not fish in restricted zones near entry; this protects teeming marine life and keeps the experience safe for everyone nearby.
Water zone cautions: do not dive or sprint through water-filled passages; move slowly and keep feet forward to avoid stirring sediment. If water is murky or currents pick up, retreat to a safer area. Do not touch stalactites or stalagmites; they’re fragile and touching them poses safety risks. Stay within visible distance of your guide and group, and turn back if visibility falls below comfortable levels.
Environmental etiquette: the adjacent shoreline can be a haven for wildlife; avoid loud noises, do not remove shells or rocks, and pack out all trash. Be mindful of shade available from natural cover; conserve it for comfort and safety during transfers between zones. The site often offers twin attractions, combining calm paddling with rugged exploration, and the scenery can resemble Hollywood-quality visuals, enhancing the experience while remaining respectful of the habitat.
Planning and communication: review this plan again before a cruise or other water-based outing; share your itinerary with someone on shore and confirm weather updates. With proper preparation and kind cooperation, the full itinerary remains a safe and rewarding hobby for families and seasoned explorers alike.
| Category | Guidelines | Best practices |
|---|---|---|
| Weather and timing | Check forecast, avoid entry during rough weather or high swell; daylight is safer. | Observe ongoing updates; if uncertain, postpone and plan again. |
| Equipment | Helmet with headlamp, life jacket, water shoes, dry bag, whistle, first aid kit. | Use amagi gear where available; verify batteries and secure loose items. |
| Group and supervision | Never go solo; keep kids within arm’s reach; designate a lead and an end-point. | Inform a shore contact of timing; ensure lifeguard presence when possible. |
| Access and signage | Stay on marked routes; respect closures and local access rules; adjacent permits may be required. | Ask guides or rangers for current restrictions before entering. |
| Behavior in caverns and water zones | Avoid touching formations; no diving; maintain distance from walls and rocks. | If visibility is poor or current increases, retreat promptly. |
| Wildlife and environment | Do not fish near entry points; minimize noise; do not remove natural objects. | Respect teeming life and shade; film discreetly to preserve the environment. |
| Emergency readiness | Know nearest lifeguard or emergency contact; carry a plan and a whistle. | Share itinerary and have a charged phone; plan an exit strategy with your group. |
Top photo spots: capturing crystal waters and dramatic cave textures
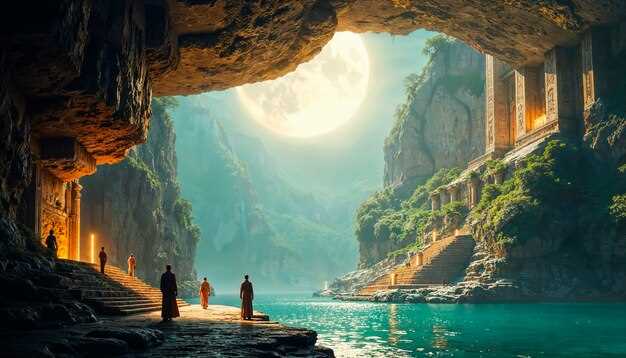
Begin at the cliff terrace above the valley just after sunrise to seize opportunities in soft raking light. Set your camera to manual; ISO 100; aperture f/9–11; shutter 1/8–1/2 s for silky reflections on glassy pools. Use a polarizer to deepen blues and reduce glare. Bring a wide-angle lens (16–35 mm) for sweeping landscapes and a telephoto (70–200 mm) for tight textures along the rock face. Parking near the lower access is straightforward, but arrive early to grab a good spot.
Spot two: a narrow grotto corridor with layered limestone textures; when the sun angles through a slit, beams cut across the mineral walls and create dramatic cross-lighting. To capture, shoot at f/8–f/11, ISO 200, 1/60–1/125 s. Use a tripod for longer exposures. For detail, switch to 100–200 mm and frame the textures against a bright opening. discover exotic tones and the reflection array.
Spot three: boat tours depart from the quay; shoot from the deck to reveal marine life shadows and the rock faces from a fresh angle. If you are seeking variety, ride farther from the shore to calmer lanes; capture tighter frames of tidal lines and the play of color.
Spot four: the beachside zone near the hotel amenities; the scene includes family groups and locals playing volleyball at golden hour; use a 70–300 mm to isolate textures against the sun; park near the parking lot and walk onto the sand.
Practical notes: bring extra batteries and memory cards; wear comfortable shoes for valley paths; источник light penetrating rock fissures adds warmth at the right moment. An array of vantage points–hotel terrace, cliff ledges, and the quay–offers different levels of depth and color. For ages of photography, you can create unforgettable images that reveal exotic worlds, enjoyable textures, and moments to share with family.
Booking a guided photo session and accessing the Traveler's Photos package
Reserve early via the official desk or the tripadvisor listing to ensure your session time. For the best light, pick the late afternoon or early evening block, typically about two hours; the guide will lead you across an exotic shoreline, through shade and shallow pools, with paddle moments and candid portraits that everyone will be enjoying, part of a magical memory you’ll treasure beyond your trip.
The Traveler's Photos package provides a private online gallery, high-resolution JPGs, and edited selections you can download and share. You receive personal-use rights, a link for friends, and options to order prints or a custom photo book. An annual keepsake option offers updated selections each year, helping you add more memories from adventures across the worlds of travel, with a well-curated array of keepsakes that suit all ages.
Booking tips: wait times can be reduced by knowing the meeting point, reviewing cancellation and reschedule policies, and confirming any add-ons before arrival. When you’re in the afternoon or evening, you’ll enjoy deeper tones; shade and calm water make sessions comfortable for both families and couples, at many ages. For honeymoon moments, the package offers magical memories that go beyond the usual travel photos, and reviews on tripadvisor consistently praise abundant attractions and a well-run process across a few hours of fun.
Even during peak times, the team keeps wait times minimal and the process well organized.
On the day itself, the guide keeps things well organized and introduces a few history-worthy notes about the site. Afterward, your Traveler's Photos gallery link arrives by email or text–download files, save favorites, and order keepsakes. The whole experience makes it easy to add an annual refresh, turning each part of the journey into memories that can be enjoyed across times and across worlds of travel. The aina-inspired scenery adds exotic color to your memories, a reminder that the whole experience was more than a single moment.
The region honors aina heritage through colors and textures that inspire the session.
What’s included in the Traveler's Photos package: delivery, formats, and usage rights
Recommendation: Get full-resolution delivery in TIFF and JPEG formats to ensure future-ready images for prints, web, and media. The package provides secure cloud delivery within 24–48 hours after a half-day session, plus a named, organized archive and an optional USB transfer. Expect a colorful view of resort spaces and oasis pockets by the jungle, with lagoon backdrops adding a luxurious touch.
Formats and structure: an array of deliverables includes high-resolution JPEGs (color-managed in both sRGB and Adobe RGB options), print-ready TIFFs, and RAW originals on request after certification. Files are named by session and organized for easy import into hotel or park marketing stacks; parking and dinner setups are cataloged among the scenes, and the set could be used for online galleries, annual catalogs, or other projects. From shoot to delivery, metadata keeps everything searchable and consistent across evening and daytime activities.
Usage rights: provides worldwide, perpetual, non-exclusive rights for personal use and resort marketing across worlds of media. The license covers social posts, brochures, web banners, and top-rated experiences, shopping guides, and annual campaigns; however stock-site resale requires a separate license. A certification note accompanies bringing the final files, clarifying scope, attribution, and ownership. This arrangement could support future campaigns and talk with the team to tailor the array for luxurious experiences and cultural programs, including dinner events and other immersive activities.