


Begin with a three-point setup in Lightroom Color Grading: Shadows, Midtones, and Highlights wheels, then keep Balance near 0 and fine-tune with small shifts. While you work, compare with the original exposure to keep color believable. Try starting with: shadows hue -8, saturation -2; midtones hue +8, saturation +6; highlights hue -4, saturation +12. These values give you a solid baseline for most outdoor scenes.
To dial in mood, reference natural light: imagine a banyuwangi dawn or a harvest golden hour; push warm tints in the shadows and cool down the highlights to create depth. The approach adalah a practical anchor for color decisions. In the HSL/Color panel, adjust Hue in small steps (−5 to +10) for Reds and Oranges, then tweak Saturation to avoid oversaturation. For a delicious, balanced look, keep skin tones stable within a ±5 degree hue range and check on a neutral gray card.
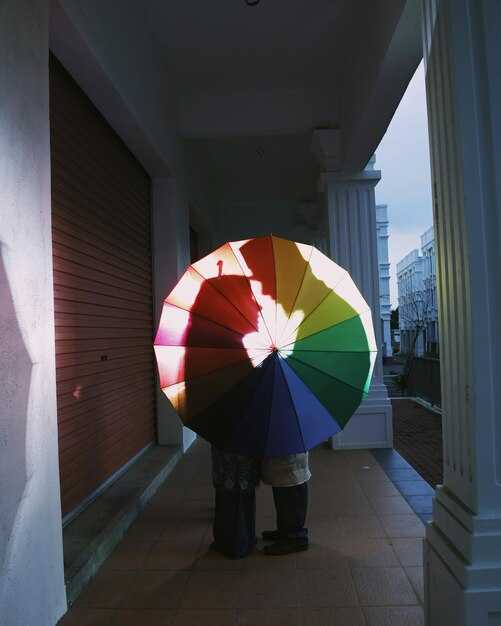
Treat reference artworks from your sekolah as a guide, not a rule. Referred studies help anchor color decisions, and a homage to a favorite photographer can be a learning tool. If you credit a color idea to azwar or another creator, note it in your log so the chain of decisions remains transparent. When you share edits in a team project, avoiding reuse without permission is punishable, so keep your notes clear. After serving progress to your team, take a bersantap break and return with fresh eyes that your peers loved.
Once you have a solid baseline, build a workflow that travels like a railway line across your images. Create a color grade chain: a global base, then regional tweaks for each shot, then a refinement pass on the wheels. Save presets for different looks (cinematic, earthy, cool) and color-match with the Eyedropper and Reference panels. The goal is to serve consistency across a batch without feeling repetitive.
New ideas in Lightroom color grading are best explored with discipline and curiosity. Referred notes help you trace what worked, and the results can be showcased as a small homage to your learning path. When you publish, mention the sources and keep your audience in mind: show how a simple adjustment, such as shifting shadows by -8 and midtones by +8, can influence a scene with a railway-like forward momentum. If readers say they loved the look, you’ve built trust and a serving template for future projects, including artworks from banyuwangi to your sekolah portfolios.
201812 Colours LR: Quick, actionable steps for Lightroom color grading
Begin with a recommendation you can act on now: set the Color Grading shadows to a cool blue and highlights to a warm amber, then tune balance to taste. This membekukan the mood and gives you a solid base to build from, even if the scene involves mountain light, caves, or reefs, and you want a controlled, non-destructive workflow.
- Base correction and profile: set White Balance to about 5200K with Tint around +6 to balance green/magenta. Choose Adobe Color as the profile for a flexible starting point, then adjust Calibration to align primary colors: Blue Primary Hue -12, Saturation -6; Red Primary Hue +5, Saturation +2; Green Primary Hue -4, Saturation -3. This keeps the look grounded and ready for a cohesive color grade, whether behind a crowded carnival scene or a quiet landscape with stones and citadels in the frame.
- Color Grading setup: in the Color Grading panel, set Shadows Hue to about 210–220 (cool), Saturation 12–18; Highlights Hue to about 50–60 (warm), Saturation 8–14; Midtones can stay near neutral or lean slightly warm (Hue 20–40, Saturation 6–12). Adjust Balance toward highlights by +12 to +20 if you want the warm tone to read more strongly on the face or rear light, and toward shadows if you prefer a cooler, more cinematic feel. This is where pengaruh of your palette begins to shape the mood around the subject and environment, including keliling the subject with a unified tint.
- Global contrast and tone curve: apply a gentle S-curve on the Tone Curve – Highlights -8, Lights -4, Darks +6, Shadows +3 for a natural lift without clipping. For scenes with gambang light or luminous reefs, keep the curve subtle to avoid harsh edges around caves or textured rocks, helping the render stay true to the scene (kepala and behind areas benefit from restraint). If you’re after a more vivid look, push the curve slightly but monitor skin tones closely.
- Fine-tune with calibration and color wheels: tighten color alignment by tweaking Blue Primary Saturation a touch less (reduce by 5–10), then nudge Green and Red primaries in small increments to keep the blue shadows clean and the highlights friendly. This alignment makes the overall image shaped and cohesive, even when you’re aiming for a cultural or cinematic vibe similar to a Kensington-inspired palette or a carnival-like glow.
- Local adjustments and masking: use Adjustment Brush or Radial Filters to refine color in key areas – for example, warm the skin by +300 to +500 Temp and +5 to +10 Tint in the face region (penumpang in the crowd may benefit from this). Isolate cooler shadows around rocks or cave entrances (tarik the hue toward blue) and brighten surrounding foliage to add depth without breaking the alignment of the overall grade. Keep the edits sederhana and easily repeatable so you can reuse them on similar shots later.
- Creative balance and consistency: compare multiple frames to ensure alignment of color across the set. If a frame feels behind the rest, adjust the global Balance and midtone warmth so the colored accents (cultural cues, gambang light, or carnival lighting) read consistently. This step helps ensure the look remains aligned with your intended mood, whether the scene leans toward a lively, tropical reef vibe or a calm, rocky mountain silhouette.
- Output considerations and presets: save a simple preset such as “Cultural Cinematic” that captures your Shadows/Hues/Saturation, Midtones warmth, and Calibration tweaks. Export in sRGB for web and LCD displays; preserve the original RAW file for future tweaks. This allows you to reproduce a consistent look across shoots, from intimate portraits to wide landscapes with caves, reefs, or citadels in frame, without reworking core steps.
As you review, look for areas to improve alignment around the composition: if the frame breathes better when the subject is placed along a line of alignment, adjust cropping to keep the subject’s head (kepala) and horizon aligned with key Elements on the frame, such as stones, citadels, or rock faces. If a shot feels too cool, pull the Highlights hue toward amber; if it feels too warm, push the Shadows hue toward teal. For coastal scenes with reefs, you’ll often find a lively, but controlled, color balance that preserves texture in rocks and the water’s depth without washing out detail. Follow these steps in a simple, straightforward workflow (sederhana), then continue (lanjut) refining global color while keeping local edits precise and repeatable. Khairul’s quick tip: keep an eye on the overall narrative you’re telling with color, not just on individual frames, and let the mood of the scene–whether it resembles a muted, reverent cavern (caves) or a bright carnival ambiance (carnival)–guide the final touch you apply behind the color wheels. The result should feel completely natural, with a cohesive palette that reads as a single, shaped aesthetic rather than separate, mismatched tones.
Choose a reference look and define the mood
Choose a reference look that matches the mood and push your color grading toward it. Gather 3–5 reference images from islands and parks that capture the vibe–calm dawn light, crisp midday color, or moody night tones. Use those references as anchors to guide hue, saturation, and luminance across the shot.
Map the reference to Lightroom’s main controls: shadows, midtones, highlights, and color wheels. Use keduanya cues–shadows lean toward the reference’s cool, highlights toward its warm, and midtones bridge the gap. Work melalui the reference by nudging hue, saturation, and luminance until the look feels cohesive, not forced.
Example: a samosir island night scene with hilly terrain and a kubah mosque in the area near a duty-free pier. The reference presented a balance of deep blue shadows and amber highlights; malaikat motifs glow subtly in the light. To mimic it, deepen shadows, lift warms in the highlights, and add a touch of cyan to the midtones. Melihat the result on a monitor helps ensure the mood holds, pelawan the harsh light with a gentle roll-off.
Practical tips: create an addition preset to reuse the mood across shoots. In the industry, this mood is often referred to as cinematic teal-and-orange. This dinamakan Mood Preset helps keep color shifts consistent across projects.
Test the look on different islands and island-wide scenes to check reach across devices. Use a flytizen-inspired palette for a modern edge, and consider a small acid tint on shadows to add bite without sacrificing skin tones. Align the shifts with the main reference so the mood stays coherent across scenes.
Tune global color: temperature, tint, and profile
Set global temperature to 5200K and tint to +2 as baseline for most daylight scenes. pertama, choose a baseline profile such as Adobe Color to establish color rendering, then evaluate the result on a neutral gray card to ensure accuracy.
Temperature acts as the first dial of mood. Use roughly 4800–5600K for daylight and 3200–4200K for tungsten, adjusting by 150–300K when the scene shifts. Tint moves opposite to the cast: +5 to +10 warms greens and skin tones, -5 to -10 cools reds. Keep highlights and shadows balanced and tanpa clipping, and aim for natural transitions rather than obvious shifts.
Profile choice matters: use Adobe Color for vibrant color, Adobe Neutral for faithful rendering. Though Color yields punchier greens and reds, Neutral preserves subtler transitions. Thousands of tests across scenes show that starting with a couple of profiles is efficient; encouraged by a pasukan of editors and perancang teams, and belas variations exist, but the goal is a quick, reversible baseline. Afterwards, fine-tune temperature and tint to suit the shot.
The Calibration panel lets you fix global biases by nudging Red, Green, and Blue primaries. Move Red toward magenta by -6 to -12, Green toward yellow by -4 to -8, Blue toward cyan by +4 to +8. Keep changes subtle to avoid gurita-like color casts in shadows. If foliage carries sayuran tones, a small hue tweak helps restore balance. Place each adjustment diletakkan in a clear order, then recheck skin tones and sky after the tweaks. You need a careful test across several targets.
transit between looks should feel deliberate. After global tweaks, copy settings to related shots and adjust per scene to preserve cohesion for the bandar of footage. In gold-lit scenes, lean warm; in cloudy interiors, push toward cooler neutrals. Use gold highlights carefully to preserve realism, then track with the histogram to avoid clipping and with the color wheel to keep hue relationships stable. afterwards, inspect a neutral gray and a skin-tone patch to confirm accuracy.
Verification and consistency: tanya yourself if the result communicates the intended feel; use a quick side-by-side reference to check for drift. The flytizen crew and pasukan editors reported impressive improvements when global color aligns with a chosen profile and a light temperature tweak. The kemewahan of a simple, repeatable workflow, with diletakkan presets and a consistent calibration routine, shines as you deliver projects at scale. afterwards, save a master preset and share it with your team for thousands of future shoots. For travel scenes at port towns (bandar), this approach points toward quality that menunjuk.
Refine hues using the HSL/Color Mixer
Warm skin tones by nudging Orange toward red: Hue -6 to -10, Saturation +6 to +12, and Luminance -3 to -7. This quick move yields a flattering base without distorting overall color balance.
Balanslaşdırılmış başlanğıc nöqtəsi üçün düzəlişləri hər bir şəkil üçün iki və ya üç rəng aralığına yönəldin və təsiri yoxlamaq üçün əvvəl/sonra görünüşündən istifadə edin. Rəng intizamı haqqında əsrlər boyu hikmət göstərir ki, səliqəli, vahid görünüş geniş dəyişikliklərdən daha çox diqqətli düzəlişlərə əsaslanır.
- Dəri tonları (Narıncı, Qırmızı):
- Narıncı: Rəng -6-dan -10-a; Doyma +6-dan +12-yə; Parlaqlıq -3-dən -7-yə
- Qırmızı: Ton -2-dən -6-dək; Doyma +3-dən +8-dək; İşıqlıq -1-dən -5-dək
- Səma və mavilər (Mavi, Su rəngi):
- Mavi: Ton -6-dan -12-yə; Doygunluq -0-dan +5-ə; Parlaqlıq -4-dən -10-a
- Aqua: Ton -4-dən -10-a; Doyma +0-dan +6-ya; İşıqlıq -2-dən -6-ya
- Bitki örtüyü (Yaşıl, Sarı):
- Yaşıl: Ton -6 -dan -12-yə; Doyma -2 -dən +8-ə; İşıqlıq -4 -dən +6-ya
- Sarı: Ton +2-dən +8-ə; Doygunluq +4-dən +10-a; Parlaqlıq -2-dən -6-ya
- Aksent və əhval-ruhiyyə (Bənövşəyi/Magenta, Narıncı):
- Bənövşəyi/Magenta: Rəng çalarlığı -2-dən +6-ya; Doyğunluq +2-dən +6-ya; Parlaqlıq +0-dan -4-ə
- Narıncı (qlobal əhval-ruhiyyə): dəri tonlarını təhrif etmədən istiliyi gücləndirmək üçün qənaətlə tənzimləyin
Tənzimləmələrin sayını mülayim saxlayın və həmişə günorta işığını nəzərə alın; bir rəngdəki kiçik bir dəyişiklik tez-tez digərlərində dalğalanma effektləri yaradır. Dəyişiklikləri dəqiq lazım olan yerlərə tətbiq etmək üçün Hədəfli Tənzimləmə Alətindən istifadə edin, qalan hissəsi olduğu kimi qalsın. Məqsəd, tamaşaçıya səylə edilməmiş kimi görünən bitkin bir palitra yaratmaqdır.
Praktikada, əsas dadı üstələmədən boşqabı canlandırmaq üçün rənglərdən səpinti şəklində istifadə edin. Sərhəd motivləri və kostyum detalları zərif parçanın üzərində yerləşən bandarda festival ab-havası (lomba) olan səhnə üçün dəri dəqiqliyini qoruyarkən quruluşu tamamlamaq üçün mavi və yaşıl rənglərə üstünlük verin. Əgər mövzu yumşaq günorta işığında Juliana-dırsa, qışqırmadan gözü oxşayan əsl, təbii görünüşə nail olun.
İş prosesində assistentin rəhbərliyi ilə rəngə addım-addım inşa etdiyiniz bir təməl kimi yanaşın. Pelanggan layihələri üçün bu yanaşma, parça toxumasından tutmuş kostyumdakı motivlərə qədər çərçivənin bütün aspektlərində sakit, inandırıcı bir əhval-ruhiyyə yaradır, nəticədə səylə edilmiş və zərif görünən bir şəkil dəsti əldə edilir - sanki incə səpkiləri olan pancake-lərin dadını çıxardırsınız.
Kölgələri, orta tonları və işıqları rəng dərəcələndirmə çarxları ilə balanslaşdırın
Balansı +8-ə qoyun və kölgələri mavi rəngə (Çalar 210, Doyma 30%), orta tonları isti narıncı rəngə (Çalar 30, Doyma 25%), işıqları isə kəhrəba rənginə (Çalar 50, Doyma 30%) doğru itələyin; bu baza təbii dəri tonlarını qoruyarkən kölgələrdəki detalları saxlayır.
Orta səhnələr üçün, bu kombinasiya yuyulma olmadan idarə olunan, kinematik görünüş təqdim edir və müxtəlif kadrlar üzrə etibarlı performansı dəstəkləyir. Daha soyuq əhval-ruhiyyə istəyirsinizsə, Kölgələrin Çalarını 200-210-a sürüşdürün və Doymanı 20-25-ə endirin; daha isti parıltı üçün, İşıqların Çalarını 55-60-a qaldırın və Doymanı 35-40-a yüksəldin. Nəticələri william və şəhər mənzərəsi çərçivələrindən olan istinadlarda müqayisə edəcəyiniz üçün, histogram ən parlaq bölgələrdə heç bir kəsilmə göstərməyənə qədər incə tənzimləmə edin.
Jivaqo üslublu sahil və ya dağ yamacı ardıcıllığı yaratmaq üçün Kölgələri 220-230 (Doygunluq 25-35), Orta tonları 25-40 (Doygunluq 20-30) və İşiqları 40-60 (Doygunluq 25-35) istiqamətində əyin. Tarazlığı sıfıra yaxın saxlamaqla formanı qoruyun ki, heç bir diapazon həddindən artıq vurğulanmasın; bu, dağlar, şimal landşaftları və ya şəhər продолжения kimi səhnələrdə görünüşünüzü tamamilə uyğun saxlayır.
Praktiki bələdçi kimi, dəmir yolu, hava limanı, şəhər mənzərəsi və ya adi günlərdəki yerlər kimi yerlərə ardıcıl yanaşın. Məqsədiniz rəssama xas alovlu bir çalar yaratmaqdırsa, dəri tonlarının detallarını qurban vermədən Kölgələr və ya İşıqlar üzərində bir az dəyişiklik etmək kömək edə bilər. Yaşlı əvvəlki parametrlər kolleksiyası, həmçinin zhivago janrında olan kadrlara bənzər müasir məzmun bu parametrlərə əməl edə bilər, ton vermək istədiyiniz vizual məzmuna uyğun olaraq kiçik düzəlişlər etməklə.
| Təkər | Rəng çaları diapazonu | Doyma diapazonu | Məsləhətlər |
|---|---|---|---|
| Kölgələr | 210–230 | 20–40 | kölgələri kəsmədən sərinlədin |
| Orta tonlar | 25–40 | 15–35 | dəri tonlarını təbii saxlayın |
| Əsas məqamlar | 40–60 | 20–40 | aşırı parlaqlıqdan qaçının |
| Balance | -20-dən +20-yə | N/A | işıqlara müsbət, kölgələrə mənfi |
Rəngi kalibrləyin və uyğunluq üçün ixrac profilini təyin edin
Sadə, təkrarlana bilən bir rutinlə başlayın: monitorunuzu 6500K və qamma 2.2-yə aparat cihazı ilə kalibrləyin, sonra profili kilidləyin. Bu, ofisdə və təhsilə bağlı sekolah layihələri zamanı günlər ərzində sabitliyi təmin edir. Ekosistemdəki cihazlar arasında keçərkən rənglərin sabit qalmasını təmin etmək üçün profili iş axınınıza daxil edin.
Lightroom Classic-də Kalibrləmə panelini açın və neytral Kamera Profilini (Adobe Standard və ya Camera Neutral) seçin. Qırmızı İlkin, Yaşıl İlkin və Göy İlkin rənglərini kiçik dəyişikliklərlə tənzimləyin. Praktiki başlanğıc nöqtələri: Qırmızı Ton -2, Qırmızı Doyma -5; Yaşıl Ton +1, Yaşıl Doyma 0; Göy Ton -3, Göy Doyma -4; İşıqlıq 0. Sadə düzəlişlər baza rəngini sabitləndirir və bu texnikaları Tokoh layihələrində təkrar istifadə edə bilərsiniz.
Ardıcıllıq üçün ixrac: İxrac dialoq pəncərəsində, veb çatdırılma üçün Rəng Məkanını sRGB olaraq təyin edin. Çaplar üçün, əgər printeriniz dəstəkləyirsə, Adobe RGB və ya ProPhoto RGB istifadə edin. Ayrı ixrac əvvəlcədən təyin edilmişləri statusu uyğun saxlayır: biri veb üçün (2048 px uzun kənar, keyfiyyət 90%), biri çap üçün (maksimum çözünürlük). Məşhur palitralardan istinad kimi istifadə edin və unutmayın ki, bu əvvəlcədən təyin edilmişlərə sadiq qalmaqla rəng dəyişikliyi minimuma endirilməlidir.
Keyfiyyət yoxlamaları: test JPEG-ləri ixrac edin və kalibrlənmiş monitorda, telefonda və siantan studiyaları və ya ofisdəki proyektorda baxın. Rənglər kiçik bir deltadan kənara çıxsa, Kalibrləməni yenidən yoxlayın, yenidən ixrac edin və yenidən test edin. Bütün layihə ərzində status jurnalını saxlayın və istehsal günləri ərzində tərəqqini izləmək üçün dəyişiklikləri layihə qeydlərinə daxil edin.
Sənədlər və istinadlar: icma məsləhətləri və profil nümunələri üçün wwwapcfr saytına baxın. Dizayn və kostyum çəkilişləri və ya hapsari ruhlu palitralar kimi yaradıcı ehtiyaclar üçün rəng istinadlarından ibarət ekosistem qurun. Anemon vurğularında və moda tərtibatında davamlı nəticələrə nail olmaq istəyirsinizsə, hər bir layihə üçün ayrıca (ayrı) istinadlar saxlayın və bütünlüklə davamlılığı təmin etmək üçün eyni üsulları (üsulları) təkrar istifadə edin.