

 Skydiving in Queenstown – The Ultimate Aerial Adventure Over Lake Wakatipu">

Reserve your jump now with one of Queenstown’s licensed operators to secure a great opening over Lake Wakatipu. There are three major companies offering tandem jumps along the southern town, and reservations via the internet are simple to complete in minutes. If youre ready, you’ll get a clear briefing and a safety plan to keep your mind calm from preflight to landing.
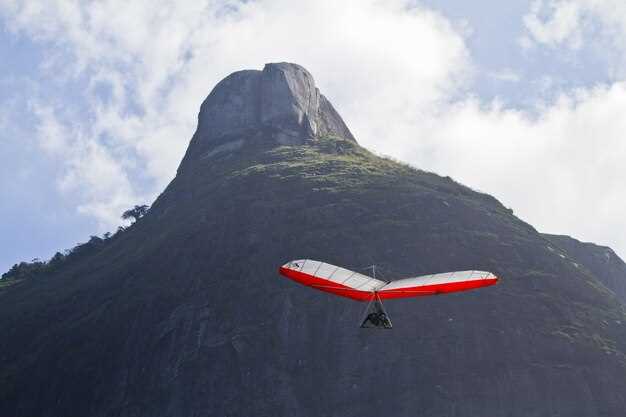
Most jumps operate at 15,000 feet with around 60 seconds of freefall, followed by a 5–7 minute canopy ride that reveals Lake Wakatipu’s glassy surface and the surrounding mountains. The drop zones sit just outside downtown Queenstown, giving you a dramatic view of The Remarkables as you ride the wind. Operators maintain strict safety checks and licensed coaches lead every step, so there’s no guesswork about what happens next. This memory stays with you ever after.
Expect a sharp safety briefing that covers posture, altitude awareness, and landing technique. The level of detail varies by operator, but all teams share the same standard of equipment and maintenance. You’ll hear the sound of the wind and your instructor’s guidance as you position your body; if something feels off, tell the mind team immediately–there’s no shame in pausing and asking for a slower approach. If youre new to this, ask questions during the briefing.
What to bring: sturdy athletic shoes, a credit card for video packages, and your camera if allowed by the operator. Most packages go from jump-only to video and photo bundles; the price range commonly sits around NZD 350–450, depending on whether you add a GoPro capture or a souvenir. The best time is morning when light is soft and wind is stable; some days there is a window that opens after dawn and lasts three to four hours. Night slots are rare, but the schedule can extend into twilight during peak seasons; check the operator page for exact opens. The internet is the fastest way to compare options and lock in your reservations.
There’s no better way to frame your Queenstown stay than a morning or afternoon freefall that lets you glimpse the lake, the Southern Alps, and the town from a rare angle. The experience has been loved by visitors for years, and many travelers come back for another ride, chasing that seconds-long thrill and the memory that lasts far beyond the landing. For those with reservations, start with a chat on the operator’s website and read the latest customer reviews–the best guides come from real riders and from trusted sources in Queenstown’s skydiving scene.
Practical guide: planning, safety, and maximizing the two-activities experience
Recommendation: Book a guided two-activities bundle at least three weeks ahead to lock the best slots, and choose a package with a refund option if plans change.
Plan your days around the base and location of the drop zone; the most dramatic scenes unfold around Lake Wakatipu with a view of the southern Alps and the remarkables. The two-activities bundle blends skydiving with another option, so you get an action-packed adventure and a chance to capture photos with the landscape as a backdrop. Whether you skydived before or this is your first time, guided staff will pace the briefing to your comfort level.
Booking tips: book upto four weeks ahead to secure the best slots, and look for a refund option in case plans change. Most operators offer transfers to the base and operate on specific days; if you were delayed, you can reschedule within the same bundle without losing your place.
Safety first: a concise briefing, licensed guides, certified gear, and a final check before exit. If you have medical conditions, inform the team; they can tailor the plan and adjust limits. Wear bright clothing for photos and keep hair tied back; staff monitor wind conditions and wind limit thresholds before release.
Maximize the two-activities experience by choosing combos around the lake that allow a quick transition; some bundles include a second activity such as a scenic flight, jet boat, or gondola ride, resulting in a bundle that takes only one morning or afternoon. If you love photos, opt for a package that includes a professional guide filming from the base, so you capture scenes from the sky and the water. The view of the southern panorama makes the white lake and sky pop in photos, creating images to share with loved ones. If you wish to return, many operators offer another day option with a discount for returning guests.
Night options exist in certain locations; check whether a night views add-on is available and plan around it for a different mood and additional photos.
What to Expect on the Lake Wakatipu Jump: Arrival, briefing, and exit process
Arrive at least 60 minutes before your jump to complete check-in, gear up, and receive the safety briefing. The Queenstown base sits beside Lake Wakatipu, so you’ll glimpse stunning scenery as you wait. A well‑organized team verifies weight, confirms waivers, and explains the session sequence, including where to stand and how you’ll move into the exit.
In small groups of two to four, your instructor covers signals, body position, and how to stay relaxed during the exit. The briefing outlines what you’ll feel, what to do if you feel uneasy, and how the helmet cameras capture footage from two angles. The video option gives you a lasting record of the drop and that skydived moment over zealand’s famous landscape.
On the craft, you strap in, listen for the countdown, and wait for the go‑ahead. The door opens, you lean into the void, and you exit with your instructor guiding the way. You’ll glide over a dramatic canyon and the lake‑front scenery below, wind rushing past and a breathtaking view filling your senses. Drops typically last 45–60 seconds, reaching speeds near 200 km/h, before you deploy and descend toward the landing zone.
When you land, the crew helps you unclip and you head to a post‑jump area where the footage is reviewed. The results often include video and stills, and you can save the clips to your device or cloud. Downloads are usually ready within 24 hours, giving you access to the amazing moment that shows your drop over zealand. If you want to extend the day, the team can arrange rafting or canyoning for a full adrenaline voyage, or you can simply savor the scenery and plan your next adventure with their crew.
Nevis Swing Combo: How the tandem jump leads into the swing and what you’ll feel
Book the Nevis Swing Combo for a clean, cinematic transition from tandem jump to the swing. A jumpmaster conducts final checks, and you’ll be securely attached in your chosen seat before you step to the edge. The iconic river valley frames the moment, and centre staff guide access to the harness rings with calm precision. This activity suits first-timers and adrenaline seekers alike, offering flexible timing and seating options.
How the tandem jump leads into the swing: you lean out, count down, and release. Expect seconds of freefall before the line tightens and the swing kicks in. The velocity ramps quickly as the arc carries you outward, turning the quiet moment into dramatic, white-knuckle motion. You’ll hear the rings of the harness and feel the wind surge around you, then settle into a smooth, rhythmic swing that lasts across multiple passes. They keep you securely connected to the main cable at all times, with guidance from the jumpmaster throughout the sequence.
What you’ll feel: a mix of wind, gravity and momentum. The river and distant shores rush toward and away from you as the arc widens, delivering alternating g-loads and brief moments of weightlessness. The sensation is iconic and much different from everyday movement, a mind-bending blend of exhilaration and focus. Youll sense a peak velocity mid-arc, then a gentle slowdown as you approach the end, landing on the platform with a rush you’ll loved sharing in a video. If you opt for a night slot, the dramatic lighting adds another layer of awe and quiet to the ride.
Practical tips to maximize the experience: book through the centre’s offer page to secure discounts and preferred times. Arrive early for access checks, wear snug clothing, and leave valuables in the locker. The jumpmaster will give you clear instructions and a quick video rundown of the sequence, making it easy to stay in the moment. After the ride, the surrounding area offers easy connections for a lakeside cycling route or a calm riverside stroll, letting you decompress and soak in the world you just conquered.
| 舞台 | Sensation | Approx. duration | Notes |
|---|---|---|---|
| Tandem Jump | Controlled release, wind, initial thrill | seconds | Jumpmaster cues, securely attached |
| Swing Kickoff | Acceleration, arc begins | seconds | access to main cable, chosen seat |
| Mid-Arc | Rhythmic movement, velocity peak | seconds | iconic views, river below |
| Finish & Landing | Deceleration to platform | minutes | video option available |
Safety, Instructors, and Gear: Certifications, briefings, and equipment you’ll use
Choose a licensed operator with Civil Aviation Authority approval and instructors who hold a current tandem rating; youre guaranteed a solid safety briefing and a thorough harness check before boarding the aircraft.
- Certifications: Operator compliance with national aviation standards, regular airworthiness checks on the aircraft, and documented maintenance schedules ensure access to well‑maintained gear and routines. Instructors should hold formal tandem qualifications and ongoing medical clearance, with recent refreshers to stay up to date on techniques and safety signals.
- Instructors: Expect experienced staff who supervise preflight checks, line up exits with you, and monitor weather and timing. A calm, quiet briefing style helps you see the highest safety standards in action and builds confidence for the altitude you’ll reach.
- Gear readiness: The kit includes a certified harness system, main canopy sized for your weight, a reserve, helmet, goggles, altimeter, and a backup radio or signaling device if provided. Some packs include an automatic activation device (AAD) for added redundancy; operators explain how these systems work and when they activate. Equipment looks clean, well‑maintained, and tested before each jump.
Briefings
- Preflight briefing covers exit technique, body position, and signals for hooks, cutaways, and landing options; you’ll also discuss weather, jump altitude, and the plan for the wave of air you’ll feel during freefall.
- Emergency procedures are explained clearly, with practical demonstrations on what to do if you feel uncomfortable or if equipment behaves unexpectedly; you’ll walk through steps until you and the instructor feel prepared.
- Sign‑offs occur after checks of headset fit, harness snugness, and reserve handling; you’ll be asked to acknowledge you understand the procedure before the door opens.
Equipment you’ll use
- Helmet and goggles for eye protection; choose a snug fit to keep sound and wind from distracting you during ascent and exit.
- Harness with a two‑point or four‑point system that secures you to the instructor and supports posture during the exit and freefall.
- Main canopy and reserve canopy, with the reserve backing up the main; you’ll be shown the lines and toggles and how to steer to safe landing zones.
- Altimeter on the wrist or a hip‑mounted device so you can track duration and the next phase of the ascent and descent.
- AAD option available with a clear briefing on its function and a plan for manual deployment if needed; the instructor reviews why it may or may not be used in your jump.
Access and location context
- Queenstown access to the staging area and aircraft deck is straightforward, with clear instructions from the ground crew about arrival time and weather checks; plan to arrive early so you aren’t rushed and can absorb the safety briefing fully.
- Altitude options commonly reach around 12,000 ft, with possible higher ascent up to 15,000 ft when conditions permit; next jumps may adjust altitude based on wind and visibility for the best experience over the mountains and lake scenery.
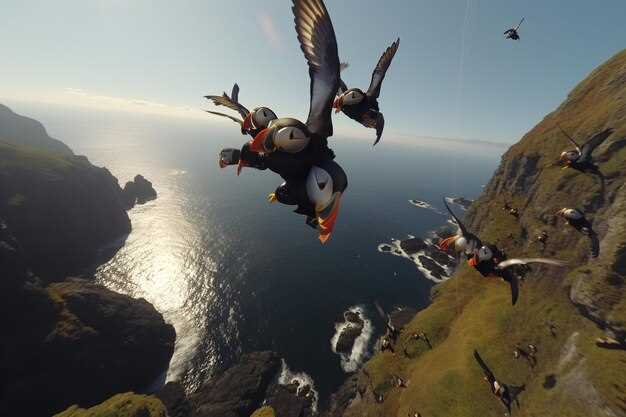
- Duration of the freefall portion typically lasts about 45–60 seconds from 12,000 ft, accompanied by a smooth canopy ride that lets you enjoy the sounds of wind and the quiet of the descent in stages; you’ll feel the air, hear the wave of velocity, and see the coastline and Remarkables range unfold.
Notes and источник
источник: operator safety manual and on‑site briefing card are provided to you at the briefing; ask questions if anything feels unclear and you’ll receive direct, practical answers that focus on your comfort and control.
Preparation and Gear: What to wear, carry, and avoid before jump day
Wear a moisture-wicking base layer and a lightweight windproof outer layer, skipping cotton entirely. Choose white or light-colored tops to reflect sun and keep you comfortable as you climb to jump altitude. For legs, select stretchable leggings or thin trekking pants rather than denim, and add a light fleece if mornings feel cool. Opt for closed-toe shoes with secure laces and a grippy sole; bulky boots slow you down and aren’t needed. If your hands run cold, thin gloves work and come off quickly during checks–coil them in a pocket for the ride back down. This setup helps you look ready and keeps your body temperature steady, so you can focus on the breathtaking views without fuss.
Carry only the essentials: your booking confirmation, a government ID, and a small amount of cash or card for extras. Keep your phone secure in a zip pocket; many operators provide lockers for personal items. If you plan to capture memories, check options for video and photos, including bundles that bring discounts when you book a package. A compact camera on a wrist strap is sometimes allowed, but follow the operator’s policy to avoid delays. Most flyers bring a lightweight charger or spare battery for any action cam you’ll use during the ride. You’ll appreciate a minimal kit that respects the level of comfort you expect while still giving you excellent chances to relive the moment through video and photos later.
Before jump day, avoid heavy meals and alcohol for at least 12 hours; stay hydrated with water. If you’re sensitive to caffeine, keep intake moderate to prevent jitters at the height. Do not carry bulky bags or valuables on jump morning; they slow the briefing and can distract you from the safety checks. Mind wind conditions and check the forecast–strong gusts can affect speeds and your calm during ascent. If sound is a concern, use light ear protection or simply prepare yourself for wind noise; it’s normal and part of the experience. A well-planned snack, a small bottle of water, and a calm mindset help you feel excellent from first glance to the moment you look down at Lake Wakatipu on the rise.
On jump day, arrive early to settle into the safety briefing and gear check; you’ll be guided through the process with clear instructions and a friendly tone. Most jump operators in Zealands offer different timeslots, so you can choose the next available window that fits your plan and still leave room for other activities, such as boating or crazy rafting, later in the day. Pack light and keep your attention on the trainer while they explain body position and exit technique; a focused mind makes heights feel more controllable and your first jump smoother. If you wish, you can review a quick practice video the night before to reinforce the correct look and posture, then apply what you learned during the jump for a more confident flight and faster recovery after landing. This approach gives you a calm, memorable experience and sets up better opportunities for more discovery in future flights, whether you’re chasing breathtaking views or chasing discounts on bundles that include your video and photos.
Booking, Weather, and Timing: Best windows, cancellation policies, and tips
Book the early-morning window online to access quiet air and give thrill-seekers their best start. Reservations tend to fill fast, especially for three or more; they offer the tightest timing around dawn, with a mountain-base pickup and a short boat transfer to the launch site. On arrival, staff brief you, fit you for parachutes, and guide you toward the aircraft, then hand you to the crew for the lift and the jump. This process keeps your party together and makes the first jump smooth for them.
Best weather windows are around dawn to mid-morning, typically from 7:00 to 10:00, when winds stay within the limit and visibility is high. When forecasts show stronger winds or low clouds, operators move reservations to the next suitable slot rather than cancel; some operators offer additional options for a flexible schedule. If the forecast goes uncertain, the team will move to the next slot. Real-time checks rely on a local источник of weather data, lake conditions, and mountain wind patterns to decide if a jump can proceed.
Cancellation policies vary by operator, but most offer a reschedule up to upto 48 hours before the booked time, or a credit toward a future jump; refunds are rare if you miss the slot. Always confirm where you can make changes, and keep your reservations current. If weather closes operations, expect a credit or alternative date according to the policy.
Tips: arrive early to complete check-in and get comfortable with warm layers and gloves. Use online access to check the latest forecast and the where-to-meet details; footage is usually available after the jump, and you can download it or share it directly. The duration is around 15–20 minutes on-site, including briefing, roughly 60 seconds of freefall, and a 4–6 minute canopy ride. After your jump, consider rafting or a small mountain-boat outing to extend your Queenstown day, then share your white horizon footage with friends.