


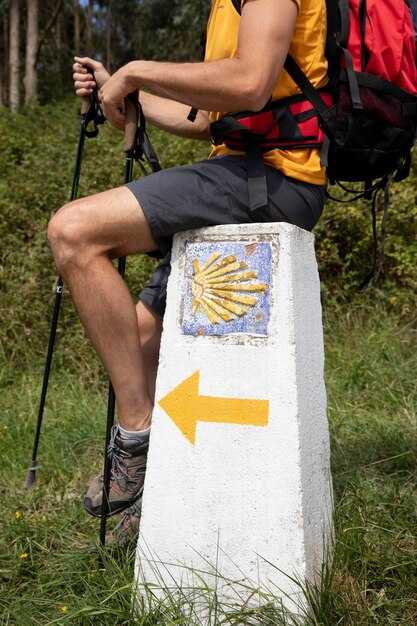
Begin with a small-group arrangement and pack a ready-made vegetarian meal for day one of climbing along tough, rocky terrain, ensuring you secure energy for the most demanding sections without stalling that might slow you. Keep the pace reasonable and align with your partner’s tempo to preserve life-forward momentum across the ascent.
Expect a route that alternates rocky ascents with shaded paths, crossing sites tied to centuries of monastic life and the ursulines heritage. The largest overlooks reward patience, and the descent reveals micro-terrains that test balance without compromising safety. A small-group format shines here, enabling real-time adjustments and mutual support.
Insights from experienced leaders emphasize pacing, choice of rest stops, and inclusion of alpine-friendly meals. This 重要性 becomes clearer when you balance panoramic moments with attention to weather, wind, and shade. If you are looking for a 合理的 plan, thats the core idea: keep a flexible schedule and respect local rules.
In practical terms, build a packing plan around a vegetarian meal option, clean water, sun protection, and a lightweight jacket. The food choices should cover protein and carbs for long days, particularly if you climb on rocky sections. Carry as few as possible yet enough for the largest elevations you expect, and confirm any dietary restrictions with your host before departure. This approach respects local life and ensures inclusion of all participants.
With respect to safety, listen to your fellow travelers and stay on marked paths to protect fragile terrain. This approach makes the journey not only climber-friendly but also a meaningful experience for a lover of nature, history, and honest effort. Expect insights that reflect centuries of tradition along sites that connect people, food culture, and the land.
Tinos Tarampados to Komi Guided Hiking Tour: Day 1 – From Tinos Port to Steni Village
Begin at first light, walking with a light pack along a coast-to-hill track that climbs a gentle grade and reaches granite outcrops. The initial segment covers roughly 6–7 km, with an estimated walking time of 3–4 hours, including short rests. Along the way you pass quiet houses set among terraces, and you learn about remnants of local agriculture. A few switchbacks offer near sea views, and the route slowly rises through olive groves and scrub, setting the stage for deeper exposure to land and people.
The surface alternates between packed dirt and granite slabs, with gentle ascents and occasional level sections. On clear days, you can spot the harbor and the island’s inland ranges in the distance. This moment invites travelers to absorb insights into how farming rhythms shaped village life, a pattern still visible in terraces and water storage remnants.
Key waypoints and terrain insights
First waypoint marks the shoreline path where spray from the sea dries quickly in the sun, then a shaded alley leads to a granite outcrop used by shepherds to watch the valley. The second waypoint reveals a series of terraces, stone walls, and dry-stone irrigation troughs that illustrate agriculture’s long arc. Third, the route reaches the village edge where houses cluster along a narrow lane, offering a gentle descent into Steni and a chance to reflect on what was learned before the arrival at land’s end.
These points provide a mix of deep nature and human scale, with quiet hours designed to be suitable for most travelers. The climb is not steep, but consistent levels require conscious pacing to maintain energy and safety. Granite remains the dominant texture, with occasional red soil lending color to the hillsides.
Practical planning for Day 1
Arrive at the harbor well before sunrise to begin while the air is cool. Carry 1.5–2 liters of water per traveler, plus light snacks, and dress in layers that shed heat as you gain altitude. Footwear should be sturdy with good tread, as granite patches can be slick after dew. A hat, sunscreen, and a light windbreaker cover essentials for the open portions.
Time for rests depends on group size, but a typical pace allocates 4–5 hours on trail with breaks included. Check weather forecasts ahead of departure; if rain or drizzle is forecast, consider a longer, slower approach and plan post-lunch transport from Steni. The day concludes in a quiet part of the village, where guests can reset before continuing to second-day sections. Guides are available to answer questions and to educate travelers on the landscape, culture, and ongoing farming practices, with a focus on sustainable travel and responsible behavior, including recommendations to minimize impact on cattle and birds and to stay on marked paths.
Day 1 Route Overview: Key Waypoints from Tinos Port to Steni Village
Begin by stepping off the port quay toward the ktikado settlement, the first element of a practical day route. This option presents two options: a gentle start with water at your side and tiny tinian rooftops in view, delivering value for a vegetarian-friendly break ahead.
From ktikado, follow a combination of tracks toward karya, a Cycladic site celebrated for white houses and carved stonework. The route threads through settlements, offering cliffside views and a coastal layer of terraces that blends with the flowing coastline.
Midway, pause at a water fountain and a small market with artichokes and seasonal produce, a stop that blends culture and activity.
For the ascent toward higher ground, when you reach the next layer, seek a meeting with a local expert to discuss the connection between Cycladic industries and daily life on this tinos island, including functional insights about local crafts.
Arriving at Steni, select a final set of stops to absorb the views of tiny settlements and columned houses, plus a few sites showing traditional crafts; the included options for a short visit to a workshop or tea room ensure a rounded experience.
Key points included cover the port start, ktikado, karya sites, a market with artichokes, a meeting with an expert, and the Steni arrival.
Meetup Time, Meeting Point, and Guide Contact for Day 1
Set your alarm for 08:15 local time. The meeting point is the central village square, beside the old fountain and under a gnarled olive tree. Check-in begins at 08:10 and a brief safety talk precedes the walk. Bring water, sun protection, and a light snack; vegetarian options are available at the winery stop. This start emphasizes safety and simplicity to keep everyone comfortable and focused.
The day plan involves a gentle route with short segments and minimal elevation. It speaks to curious travelers who value depth over speed. Distinctive moments come at four stops, with the first at a small gallery, the second at a winery, the third along houses that illustrate preserved and modern design, and the fourth at a coastal overlook. Each stop contains context that educating about local culture while allowing time to reflect.
Boarding onto the transport occurs after the briefing, with a clear policy for pacing and regrouping. If you need a longer rest or want to capture more shots, indicate to the leader; in most cases, the pace is adjusted to maintain safety and comfort. The appointed person will be available by phone during the day to check in or report issues: +30 69 1234 5678 (WhatsApp).
| 时间 | 活动 | Meeting Point / Location | Notes |
|---|---|---|---|
| 08:15 | Meetup and check-in | Central village square, by the fountain | Safety briefing; group introduction |
| 08:30 | Walk to starting trail | Main street trailhead | Boarding the shuttle if needed; pace set |
| 09:15 | First stop: Gallery | Old town gallery street | Educational context; short visit |
| 10:00 | Second stop: Winery | Vineyard overlooking hills | Vegetarian options; tasting |
| 11:15 | Third stop: Village lanes | Residential district | Distinctive architecture; photo time |
| 12:00 | Final viewpoint and wrap-up | Cliff overlook | Reflections and Q&A |
| Stop | 亮点 | Duration | Notes |
|---|---|---|---|
| First | Gallery display; educating about local artists | 15 min | Short, insightful |
| Second | Winery tasting; vegetarian-friendly bites | 40 min | Depth of flavors; options |
| Third | Houses: preserved vs modern design | 20 min | Gentle stroll; curious discoveries |
| Fourth | Coastal lookout | 20 min | Most scenic photo opportunities |
Trail Terrain, Elevation, and Pacing for the Day 1 Stretch
Recommendation: start Day 1 with a controlled tempo, targeting 3.5–4.0 km/h on level terrain and easing to 3.0–3.5 km/h on ascents; plan a 10–15 minute rest at mid-point to hydrate and fuel. For a 9–11 km stretch, expect 3.5–4.5 hours of moving time and 1–1.5 hours of breaks, totaling 5–6 hours on the trail.
Terrain and Elevation Profile
The route begins near loutra with roots and rocky steps; the entry from the ktikado trailhead opens into a shade-dominated forest and then climbs onto limestone sections that become scree-like in sun. A small religious shrine sits beside the path, offering a moment of reflection and a sense of home to the community. Elevation gain for this stretch runs roughly 520–620 m, with short pitches reaching 12–18% grade before a gradual crest toward a coastal ridge. Distances span 9–11 km, delivering a stunning, extensive arc of terrain that highlights enduring views and the landscape’s roots through varied paths, from rocky roots to shaded forest.
Pacing, Breaks, and Inclusion
Two rest opportunities are built in: a mid-day pause after about two hours, and a longer lunch stop at a lookout where food choices are available. Whether you travel solo or with a group, ensuring pacing stays within the planned window helps anyone meet the meeting point on time. Loutra’s quieter lanes offer opportunities to speak with locals, observe regional food practices, and see artist showcases along the paths, making the day inclusive for people with different fitness levels. For 2-day plans, Day 1 ends at a village meeting point and leaves ample energy for the following section. An insight from a traveler in hanoi highlights the value of maintaining a steady rhythm.
What to Pack: Packing List for Day 1 Hike to Steni
Pack a lightweight 20–25 liter daypack with a snug hip belt to keep weight balanced as you arrive at the trailhead, with quick-access pockets for snacks and a phone. This setup is a truly functional start for Day 1 and helps you discover the most charming segments away from crowds, while staying ready for available shortcuts and intimate moments with nature.
Hydration is non-negotiable: carry at least 1.5–2 L per person, plus a small electrolyte option. A hydration bladder makes sipping on steep sections seamless, and a compact bottle can be tucked into a side pocket for easy access. Include sweet snacks and food options that are easy to eat on the move–fruit, nuts, energy bars–and a light lunch if you expect longer times between stops while exploring lush valleys and roots along the way.
Clothing and layers cover you for months of changeable weather: moisture-wicking base layer, a light insulating layer, and a compact rain shell in case of sudden showers. Choose breathable fabrics, add a sun hat, sunglasses, and sunscreen; pack an extra pair of socks to swap mid-journey after a short rest near distinctive landscapes and the intimate corners of the route. This keeps you warm without overheating and helps prevent impairments related to damp fabric or chafing.
Footwear and protection: sturdy trail shoes or light boots with good grip, plus a spare pair of socks. Sunscreen and lip balm are essential, as are insect repellent and a light windbreaker for breezier ridges. Include a small, thoughtful personal care kit to prevent blisters and maintain comfort on longer stretches through diverse scenery along the roots and around houses where locals live. If you’re visiting churches or other cultural sites, wear respectful footwear and avoid loud behavior.
Navigation and safety basics: map or offline route, fully charged phone with a simple navigator, and a compact power bank. A headlamp or small flashlight, whistle, and a compact first-aid kit cover most situations. Time your pace to the terrain and where daylight will be most forgiving, especially near home and away points along the way, and note a point where paths split for easy reorientation.
Other practical items: a compact towel, a camera or phone for photos, a waterproof bag for valuables, zip-locks for trash, a short, sweet snack stash, and a small blanket or camp towel for a short rest at a charming lookout. Keep your pack thoughtful yet compact so it stays truly manageable through the short morning window and well into the day.
If you expect to pass by houses or small churches on the way, move quietly and respect locals. Pets? Only if permitted; otherwise leave them at home to avoid impairments for wildlife and other visitors. Bring a leash if allowed and bag supplies for any needs along the way. Diversify your route thinking and be prepared to adjust to diverse conditions.
3-day option: for a 3-day trip, leave noncritical items in your home base and rotate gear as you flow through a range of routes. This keeps the carry light while you discover the region’s charming towns, sweet viewpoints, and lush landscapes across valleys and ridges during the warm months and cooler mornings. On longer stays, expect diverse tours around quaint villages to enrich the experience.
Day 1 essentials: where to stash what and how to distribute weight
Place hydration near the back panel and the top pocket for quick access; snacks go in the main compartment’s side pockets; your map or phone stays in an outer pouch for fast checks. Layering pieces such as a wind layer and a rain shell should sit in the bottom so you can grab them without emptying the pack. Reserve a small interior pocket for impairments-related items like blister tape or medical supplies, and keep a lightweight cord or carabiner for emergencies. Consider distributing weight so the most used items sit closer to your body and the heavier gear rests lower in the pack to prevent impairments to your balance.
Pre-walk quick checks: last-minute items and rules

Before you leave home base, verify you have shoes, water, sun protection, a map, and a charged phone with a power bank. Confirm any pet or church stop rules in nearby areas, and review the route’s points where paths diverge. This short routine saves time and keeps the trip smooth in all seasons, helping you arrive prepared for the day ahead.
Footwear and Gear: Shoes, Poles, and Rain Protection for Coastal Trails
Recommendation: Start with a waterproof trail shoe featuring a 5–7 mm lug depth, a reinforced toe cap, and a breathable, quick-drying upper. Choose a low-to-mid ankle cut for mobility or a high collar for extra support in windy coastal segments. Break them in for 2–3 weeks of mixed terrain to prevent a drawback like blisters. Pair with moisture-wicking socks and, if sand is frequent, lightweight gaiters to block debris. Look for a model with different stiffness levels (levels) to adapt to soft beach sections or slick rocky slabs. Before you go, test them with the socks and insoles you’ll wear and ensure comfort on streams and long coastal stretches. When youre looking for options, check field tests and retailer ratings; select footwear used in similar coast routes to maximize reliability.
Poles: Opt light aluminum or carbon shafts, adjustable from 110 cm to 130 cm for most statures; two-section design saves space. Grips should be contoured with a moisture channel; choose foam or cork for comfort. Use carbide tips for rocky sections and switch to rubber tips on paved boardwalks near ruins; carry a spare tip kit. Pair poles with your other gear to improve stability on damp boardwalks and while crossing streams; keep wrists straps snug so they don’t slip during gusts. Consider ferrata-style sections on some coastal routes and plan for extra handholds if you encounter them.
Rain protection and packing: carry a compact, breathable rain shell with taped seams; add a packable rain pant and a rain cover for your daypack (20–30 liters). Look for a jacket with adjustable hood, cuffs, and hem and a waterproof rating around 10,000–20,000 mm; prioritize breathability so sweat can escape. Include a light insulating layer for early mornings and windy cliff tops. A compact umbrella is usually impractical on gusty shores; use a hood instead. Pack a compact emergency rain wrap for your gear to protect cameras, maps, and electronics. After rain, air-dry footwear away from heat to preserve materials and function.
Why this matters: from tinian shores to greek coastlines, coastal routes reward travelers with beautiful views and known highlights such as sea cliffs, ports, and coastal ruins. The right kit makes the experience more rewarding by reducing fatigue and preserving mobility on wet stones, streams, and sand. This travel gear is known to be functional across varied conditions, and pairing it with a thoughtful booking approach helps manage plans in case of weather changes. If conditions shift, check refund policies before you commit; many operators offer partial refunds or reschedules. For educational value, use the outing as a chance to discover how streams feed the coast and how preserved houses along the shore tell stories of resilience. If you’re traveling with pets, ensure they’re allowed, leashed, and comfortable in heat; bring water and shade. From tinian shores to greek coastlines, the route can feel special and once you master the basics, you’ll look forward to the next trip.
Safety Protocols and Emergency Contacts on Day 1
This addition is adding value by ensuring help is available if you get separated on uneven, cycladic terrain, with the private facilitator coordinating the group at sunrise for a safer start to days of travel.
- Footwear and balance: wear sturdy closed shoes with ankle support and good tread; tighten laces securely; keep a light, balanced daypack to manage hill sections and uneven surfaces; carry blister care and a compact rain layer for variable conditions.
- Weather, hours and hydration: check the forecast and plan for 4–6 hours of movement on varied terrain; bring 1–1.5 liters of water per person; be prepared to refill at official points if available; sunscreen and a hat protect you throughout the day.
- Trail etiquette and crosses: stay on marked paths to avoid fragile ground; be mindful at river crossings and loose stones; use three points of contact on steep or deteriorating sections; slow your pace on narrow passages to protect others.
- Respect for communities and religious spaces: observe quiet behavior near religious sites; ask permission before entering private property; photograph only with consent; preserve distinctive cycladic scenery and regards for local residents.
- Pets policy: pets are allowed only with prior approval; keep on a leash, bring water, and clean up after them; ensure availability of pet-friendly segments before setting out.
- Educational opportunities: use short stops to discuss local flora, farming terraces, and architectural features; this educates participants about how farmers work the hills and communicates cultural value to travelers.
- Photo stops and questions: designate brief windows for photos (limit time to avoid delaying the group); encourage questions during the planned Q&A to keep the pace steady and informative.
- Emergency planning on day 1: know the rally point if someone is injured; assign a lead to coordinate actions; keep a printed map and the group’s coordinates ready; do not hide from the group or shelter in unsafe locations during a storm.
- Equipment and availability: bring a small headlamp, a compact flashlight, and a power bank for hours of use; verify the availability of water points and rest stops along throughout the route; adjust packing to balance weight and ease of movement.
- Bringing and safety mindset: carry essential items (first aid, whistle, multitool) and maintain a calm, educational tone with fellow travelers; maintain a safety balance between pace and rest to accommodate different levels within the group.
Emergency Contacts
- 112 – European emergency number (24/7)
- Local Ranger Station – 24-hour line: +30 000 000 0000
- Nearest Medical Facility (Town Clinic) – +30 000 000 0001
- Mountain Rescue Team – +30 000 000 0002
- Local Police – +30 000 000 0003
Highlights, Photo Opportunities, and Cultural Tips Along the Route
Advised: begin with a three-hour morning traverse to enjoy quiet coastlines and a manageable pace for most hikers.
- Coastlines: rugged cliffs, sheltered coves, and turquoise water create constant chances for dramatic wide shots and intimate close-ups.
- Villages and architecture: whitewashed lanes, stone stairways, and tile arches frame every snapshot with typical charm.
- Town centers and markets: farmers selling citrus, herbs, and fresh produce provide authentic backdrops and a sense of daily life.
- Three-hour blocks: plan pauses at shaded squares or seaside cafes to keep intensity steady and mobility comfortable.
- Photo rhythm: overlook points, harbor walls, and detours along low walls yield diverse angles; bring a light tripod for dusk or dawn light.
- Girls and locals: these interactions reveal crafts, songs, and stories; greet politely and respect private spaces when trading or chatting.
- Between routes: choose inland detours for quiet courtyards or coastal lanes for lively lanes and small chapels.
- Coastline views and landscape: plenty of chances to capture long horizons and intimate moments of daily life in the lanes between settlements.
- Mobility and accessibility: if mobility is a concern, opt for flatter segments and easy exits near town edges; there are plenty of alternative routes.
- Entry etiquette: some religious sites require modest dress and permission to enter; plan around visiting hours and respect signage.