


Book your first night at campsites online to secure a spot and learn the routine before you drive into unfamiliar territory. This practical step helps you test the kapı ve window operation, estimate the weight you carry, and map a safe route from the city to a proper park. If you leave with a simple plan, you’ll reduce mistakes and gain confidence for the road ahead.
Many travelers expect constant luxury on the road. Once you understand the rhythm, a compact kit, smart storage, and well-chosen bedding give you plenty of comfort without bloating the cost. Some beginners felt overwhelmed by options, but the right basics keep you nimble and affordable. Those choices also leave room in your daily hayatlar for real experiences rather than gadgets, and they avoid overpacking on weight or clutter.
A third misconception is that you can cover longer distances every day. In practice, efficient routes, traffic, and campground check-ins mean many days stop short of 3–4 hours of driving. Some beliefs were born from friends’ stories, but planning around campsites and park entrances saves time and gives you a smoother rhythm for your stops.
Another myth says every spot is available online. In reality, availability shifts with season and events. A host said that you should always tell the front desk about your van’s size and weight, call ahead when possible, and have at least two backup options within a short drive. As a rule, share the date you’ll arrive and what you need; some sites can accommodate late arrivals conveniently, while others might require a quick detour.
Finally, some think you must commit to a single setup to enjoy van travel. Whatever you choose–a simple bed, a compact kitchen, or a few minimal comforts–consistent routines beat heavy gear. From one campsite to the next, keep doors closed when driving, check the window seals, and leave no traces behind. If you plan thoughtfully, your lives on the road become easier and more rewarding, with plenty of opportunities beyond the online map to explore other parks.
Practical Camper Van Travel Guide
Get a compact, modular kitchen kit that clips into a drawer and a fold-out table; it takes under 5 minutes to set up and clean. Add a roof rack; storage gets larger, and roofs can carry totes, chairs, and a compact water container. Use labeled bins to keep items organized, reducing clutter and making it easy to move from camp to camp.
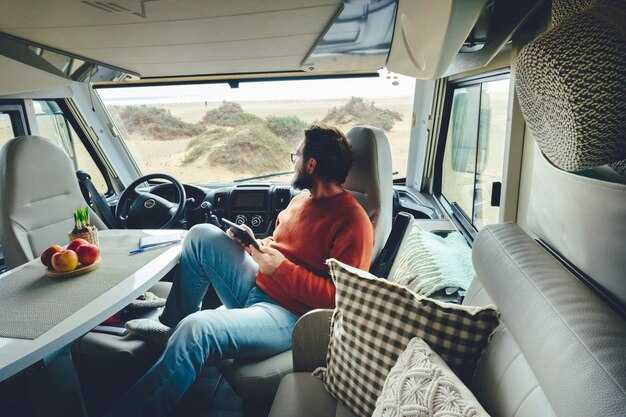
Set expectations with your nomad partner early; share duties and charging plans so quiet nights stay calm. Each person knows their role and their gear, making the trip extremely smooth while going between stops.
Designate storage zones and run a 15-minute daily chore to reset the cabin at day’s end, keeping clutter away. This routine is worth doing because it makes camping transitions smoother. Use labeled bins, hooks, and a slim shelf to separate kitchen from sleeping area, and keep the space nice for both of you.
Prioritize safety with a compact fire extinguisher, a basic first-aid kit, and a roadside toolkit. Keep arms and legs inside when the van moves, and use seat belts at all times. If a problem arises, a quick fix is done with the toolkit.
When raining, keep doors closed and run a vent fan to vent moisture. Carry a compact tarp for shade and drying gear, and store an extra outdoor mat near the doors for a dry, quiet transition between campsites. Regular checks reduce leaks and puddles that spoil camping.
Going digital helps you stay on point: offline maps save data, a shared checklist tracks gear, and a note app documents repairs and maintenance for their van.
Budgeting for Van Life: Hidden Costs and How to Plan
Set a monthly budget and track every expense from day one. Those initial numbers reveal where money leaks after the first 30 days and help you avoid mistakes. Keep a constant log on a single note or online spreadsheet, so you know what repeats and what you can cut. If youre new to camper life, imagine a month with four nights in paid campsites, two nights free boondocking, some nights in an airbnb, and the rest driving between stops–your costs can swing wildly.
Your budget should cover these core areas: fuel and maintenance; campsite stays; showers and laundry; propane and energy; internet; groceries; insurance and registration; and a rainy-day fund. For fuel, plan for 1,200–1,800 miles a month. At about 18 mpg and $4.50 per gallon, you’ll see roughly $300–$450. Set aside $50–$100 for maintenance, and $40–$80 for insurance. Campsite costs vary by location: 15–25 nights at $15–$40 per night equals about $225–$1,000. Those numbers hinge on whether you boondock a few nights or stay mostly in sites. Showering and laundry can add $50–$100 monthly, unless you rely on free options. Propane and battery needs run $20–$50 if you’re off-grid; solar lowers this. Online price checks help you pick deals and avoid overpaying at busy spots. Some months are more difficult than others, so add a cushion.
Step 1: build a baseline by listing every category and setting a monthly target. Step 2: cap each category with a ceiling you will not exceed; whatever youre budget allows, keep a hard limit. Step 3: track weekly using an online sheet; compare actuals with targets and adjust. Step 4: maintain a rainy-day fund equal to 2–3 months of expenses to cover surprises like tire issues or tow charges. The size of your camper shapes fuel, parking, and service costs, so tailor each line to your vehicle. If you spot deals, you can save those dollars; whatever youre comfortable with, add a 10–20% buffer for surprise charges. Keep the plan flexible for seasons; a beach stay or city trip can swing prices. A steady fund reduces danger of major repairs derailing your trips. When you compare options, mix cheaper boondocking with nice offline sites and still stay within budget.
Indoor Cooking Safety: Ventilation, Fuel, and Setup
Ventilate before you start cooking: open a front window or switch on the roof vent, and keep a smoke alarm within reach. If it’s raining, use a powered exhaust and crack a door slightly; if you can’t vent, think about CO buildup and avoid long sessions. Taking these steps now saves trouble later.
Five practical checks help you keep indoor cooking safe while you travel. Some setups require more attention than others, but following these steps keeps the process predictable. This approach makes it easier to cook safely on the road.
Step 1: Ventilation and air paths. Create two air paths: intake near the door and exhaust opposite the stove. This reduces fumes in tight areas and works well when expectations shift with weather; try a few ways to place the vent for best flow. For long sessions, some jobs require extra airflow.
Step 2: Fuel safety. Use only approved cylinders and regulators. Keep fuel containers upright and secured so they don’t tip during converting or moving. Check hoses for cracks; never use a damaged line. If you smell gas, leave the area and ventilate before investigating the leak.
Step 3: Setup and placement. Place the stove on a stable, heat‑resistant surface and well away from upholstery, curtains, and the toilet area. Keep cooking gear within reach, but clear the front seat when someone sits, avoiding clutter that can become a mess and taking enough space for safe operation.
Step 4: Cleaning and spill control. Wipe any spill immediately with a damp cloth, then dry the area. Store cleaners and fuel separately, and keep a dedicated cleaning rag in the kitchen zone. Regular cleaning reduces the chances of a dangerous buildup and a lingering mess.
Step 5: After cooking and routines. When done, turn off the burner and close the gas valve if present. Let the space ventilate for a few minutes, then store fuel in an available outside spot if possible. If you know the safety steps, you can probably repeat these five checks for future meals. Recently, some safety news highlights that proper ventilation saves lives in compact vans. In japan, people use extra fans to improve air flow. Some travelers think ahead by stocking a spare seal kit and cleaning supplies, so cleaning is quick. Thinking about habits every time you cook helps you keep five steps easy to repeat, and it’s worth doing for a calmer cabin, with enough space for the next cook and the seat area to stay clean.
Finding Legal Overnight Parking: Rules, Permissions, and Tactics
Start by sourcing official overnight parking options along your route online and confirm permissions before you park. For a campervan, clarity on local rules keeps the whole trip smooth and avoids surprises when you travel these miles. Use digital resources, call ahead when possible, and note posted signs to avoid trouble.
- Know the ground rules first. Rest areas, city lots, and some state or national lands set limits on overnight stays. Typical windows range from 8 to 12 hours in many areas, but signage always trumps memory. If a place bans overnight camping, move on to the next option on your path and save time for a paid campground or an approved free lot.
- Choose legal options that fit your budget and duration. Paid campgrounds, official RV parks, and designated overnight lots are available in most regions. Private landowners may offer permission with a small donation or tip, which keeps experiences straightforward and avoids fines. Always verify availability online or with staff when you arrive.
- Where to park legally. Look for dispersed camping in national forests (permit sometimes required), designated rest areas with overnight approval, and municipal lots explicitly allowing overnight parking. Portable or small camper rigs often fit tighter spaces, but you’ll want to keep to the edge and avoid blocking access.
- How to obtain permission. If you must park on private property, call or email in advance and get written consent if possible. When staying in a commercial lot or campground, keep a copy of the receipt or permit in your mind for quick reference. These steps save confusion when someone asks why you’re there.
- What to prepare before you go. Pack a clean set of clothes, a basic cleaning kit for surfaces, and trash bags–these help keep your space tidy and respectful of neighbors. Bring a portable toilet or waste bags if permitted, and keep all trash sealed to prevent attracting animals or pests.
- How to park responsibly. Choose a well-lit spot that doesn’t block driveways, entrances, or emergency routes. Set up away from traffic, keep noise extremely low after quiet hours, and limit generator use if allowed. If you feel unsure, move to another available option rather than testing limits.
- What to do after you park. Do a quick check of surrounding area, verify the spot is clean, and take photos for your records on a digital device. These notes help when you plan future routes and remember which places work best for campervan setups.
- Plan your route with online resources like official city pages and Park4Night or similar directories to map available options.
- Call ahead or email for permission; keep a short confirmation note in case you’re asked to show it.
- Check posted signs on arrival; if anything looks uncertain, choose a different, clearly legal site.
- Set up mindfully: limit lighting, keep windows closed if you’re near other travelers, and pack out every bit of trash to leave the space as you found it.
- Follow up after the night by noting what worked and what didn’t, adding those experiences to your planning for the next leg of the journey.
Pre-Trip Maintenance: Basic Checks and Tools for Peace of Mind
Do a 30-minute pre-trip check focusing on tires, fluids, battery, and power connections. theres a simple 10-point guide you can run every time you plan a trip, and it wont feel like a hassle.
Lastikler ve jantlar: diş derinliğinin 4/32 inç'in üzerinde olduğunu doğrulayın, yan duvarlarda kesik veya şişkinlik olup olmadığını inceleyin ve şişirme basıncının plakette belirtilen boyutla eşleştiğini doğrulayın. Yedek lastiği hazır bulundurun ve kargo alanında kolayca erişilebilir olduğundan emin olun. İşlem tamamlandıktan sonra, aracı birkaç metre hareket ettirdikten sonra bijon somunlarını tekrar kontrol edin.
Sıvılar ve contalar: motor yağı seviyesini, soğutma sıvısı konsantrasyonunu, fren hidroliğini, cam suyu seviyesini ve radyatör kapağını kontrol edin; her bir pencere contasını sızıntılara karşı inceleyin.
Güç ve şarj: aküyü test edin, terminalleri temizleyin ve motor çalışırken alternatörün 13,5–14,5 V aralığında şarj ettiğini doğrulayın. Güneş enerjisi veya jeneratöre güveniyorsanız, invertör ve kıyı gücü bağlantılarının güvenli olduğunu doğrulayın. Teşhis için bir servisten yardım alırsanız, makbuzları saklayın; ödenmiş çekler bakımı takip etmenize yardımcı olur. Yedek parçalar için, doğru boyut ve uyumlulukta ürün aldığınızdan emin olmak için çevrimiçi perakendecileri kontrol edin. Bu yaklaşım yolda yol kenarında sürprizlerle karşılaşma riskini azaltır ve genellikle zamandan tasarruf sağlar.
Tools and repair items: carry a compact toolkit you can use with your hands, jumper cables, spare fuses, duct tape, zip ties, a tire repair kit, inflator, and a small first-aid kit. Keep these means within arms reach so you can address a problem without delaying your trip. If others ride with you, share the plan and keep the kit accessible for everyone.
Packing and planning: taking a meal for those long checks so you dont raid snacks; document destination and areas you plan to visit in a small log. Use online reviews to choose trusted products and buy items available in your region; smaller kits save space and avoid sacrifices of comfort.
Off-Grid Power and Water: Battery, Solar, and Fresh Water Management
İlk olarak, 2×100Ah LiFePO4 batarya grubu ve 20–40A MPPT kontrol cihazı ile 200–300W güneş paneli kurun. Bu kurulum, küçük bir buzdolabını, LED aydınlatmayı ve cihaz şarjını sürekli takviyeye gerek kalmadan çalıştırmak için yeterli gücü sağlayarak günlük rutinleri kolaylaştırır.
Çatıya monte panel yerleşiminde yazın en yüksek güneş ışınlarını hedefleyin ve sıcak havalarda şarjın sabit kalması için sıcaklık dengeli bir MPPT kullanın. Şarj durumunu bir akü monitörü ile takip edin ve yükleri dengede tutun: buzdolabını zamanlayıcıya bağlayın, temel ışıklandırmayı sadece gün batımından sonra kullanın ve birkaç küçük tüketim yerine telefonlar için tek bir hızlı şarj cihazı tercih edin. Tek başınaysanız, 100–150W panellere inebilirsiniz, ancak daha uzun bir güneşlenme aralığı veya bulutlu günler için yedek bir şarj cihazı planlayın; işte burada planlama arazide işe yarıyor.
Fresh water storage should start at 40–60 liters for two people, with a simple inline filter and a basic faucet pump. Purify every drop that isn’t from a trusted source using a proper filter and, if possible, a small UV purifier for extra peace of mind. For daily use, budget about 2–3 liters per person for drinking and cooking, plus 10–20 liters for hygiene; this leaves 20–40 liters for laundry or washing dishes while keeping rinse water manageable. If space is tight, opt for a compact 2–3 stage filtration setup and reuse grey water for outdoor plants where permitted, keeping a clean, pure flow at all points of use.
Ventilation matters, especially after cooking or showering. Crack vents during the day and pull air through the cabin at night to reduce humidity, odors, and heat buildup. In summer, use shade covers and a small fan to keep air moving without draining the power bank; this simple approach helps the system cope with long days on the road and makes the living space feel noticeably fresher.
When you park near other rigs or an Airbnb, note that the path from power to water is what makes the difference between a great stay and a stressful one. Keep a compact cleaning kit handy, and store clothes in dry, ventilated bins to reduce mildew risk. Share practical tips with your community on Facebook to refine the setup over time, and keep a log year by year of changes you’ve done; even small tweaks, like adding a larger hose for the water tank or upgrading a panel, can save time and reduce stress on busy trips. With a solid plan, you’ll have enough energy and water to enjoy summer trips, long weekends, and short getaways alike, while staying in control of your daily situation.