


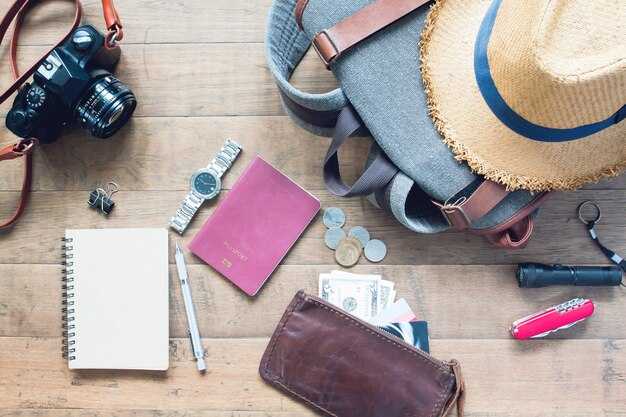
Совет 1: Start with a 40–45L backpack you can carry comfortably on a 2–3 hour local hike. Keep total gear under 10–12% of your body mass, and use a detailed packing list to trim useless items. If youve never backpacked, test a day-out loop at a nearby site to gain confidence and learn how different terrains feel on your back.
Совет 2: Prioritize lightweight gear. A compact tent or tarp, a 0–5°C sleeping bag, a sleeping pad, and a compact stove (white gas or alcohol) save weight. Choose a 2-person tent if you’re sharing rooms with a friend; otherwise a solo shelter that fits in your pack. Consider a lightweight water filter for site water access and a compact cookset you can clean in seconds.
Совет 3: Build a safety kit with a whistle, map, compass, and headlamp with spare batteries. Add a compact first-aid kit, multitool, and a fire starter; store extras in a small dry bag to avoid paria items that collect dust. Remember to have a fire plan and know escape routes for crest ridges and rockwall sections.
Совет 4: Set a daily budget and track it with a simple app or notebook; target meals of 600–800 kcal per day from cheap staples like oats, rice, beans, and dried fruit. If you’re camping, use public or free sites when possible; many parks offer very affordable options, sometimes with water access and pit toilets. Carry a reusable bottle and keep your meals simple to maximize gain while keeping costs low.
Совет 5: Map your route in advance using a mix of offline topo maps and trail apps. Check access rules for the area and identify a few safe backups in case of unexpected weather. Look for spectacular overlooks and plan a few shorter days as runners-up in case conditions shift.
Совет 6: Dress in layers and avoid cotton. For cool mornings, wear a breathable base layer, a light fleece, and a wind shell. Pack a hat and gloves for white-ridge winds and a compact rain layer for sudden showers. Roll clothes to save space and use packing cubes to create small rooms of organized gear.
Совет 7: Choose shoes that fit well and break them in with short hikes before the trip. Pack two pairs of socks and moisture-wicking liners to prevent blisters on rockwall sections and muddy trails. Carry foot care items and a blister kit; dry socks changeouts can dramatically improve comfort after long days.
Совет 8: Distribute weight evenly: heavier items against your back and close to your spine, lighter gear outward. Use compression straps and small packing rooms inside your bag to keep gear accessible. Label items, and use a simple gear checklist to ensure you remember the basics without overloading.
Совет 9: Follow Leave No Trace rules, cook away from tents, store food in bear boxes where required, and respect wildlife. Keep a minimal camp footprint near the site and practice safe food storage to prevent attracting critters. Be mindful of weather forecasts and plan a forced-rest day if storms threaten.
Совет 10: Share your itinerary with a trusted contact and set a check-in time. Use offline maps and a portable battery pack; don’t rely on a single signal, as coverage can drop on ridges or near rockwall sections. Learn basic self-rescue steps and keep a small whistle accessible.
Совет 11: After each trip, rinse gear, dry it thoroughly, and inspect for wear. Document what worked and what didn’t, updating your detailed list for the next run. Store equipment in a dry, accessible space; use rooms within the closet to separate gear by category, like shelter, cooking, and clothing. Remember to log the adjustments youve made so you have a plan for future trips.
11 Backpacking Tips for First-Time Travelers: Gear, Safety, Budget Travel, and Elevation Gain
Tip 1: Check your pack fit and balance before departure; tighten the hip belt so most weight rides on your hips, not your shoulders, and verify the sternum strap keeps the load stable. Bring a hydration reservoir and check that you can reach it without removing the pack to stay hydrated on trailheads and climbs.
Tip 2: Choose sturdy footwear and add lined socks; break in boots for 5–7 days of light use to prevent blisters, then pack a compact repair kit and a thin rain shell. The prettiest views often come after a dry period, so plan for clear mornings.
Tip 3: Plan elevation gain per day for beginners: aim 1,000–1,500 ft; pace around 2 mph on flats and slow to 1 mph on steeper sections; take a 10–15 minute break after every 1,000 ft of gain to stay fresh.
Tip 4: Safety starts with sharing your route with a friend and carrying a map, compass, and whistle; check weather forecasts the night before and layer up for cold gusts.
Tip 5: Budget meals save you money: cook breakfast and dinner with a compact stove, plan 2–3 meals and 2–3 snacks per day, and store fuel safely; bring a meal plan and reusable containers to cut waste.
Tip 6: Navigation and access: learn trail signage, carry a lightweight map, and download offline maps; a small GPS or app helps, but you should still check trailheads for closures and routes.
Tip 7: Water management: filter or treat water from streams; plan 2–4 liters per person per day in warm weather; keep a spare filter and clean bottle for reliability, especially near forested areas like yosemite or zion.
Tip 8: Gear you’ll find handy: a dry bag for electronics, a first‑aid kit, a multitool, and a headlamp; test everything and bring spare batteries so night use isn’t hindered.
Tip 9: Wildlife and camp discipline: store food in bear canisters where required; avoid strong scents; in windy nights, pull hoods up to stay warm while you cook or rest.
Tip 10: Leave No Trace on every stop: stay on marked trails, line up your gear neatly at campsites, pack out trash, and minimize impact near iconic parks like yosemite, zion, and the tonto area; respect quiet hours to enjoy the forest.
Совет 11: Review choices and plan in advance for elevation and access: verify permits if required for parks theyve lined up, whether it’s yosemite, zion, or other parks; bring a lightweight notebook to log daily elevation gain, trailheads visited, and the prettiest sections theyve enjoyed–author notes confirm this helps future trips; if you drive to the trailhead, park legally and follow local rules.
Practical guidance on gear, safety, and budgeting for new hikers
Choose a 40–50 liter pack with a rigid frame and a torso length you can adjust, and test it on a couple of short day hikes before a multi-day trip to confirm fit and access to front and side pockets. Depending on your body, a pack with contiguous pockets makes gear retrieval faster and keeps your load balanced so it feels steadier on uneven trails.
Gear basics: select a sleeping system that matches the season, such as a 20–32°F bag, a 1.5–3 inch thick pad, and a 3-season shelter. In winter, add a lightweight puffy layer and a compact stove with fuel that lasts for several meals. Keep a spare bag or dry sack to protect electronics; count the ounces carefully and aim for a total kit under 8–12 pounds (dry) excluding water. For water, carry at least 1 liter in a bottle plus your purifier or purification tablets, and practice filling from springs or lakes during a short morning hike to avoid delays on the first night of your trip.
Safety basics: pack a map and compass as your backbone, and add a compact headlamp with fresh batteries. If you’ll be in areas with limited cell service, a personal locator beacon or satellite messenger increases access to help in an emergency. Include a first-aid kit, a whistle, and a small repair kit for gear. In jagged terrain or canyons, pace yourself, test footing on every step, and plan your turns so you’re never counting on a single escape route.
Budgeting and planning: target a gear budget of roughly $250–400 for first-season essentials, and consider renting or borrowing items you’ll use infrequently. Subscribe to a monthly newsletter for seasonal deals and safety reminders, then compare prices across a few reputable retailers. If you travel by air, book into a nearby airport and reserve a hotel or hostel near trailheads to cut shuttle time; bring an extra day’s buffer for weather changes or last-minute permits, because flexibility saves stress and money.
Trip design for beginners: start with a short loop near lakes or gentle canyons, avoiding long sections with jagged ridges on day one. For families, pick routes that are kid-friendly and have easy access to exits; plan morning starts when air is cooler and trails are quieter, then finish before afternoon heat. If your route requires passes, buy them in advance to avoid delays at the trailhead, and double-check access rules for zions and nearby canyons. This approach keeps vibes calm and helps you build confidence without overextending the first few trips, which makes the learning curve smoother than a single long ascent.
Choose a lightweight, reliable sleep system for altitude comfort
Starting with a 20°F (−7°C) down sleeping bag and a 2.5–3 inch insulated pad, add a lightweight liner for a few extra degrees. This setup stays compact and handles alpine nights on multi-day hikes, keeping the vibes warm against wind and mostly comfortable after a long day.
Set up with a two-layer sleep surface: a bottom closed-cell foam pad and an inflatable pad on top. The bottom layer blocks cold from the ground and resists rocks, while the top pad adds cushion and warmth. This combo is actually dependable for weekends and longer treks, and it stays accessible for post-hike camps.
Fill matters: down stays lighter when dry, synthetic holds warmth in damp conditions. In the northern ranges, where you’ll see lakes and glaciers and occasional mist, a bag rated around 20–30°F with synthetic fill can balance weight and reliability. columbia and other brands offer solid synthetic options that stay warmer when damp, which makes them a good fit for weekends and starting multi-day hikes. Temps isnt predictable, so add a lightweight liner to boost warmth somewhat if you expect really chilly nights.
For fit and features, side sleepers benefit from a semi-rectangular shape that gives shoulder room, while a snug hood and a draft collar cut drafts on the top. Look for a zipper draft tube and well-sealed seams–the points against drafts matter most when you’re on a high peak or a wind-swept side of a ridge and you’ve already crossed exposed sections. Ones designed to seal well around the neck and zipper will help maintain heat in breezy conditions.
Packing and planning: keep the sleep system simple and accessible in your pack–the bottom of the pack should carry the pad, the bag goes in a dry bag inside your main compartment. This approach works well for weekends and for starting multi-day routes where you’ll be looking at a long list of gear. If you’re trekking in bighorn country or northern routes with lakes and glaciers, this setup saves space and keeps you comfortable after a long day of hikes. For travel or border-adjacent trips, pack your passport securely in a dry pocket.
Layer up: clothing strategy for variable weather and elevation
Start with a three-layer system: base, mid, and outer shell. For likely cold snaps on alpine mornings or atop a ridge, this setup keeps core warm while you vent during climbs. Highly packable fleece or down adds warmth without bulk, and you can add or shed a layer at switchbacks or as you descend. On the jackson ridge route, plan your layering ahead as part of planning your moves, and keep a lightweight cap and gloves in the outer pocket so you don’t overheat once the sun hits.
Base layer: Merino wool or high-tech synthetic near-skin fabrics wick moisture and stay warm when damp. Mid layer: fleece or lightweight down, cut to move with you. Outer layer: waterproof and breathable, with sealed seams and a reliable hood. For variable conditions, carry a light cape for sudden drizzle or sun breaks. Harbor a compact down jacket in your pack for late-day chills at the summit. For legs, wear quick-drying hiking pants and add gaiters when mud or snow shows up. Packing strategy: avoid cotton, keep layers modular, and test your setup on the trail. Planning your itinerary around elevation gains helps you decide how many layers to carry at different times. Use a checklist to verify you have spare socks, a hat, gloves, spray sunscreen, lip balm, and a small rain shell. Wind and temperature rates can flip quickly with cloud cover, so practice fast adjustments at breaks and switch to a drier layer if you feel damp. In ranch country foothills, wind can spike quickly.
On a hike toward the eagle peak, you would start warm and then shed a layer as you climb; once you reach the crest, expect wind to bite, so re-zip and add the cape for a windbreak. The issue is staying dry: sweaty fabric chills fast, so ventilate with vents and switch to dry layers during breaks. Harbor warmth by tucking a compact jacket in a side pocket to pull out at overlooks. When planning, map your day with elevation points and rest stops, keeping a filled rhythm between ascent and descent. At camp or trailhead, thank your legs for carrying you, swap damp socks for dry ones, and finish with sunscreen spray for protection against sun exposure.
Plan meals, fuel, and water to balance weight and calories
Pack three-day, high-calorie meals totaling 3,000–3,500 kcal per day, and plan for 4–5 L of water daily in heat; keep a flexible plan to adjust for current weather and terrain.
- Food targets
- Daily calories: 3,000–3,500 kcal; food weight: 0.9–1.0 kg/day; three days: 2.7–3.0 kg of dry food.
- Distribute calories roughly: breakfast and snacks 30–35%, lunch 35–40%, dinner 25–30%.
- Three-day sample menu
- День 1
- Breakfast: 100 g oats, 20 g powdered milk, 25 g peanut butter, 30 g dried fruit, 10 g oil → ~800 kcal; weight ~185 g.
- Lunch: 4 tortillas (160 g), 120 g tuna in oil (~240 kcal), 50 g cheese (200 kcal), 25 g nuts (150 kcal), 60 g trail mix/bar (230 kcal) → ~1,190 kcal; weight ~360 g.
- Dinner: 1 dehydrated meal pouch (120 g dry), 15 g oil → ~650–700 kcal; weight ~135 g.
- Snacks: 2 bars (60 g total) → ~280–340 kcal; weight ~60 g.
- День 2
- Breakfast: 110 g oats, 25 g dried milk, 30 g nuts, 25 g dried fruit, 10 g oil → ~820 kcal; weight ~190 g.
- Lunch: 3 tortillas (120 g), 100 g sardines or tuna, 40 g cheese, 30 g olives, 40 g chocolate → ~1,000 kcal; weight ~300 g.
- Dinner: 1 dehydrated meal (100 g), 20 g oil, add 40 g rice for heft → ~700 kcal; weight ~160 g.
- Snacks: 1 energy bar (60 g) + 30 g almonds → ~320 kcal; weight ~90 g.
- День 3
- Breakfast: 120 g oats, 20 g powdered milk, 20 g peanut butter, 30 g dried fruit, 10 g oil → ~760 kcal; weight ~200 g.
- Lunch: 3 tortillas (120 g), 100 g chicken or tofu in oil, 40 g cheese, 30 g nuts → ~970 kcal; weight ~250 g.
- Dinner: 1 dehydrated meal (120 g), 20 g oil → ~650 kcal; weight ~140 g.
- Snacks: 2 bars (60 g) → ~280 kcal; weight ~60 g.
- День 1
- Total daily outlook
- Calories: ~2,900–3,100 kcal on average; weight: ~0.9–1.0 kg of food/day.
- Three-day food total: ~2.7–3.0 kg; gives margin for longer stretches or a light refill in a village.
Fuel plan: use white gas; one standard 230 g canister typically covers a solo three-day trip if you keep boil times lean and limit reheating. Bring a backup canister (another 230 g) if you expect colder mornings or longer dining windows. Use a compact stove to minimize simmer time and wind exposure.
Water strategy: baseline 3 L/day for moderate climates, plus 1–2 L extra on hot days or when miles between springs stretch longer. Carry 9–12 L for the three days, refilling at springs or village taps along the routes. In alpine sections with glaciers and snowmelt, you can supplement by melting snow with heat to reduce carrying weight, but do not rely on it in warm weather. Look for water holes and springs near land features where goats and bighorn graze; these sources can change with time and season.
Logistics note: map current entry points and plan several refills; some routes pass familiar land where a village, resort, or small hotels offer quick resupply. If you went to a delta valley or near white glaciers, time your stops to join Todd or another partner for a safer, more efficient water and fuel plan. If you encounter a water hole or spring, stock up and adjust your menu to minimize weight on the next leg.
Note: keep a compact log of daily water and fuel usage; note the weight you carry at the start of each day and adjust if you face heavier packs over rough terrain or unexpected weather. This approach makes your three-day plan adaptable to several scenarios and keeps your adventure balanced, even when conditions shift.
Navigate safely with maps, backups, and simple signaling tools
Keep a small, waterproof map and a charged GPS as your first line of defense; carry a compass and a printed topo as reliable backups. If your phone dies, you still have a plan to reach a camp or a nearby valley with beautiful views.
For a five-day trip, download an offline map, set a location marker, and share the plan in the inbox alongside trip12. youve spent time plotting a flexible route and a few scenic detours, which helps you avoid getting lost in tough terrain. When you head toward Zions or a rocky valley with glaciers, your backups keep you on track, and you can switch to a nearby camp if weather or muddy trails demand it. Start early to catch daylight and read terrain while you still have visibility; move with steady legs along exposed stretches. If you have the option, you can also use a simple base near a trailhead, but you’ll still rely on these tools on the trail, not hotels. This approach keeps your adventure on track.
Two or three signaling tools stay with you at all times. The three-blast whistle signals others at distance; a small signal mirror flashes sunlight toward rescuers; and a bright panel or bandana on your pack remains visible in open terrain. If youve got heavy clouds or pouring rain, a reflective panel on your bag still helps. When you pause near tall rock spires or muddy slopes, keep your location posted to a trusted contact in inbox or notes, so someone else knows where you are, even if you cant call out from the trail. Else, you can rely on terrain features to reorient yourself near pools or on a bare rock face.
Commonly, this setup is recommended for first-time backpackers.
| Tool | Use | Why it helps |
|---|---|---|
| Whistle | Three strong blasts to signal location | Audible across terrain, effective in mud and wind |
| Signal mirror | Sun reflection to catch eyes | Visible from distance when skies are clear |
| Bright panel / bandana | High-visibility marker on your pack | Easy to spot from above or across a valley |
| Offline map device | GPS with preloaded maps | Maintains location fixes when cell service is absent |
Set daily mileage and elevation gain targets to pace your trek
Start with a concrete target: 12 miles and 2,000–2,500 ft of gain on standard trails with a moderate pack. This keeps you moving and gives room to enjoy the day, across varied terrain where peaks include great views.
Over several days, adjust by somewhat conservative increments. If you backpack heavier, drop to 8–10 miles with 1,000–1,800 ft of gain on tougher sections. If you’re fresh and the ground is forgiving, push toward 14 miles with 2,500–3,500 ft. Likely you’ll fine‑tune these numbers as you learn how your body reacts to elevation and heat, taking into account weather, trail quality, and rest needs.
Include rest breaks every 1–2 hours and longer pauses at landmarks to reset pace, enjoy scenery, and recharge for the next section across ridges and valleys. This habit helps you stay steady on the Pacific‑coast routes and avoid hitting a wall near crowded trailheads around Jackson or other popular starts.
Use these targets as a framework, not a rigid rule. Starts on weekends can push you toward slower sections or longer seconds; plan for that by keeping a flexible daily window so you can adjust without rushing.
- Set a baseline day, for example 12 miles with 2,200–2,400 ft of gain, and log how it feels at sunset. Adjust the next day by 1–2 miles or 300–500 ft based on terrain and fatigue.
- Factor pack weight and terrain. Heavier packs and rocky climbs reduce mileage by roughly 10–20%; lighter gear and smooth trails allow a small bump in distance but keep elevation gains in check.
- Break the route into segments. Plan core miles in the morning, then a steady elevation block, and a final push to camp or a shelter, with a rest at a scenic overlook or a cool stream.
- Track progress with simple notes. Each day, record miles, gain, time spent moving, and a quick condition check; use the data to refine the next day’s targets.
- Adjust for reality. If you backpacked a day with steep cliffs or a heat wave, scale back the next day to preserve energy and safety, keeping the pace comfortable for the group and for someones whose pace is slower.
On a real trek, you’ll find that taking a measured pace keeps you from burning out too soon. You can click through digital maps or use a simple notebook; either way, the key is consistency across miles and meters, so you can enjoy the views, rest when needed, and keep moving toward the next peaks with confidence. If you’re hiking near Fenton or along the Pacific trails, these targets help you manage time, avoid rushing, and stay in tune with the terrain so the longest days feel doable and awesome, even when the route is somewhat demanding. Remember: the goal is steady rates, not reckless speed, and room to adapt when weather, crowds, or trail conditions change.
Links to elevation profiles, route summaries, and rough speed estimates can support planning, but your best guide remains the day’s terrain, temperatures, and how your legs feel. By pacing each day thoughtfully, you’ll finish with energy to spare and memories to cherish, again and again, backpacker friends along the way.