

Choose a certified adaptive paragliding organization with trained instructors, tested gear, and clear safety protocols to begin your ascent. A well-structured program pairs a patient briefing with hands-on fit checks, ensuring access and comfort for wheelchair users from the first step to the launch. The coordinator andrea leads the team, guiding peers to tailor the ride to each resident’s needs and building confidence that extends beyond the flight.
In 2024, programs across four regional sites completed 180 flights for 120 participants who use wheelchairs, with zero serious incidents reported and a 92% satisfaction rate about gear and briefing quality. Observers note that the most common accessibility gains come from properly mounted sit-on harnesses, adjustable seat boards, and on-site transport support that halves setup time from arrival to takeoff. Agencies that track outcomes emphasize a weekly safety checklist, gust window estimates of 8–25 mph, and a mandatory buddy system so there is always a trained peer nearby.
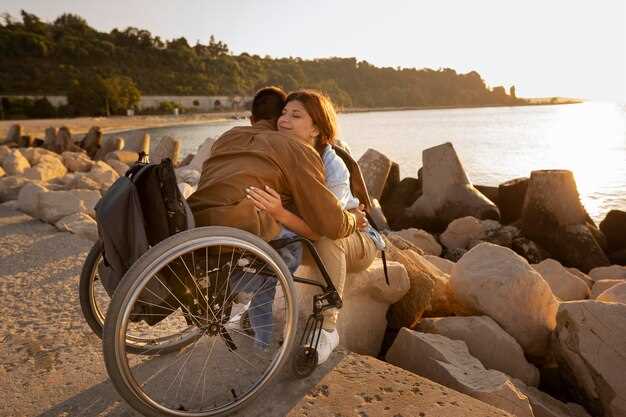
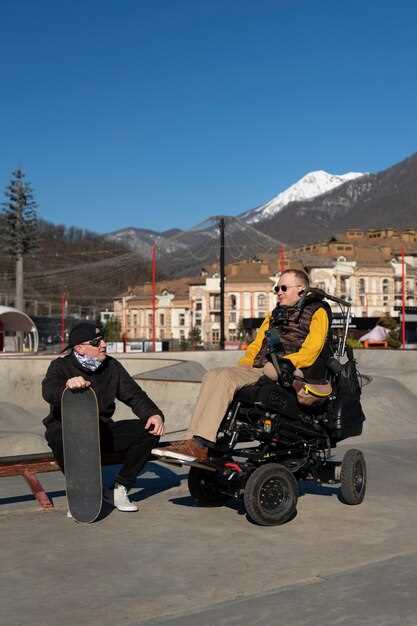
Whether you are a resident or visiting, plan a pre-flight walk-through with the crew and ensure your transport needs are booked in advance. To access the best conditions, compare at least two drop zones, check wind guidance, and request a harness that allows a seated orientation for balance. Tell the organization about any accident history, allergies, or medication so the medical team can tailor the briefing. For support, bring a trusted peer; peers can help with seating, transfers, and filming the run from the backdrop mountains.
The experience feels thrilling yet grounded, with a super sense of accomplishment. Although the wind shifts, the safety team keeps pace with a precise checklist. Participants notice that the flight path gives a gourmet level of focus to detail–trajectory, posture, and breathing–while the backdrop reveals terrain and weather in real time. For many, paragliders become allies, and the moment of lift is a milestone for everyone who watches from the ground. The program connects people with peers who share challenges, and it helps break isolation for residents who otherwise stay indoors; andrea and the organizing team celebrate each lucky breakthrough as the flight unfolds.
To get involved, contact the local organization or a community center and ask for the adaptive paragliding program; there, you can review equipment options, safety standards, and accessibility features that suit your needs. If you know someone who wants to try, invite them to observe a session; the welcoming backdrop of the launch field often turns curiosity into action. The accessible adventure awaits those who seek it, whether they walk with a cane or use a wheelchair, and who want to share the thrill with their peers and supporters.
Adaptive Paragliding for Wheelchair Users: Accessibility, Training, and Gear
Choose a certified adaptive paragliding program that uses a wheelchair-friendly harness and tandem instruction for your first flight.
-
Accessibility and Site Design: Select takeoff locations with paved access, ramped entry to gondolas, and clearly marked landing zones. Work with a ground crew that can secure wheelchairs and assist with harness connections, so you can focus on the flight. From a panorama perspective, takeoff points should provide wide, unobstructed views that help with orientation in the air. Confirm wind windows in advance and ensure there is a safe fallback area if conditions shift. Those measures reduce barriers and support thousands of participants to visit alpine resorts with confidence. источник from reputable sources confirms that these practices improve participation and safety.
-
Training Path and Safety: A structured plan spans roughly 6–8 weeks with 8–12 sessions, combining ground handling, canopy control, and emergency drills. Begin with wheelchair-to-ground practice, then work on harness fit and cockpit positioning, followed by supervised ground launches from a gentle slope. The program emphasizes wind-reading, grip techniques, and preflight checks so you can grab the control handles smoothly during flight. Canadian clinics and military veterans programs show that consistent practice yields reliable outcomes during the training cycle. During sessions, maintain clear communication with your instructor, and use progressive steps to build confidence and stability in the air.
-
Gear, Equipment, and Setup: The core system combines a wheelchair adapter with a flight seat and a rescue option, plus a streamlined canopy designed for stability. The harness should allow secure attachment and easy detachment in an emergency, with a grab strap to maintain grip in variable winds. Ensure wheel chocks, anti-tip supports, and quick-release buckles function properly, and carry a compact on-site repair kit. When ready, plan for a tandem or solo flight to a meadow or plain landing zone with ample space for a safe touchdown. Visit local centers to try equipment on a practice day and learn about gondola access, weather windows, and safety procedures. The opportunity to fly often begins with a demonstration and can grow into an ongoing program for those seeking adventures in skiing-friendly alpine regions.
Eligibility and Medical Clearance for Flight
Get medical clearance from a physician with aviation or sports medicine experience before booking any flight. For wheelchair users, the clinician should assess heart health, lung capacity, blood pressure response to exertion, and any implants or prosthetics that affect harness fit. You must have documentation that you have no active conditions that could compromise safety, and that you have needs that support safe participation. If thats not clear, request a written note specifying restrictions and the conditions under which you can fly.
Eligibility requires medical stability, the ability to transfer to the harness with or without assistance, and the cognitive capacity to follow briefings. The clearance should confirm you can communicate with instructors, understand signals, and participate in emergency procedures. Instructors review your wheelchair setup, front attachment points, and rescue plan. They determine whether you can manage transfers, check equipment, and maintain situational awareness during sessions. For thousands of athletes, careful planning makes adaptive flight possible, even when some aspects feel hard. Time and scheduling matter; coordinate with your medical provider and the local site to avoid delays. This approach marks a historic shift for thousands of wheelchair users, and whether you need additional tests depends on your condition. annemasse
What you bring for clearance includes a current prescription list, a summary of mobility needs, and a physician’s note detailing any conditions that affect safety. Clinics will send forms to complete, and the team of instructors will coordinate a practical evaluation that includes harness fitting, safety checks, and a supervised test flight. At annemasse, andrea will guide you through the steps, explaining how to prepare your seating, and how the aerodynamic harness interacts with your body. Next sessions gradually increase exposure, from gentle ground handling to short glides over nature and past viaduct routes. The experience that paragliders enjoys comes with welcome support from the team and a plan to land safely on plateaus or gentle slopes. You should feel confident to proceed, knowing you have medical clearance and a clear plan for ongoing monitoring during acclimation.
Chair-to-Harness Transfers and Ground Handling
Call for a trained assistant to supervise every chair-to-harness transfer. An experienced ground crew member should stand on the near side, ready to support hip alignment and leg strap threading while you maintain a stable stance with knees soft and core engaged. This approach reduces risk and builds confidence in both the flyer and the shore team, especially during initial flights conducted in Lanzarote–style conditions.
For aerodynamic control, keep your torso upright, shoulders relaxed, and head level; the second person checks for even weight distribution and that the wheelchair is loaded evenly. staneks buckles should lock with minimal play, and harness connections must glide smoothly when tightened.
Whether you are new or have years of experience, follow a consistent transfer sequence, and use a gondola‑style harness in a controlled, supervised setting. David, an instructor in an international program, highlights the value of practice and clear communication as you learn to feel comfortable with the harness and lines over time.
In introduction courses, instructors emphasize signals, line management, and safety checks. Ground handling becomes easier if you keep line slack constant and recheck brake status before taxi. For pilots who fly regularly, the handling cues are alike across settings, making the transfer more predictable regardless of location or weather.
Ground handling specifics include line organization, avoiding tangles, and selecting a firm, clear area for taxi. If wind exceeds safe thresholds or gusts rise sharply, pause and reassess before attempting a transfer; always have supervision and a known call method to escalate concerns to the team.
A practical data-driven protocol helps volunteers and participants measure progress. A structured approach reduces risk and supports the flyer with a confident feel during the first flights. The team can document the transfer time and harness load to compare performance across years of operation.
| Step | Action | Equipment | Time (min) |
|---|---|---|---|
| 1 | Pre-transfer check: engage brakes, verify harness size, secure wheelchair | Wheelchair, harness, locking brakes | 2 |
| 2 | Positioning and alignment: partner stands on the near side, align with wing line | Assistants, alignment mats | 1–2 |
| 3 | Transfer to harness: seat into harness, tighten chest/waist straps, adjust leg loops | Harness, carabiners, strap adjusters | 3–4 |
| 4 | Ground handling setup: check lines, assess wind, plan taxi path, assign roles | Lines, gloves, radio or verbal cue | 2 |
| 5 | Safety confirmation: final check, signal go, note concerns | Radio/voice cue, checklists | 1 |
Having a clear, supervised process makes the experience more inclusive and reliable, whether you are preparing in international training camps or everyday practice sessions. This approach supports a more confident, safer transition from wheelchair to harness and a smoother ground handling phase before you lift off.
Adaptive Equipment: Harnesses, Carabiners, and Wheelchair Modifications
Choose a three-point harness designed for seated pilots, with soft padding and a chest strap, and pair it with locking carabiners rated for high loads. Attach to a rigid wheelchair mounting plate and verify alignment, then practice under supervised guidance until youre ready to launch. The first attempts are launched under careful supervision.
Basics of harness fit involve a wrap-around or sit-slung style that distributes load evenly across hips and shoulders. The harness should feel secure; padding should be felt softly against the skin, and adjustable straps let you tailor tension without pinching. Ensure the harness sits above the hips and supports the torso while leaving arms free for movement. This setup really improves stability for beginners.
Carabiners: use locking units rated at least 24 kN; never cross-load or rely on a damaged gate. Inspect gates for burrs and corrosion before every session; keep them closed during transfer. Use two carabiners at the main connection points; ensure orientation avoids sharp edges. If something looks off, it doesnt belong here.
Wheelchair modifications: fit a rigid mounting plate under the seat, add anti-tip bars, and provide a low-profile, padded footrest. Use soft foam pads on contact areas and adjust straps to maintain balance during transfers. A couple of quick checks catch misalignment before transfer. Test on flat, smooth areas first; if youre concerned about stability in any areas, consult your instructor. Ensure the chair remains balanced at takeoff and land.
Training and checks: the trainer explains safety steps and demonstrates load checks. Follow a ground test: fit the harness, verify attachment points, confirm wheelchair mounting, and simulate gentle weight shifts before any flight. Regularly inspect harness straps for fraying, carabiners for wear, and fasteners for tightness. This process creates an opportunity to enjoy magical moments above the alps while staying mindful of concerns and youre limits. Youre also looking for amazing progress, and you constantly monitor currents and wind conditions, moving gently and with care.
In-Flight Safety Protocols: Pre-Flight Checks, Radios, and Emergency Procedures
Perform a full pre-flight check with an independent observer and your ground crew at least 20 minutes before launch. Verify the chair attachment to the frame, secure the harness, and confirm that each line passes cleanly through the pulleys. Ensure the reserve is accessible, test the quick-release, and inspect the wing for wear or fraying. Check radio batteries and spare cells, then run a quick functionality test on the electronics. Review local site data for santacroce and peisey-vallandry, and note any wind shifts that could affect passing over the approach. This routine keeps you ready to roll, helps you feel normal and fully prepared, and supports a calm mind through the setup process. from Andrea and Matthew stress that attention to these details is a cornerstone of independent, safe adventure.
Pre-Flight Checks Run through the chair-harness integration, confirm all fasteners are seated, and verify the line layout from the wing through the risers. Perform a ground test on the wing to confirm neutral alignment, and confirm the ski-out exit path is clear. Double-check the battery life of the radio and AAD, then verify that the emergency cutoffs respond to a manual input. Make a deliberate pass through the checklist with a crew member so nothing is skipped, especially if a couple of hands are assisting. Keep the atmosphere calm, measure wind at shoulder height, and ensure the pilot (you) feels ready to proceed with the maneuvering that lies ahead.
Radios and Comms Use a robust, weatherproof radio with charged batteries and spare cells. Establish a simple channel plan: ground crew on Channel 1, pilot on Channel 2, with a designated call sign for each site (for example Santacroce-1 or Peisey-Vallandry-1). Run a radio check with the team before moving, and confirm the status of any line tension or canopy movement on both ends. When you say you are ready, include a brief description of the current wind and visibility so the other party can anticipate the next steps. If a passing gust shifts the window, use clear, concise language to keep skies and minds aligned. This approach helps you maintain control through the process and ensures views remain clear for coordinated action.
Emergency Procedures If a problem arises–loss of radio, line snag, canopy collapse, or medical issue–activate the pre-planned steps without delay. Maintain control of the harness and stay oriented toward the landing zone; if you lose attitude control, apply smooth, opposite pressure to regain stability, then assess whether to deploy the reserve. In a radio failure, switch to the backup channel and use pre-arranged hand signals with the ground crew. For a line snag, calmly identify the affected side, pass the free line responsibly, and attempt to restore balanced flight. If a reserve is required, execute a controlled pull with steady pressure and follow the rescue plan at the ski-out or landing area. In international or national contexts, confirm local rescue contact points and relay your position through the team. Include local references to the team’s training at colombia sites and national standards in your drills to maintain readiness for solo operations and independent decisions. Rescue teams, including soldiers on the ground, may guide you to a safe landing, with the sky as your backdrop and the mind focused on the next safe moment. Keep a magical mindset: every prepared action increases your confidence and expands your adventure horizon, from the first test at a small hill to your widest views of the skies.
Post-Flight Care and Gear Maintenance
Rinse and dry your wing, harness, and chair setup within 15 minutes of landing to prevent contamines from lingering and to keep fabrics, webbing, and mounting points ready for the next flights and sport, keeping the experience enjoyable.
- Inspect the wing canopy for tears, frays, or UV damage; check seams at load points and verify there are no contaminants on the fabric that could reduce performance.
- Evaluate harness webbing, buckles, and carabiners; confirm secure attachment points for prosthetic adapters and ensure safety straps operate smoothly.
- Examine chair or wheelchair components: frame integrity, wheel bearings, brakes, and footrests; for a resident using a chair, confirm secure seating and assistive strap positions; lubricate moving parts per manufacturer guidelines and use proper lubrication at movable joints, and test locking mechanisms.
- Review electronics and batteries if used: charge levels, connector integrity, and moisture protection; remove batteries after exposure to rain and store them in a dry place.
- Clean and dry ground-transport and gondola access points used to reach the takeoff; ensure seats and straps are dry to prevent mildew in an afternoon sortie.
- Store and label gear: hang fabric parts to air-dry away from direct sun, roll canopies carefully, and keep everything in a ventilated bag or cabinet to extend life, already following proper practices to simplify upkeep.
- Andrea points to a simple, repeatable checklist after every flight: record date, duration, and any maintenance notes to build a historic log of wear and fixes.
- Maintain a small spare-parts kit: replacements for fasteners, patches, and wing repair tape; for some uses, coordinate with a certified technician for safe repairs, and choose suitable materials for quick fixes.
- Document concerns clearly: unusual noises, stiffness, misalignment, or braking drag; address them safely before the next flying session, especially if you plan a highest flight in challenging conditions.