


Aim to enter the forest at first light. Pack a raincoat and shoes with good grip for the damp ground. The season brings mist and variable sun, so a simple kit keeps you mobile and lets you observe the waterfalls without fuss. Look for stable rocks and scan the path below for loose dirt and slick stones.
Essentials stay light: a small daypack, snacks, and a compact bottle. Many parks offer free access to trails; check the trailhead board for any issues or temporary closures. Look for the main spots where the woods thin, and dont wander into rough ground; this protects the forest and preserves the experience.
Choose viewpoint options along the route to compare perspectives of the cascades. The setting is humid, and arriving earlier means calmer air, while later hours can bring more people. If a path turns sharply, pause, reassess, and stay on the marked line below the slick section.
Respect the terrain: dirt on the surface can hide roots; wear shoes with grip. dont litter, and keep distance from the water to protect the ecosystem. Local ricas guides emphasize minimal impact; seek spots with less crowd and stay on designated trails.
Second, check the short-term forecast and choose a loop that matches your energy and daylight. The nearby parks connect multiple waterfalls and let you turn back at will if conditions worsen.
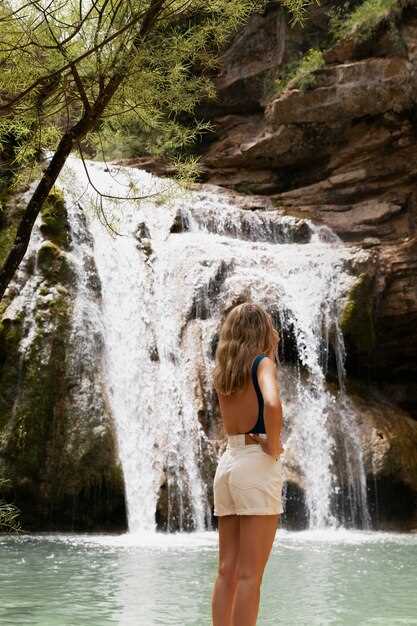
Rio Celeste: Tips for Visiting Costa Rica's Blue Waterfall and Exploring Its Unique Ecosystem
Arrive at dawn; park at the main parking area and head to the parque entrance before the crowds converge along the cloud path to the overlook.
- Location and access – located near parque Guatuso; check maps ahead to confirm location. The drive from the capital region takes roughly 3–4 hours, with occasional rough stretches beyond the main road; plan a relaxed pace to enjoy wildlife along the route. This view appeals to rican travelers seeking a simple, magical adventure.
- Trail and gear – the path includes a short ascent and a wooden boardwalk near the top; closed-toe shoes are a must; carry a full bottle of water and a light snack such as a breakfast bar. The simple setup keeps you comfortable during the visit. There is a crazy-high humidity sometimes, so pace yourself and head down to the pool when you feel steady.
- Color and scenery – the hue shifts with sun; the magical tint blooms at the lower pool, creating a must-see moment that often appears after sunrise and before the afternoon clouds roll in. Every season, the color changes with light, ranging from teal to aquamarine depending on the angle and water clarity.
- Wildlife and ecosystem – expect sloths in the canopy and keep voices low; keel-billed toucans and other birds may head along the trail. Their presence adds to the adventure and emphasizes the rich biodiversity of this area.
- Practicalities – arrive early to beat the crowds; parking is limited, so plan to depart earlier or later to avoid peak crowds. Bring a spare battery for cameras and a bottle to stay hydrated. In the samen case you encounter rain, seek shelter at the main shelter and avoid slippery surfaces.
- Respect and safety – stay on the marked path, never lean over barriers, and respect parque rules. If conditions worsen, turn back along the cloud path toward the exit, and head home when you’re ready.
Getting there: routes from La Fortuna, Arenal, and Bijagua to Rio Celeste
Recommendation: Start before sunrise; take a straight northbound route, pack lunch, and budget a full-day if you want to explore the nearby spots along the way.
From La Fortuna and Arenal
Begin on the main highway north toward Bijagua; signs along the way guide you toward the entry area. The drive usually lasts about 2.5–3 hours in dry months; in the rainy season plan 3–3.5 hours. The final stretch features a narrower road with occasional curves, but a standard sedan handles it; a higher-clearance vehicle helps during heavy rain. There are several spots to stop and admire the forest and the water reflecting the morning light. Carry water; if you prefer lunch, Bijagua has modest cafes, or you can bring a snack to enjoy at a lookout. The trail to the viewpoint is easy for most, though a small climb requires a basic fitness. This exploration is impressive, and the colors feel vivid as you approach the river basin. Arrive with enough daylight to head straight to the entrance, and leave time for parking and signage checks; there are several helpful signs that indicate the main path and the viewing platform.
From Bijagua and northern routes
From Bijagua, head north on the primary artery toward the preserve; signs point the way to the entry. The drive is shorter, typically 45–60 minutes, weather permitting. The road remains well marked, with a few rough sections that are manageable with a sturdy vehicle. Along the way you’ll pass forest canopies and clear streams where you can admire the vivid greens and the water glistening in sunlight. There are small places to grab lunch or a coffee; later, at the park, a well-run service area offers basic facilities. Second option: if time allows, add a short stroll in a nearby reserve. Whether traveling solo or with family, this route reduces transfers and gives you more time on the trail. Keeping a steady pace helps your fitness level stay comfortable, and you’ll reach daylight at the trailhead with enough time to appreciate the view.
Best times to visit: weather patterns, crowd levels, and peak blue water visibility
Open at dawn during the dry months; plan to arrive earlier than opening, ideally in the morning, to enjoy calmer crowds and the best tint in the rivers. If you've been somewhere similar, you were ready to walk a short loop, then stop at viewpoints to absorb the landscapes and the light, continue to the next lookouts without rushing. Bring a bottle, brown footwear, a compact map, and be mindful that families with infants may need slower pacing; some sections include stairs and uneven ground, so choose routes that suit your pace.
Weather patterns favor crisp mornings with lower humidity during the dry window; cloud cover reduces glare and helps with color separation in the streams. Weekdays tend to be quieter; weekends draw more visitors and longer queues, especially during school holidays. Shoulder months offer a compromise on cost and crowd levels; plan a round trip that fits your schedule and budget to avoid peaks.
Peak tint occurs after several sunny days following a dry spell; after heavy rain, milky water reduces visibility briefly. To achieve the most impressive color, aim for the first hours after sunrise when the current slows and reflections heighten. If planning a longer visit, explore a nearby station and take the stairs to a higher tree-shaded overlook for a broader view of the river networks; the experience tends to be striking for families and solo travelers alike, especially in rica. Nearby arenal- viewpoints can offer a different angle on the same landscapes.
Practical tips: right planning helps. Book a morning slot, and if planning a combo with a nearby path, reserve early to avoid high costs at the gate. Opening hours vary by month; the right move is to check the latest schedule a few days before. Bring water, snacks, and sun protection; climbs include stairs and tree shade to reduce fatigue. If you travel with infants, keep pace gentle and choose routes with shorter sections. Office updates and ranger station advisories may note openings, weather, and safety tips, so stop there for maps and an updated plan. Don’t forget to pack a bottle and a small first-aid kit; you might want to bring a spare shirt and a sun hat.
| Period | Weather pattern | Crowd level | Water tint visibility |
|---|---|---|---|
| Dry season (Dec–Apr) | Clear mornings, cooler temps | Low to moderate | Best tint, minimal sediment |
| Green season (May–Nov) | Frequent showers, higher humidity | Higher on weekends | Variable; improves after dry spells |
| Shoulder months (Nov, May) | Mixed, transitional | Moderate | Balanced clarity |
What to pack: a concise rainforest hiking checklist for Rio Celeste
three core pieces: lightweight rain shell, breathable base layer, quick-dry bottom; two pairs of socks handle mud and humidity.
Sturdy, grippy hiking shoes protect feet on slick roots; gaiters help over mud; monkeys may watch from trees beyond the canopy.
Carry a reusable water bottle (two liters), plus a compact hydration sleeve; include electrolyte mix to stay refreshed; keep a small towel handy for a quick rinse near refreshing pools, though swims are discouraged in protected zones.
Carry maps or offline maps on a phone, plus a compact compass; know the location of the main point and the entry checkpoint. rangers manage entry checks; travel as a group; stay with the group, avoid wandering beyond designated paths; customers should keep IDs visible when requested and respect countrys protections.
hack packing tip: roll clothes tightly, use dry bags, and compress gear to save space; share a single solar charger within the station to extend battery life; youre prepared to explore without extra bulk.
Time plan: three hours round-trip; start at the official entry gate, reach the viewpoints, and soak in the refreshing scenery; though weather shifts, rain comes and goes quickly in this region, really.
Transportation options: park shuttle, private ride, or shared van; this works both with solo travelers and with groups; pick a point near the exit around the hour you plan to depart; the famous scenery adds a great memory to any itinerary in countrys protected areas.
reaction of wildlife matters: keep quiet, avoid sudden movements, and back away slowly if something approaches.
Fortunaarenal note: respect signage at fortunaarenal station; keep back from edges; leave no trace; always share location updates with the group like a beacon so everyone stays safe.
On-trail safety: footwear, footing, and river crossing tips
Wear closed-toe, lug-soled footwear with ankle support. Choose boots or shoes that dry quickly and offer solid grip on uneven, slick surfaces. Waterproof uppers help, but breathability matters in humidity. Carry moisture-wicking socks and a spare pair; a dry change can save a long day across miles. Across miles, traction reliability beats plush cushioning every time.
Footwear and footing
Test each footing before committing weight. Scan ahead for mossy rocks, slick roots, and soft mud. Keep your center of gravity low, knees bent, and step with a short, controlled pace. Place midfoot first, then the heel, maintaining three points of contact whenever possible. If a surface shifts, stop and recheck rather than rushing. Rock colour darkens when wet, signaling to slow down. A trekking pole helps probe stability on questionable spots. Look for opportunities to rest on solid, overlooking ledges rather than pushing through uncertain sections.
River crossing technique
When crossing, stop on the bank if the current is strong or visibility is poor. Plan a route using dry rocks, staying away from slick algae. Use a trekking pole or sturdy staff to probe depth and stability as you step. Keep your weight low, feet close together, and hips over your feet; move one foot at a time, maintaining three-point contact. If you slip, let go of the pole, drop the pack, and regain balance on solid ground. On weekends, guided groups often provide a safer line across; respectfully follow directions and keep pace with the group. If the water is high, retreat to the trailhead rather than risk the river. After crossing, dry feet, adjust socks, and note any hotspots so you can swap to refreshments when available.
Before heading out, open google maps to view terrain notes, and pick an early start to avoid crowds on busy weekends. Share your itinerary with a partner via a quick message when you begin; post a rough return time at the trailhead. Motmot sightings along the path add a bit of colour to the excursion, reminding us to respect ourselves, the landscape, and those we encounter along the way. Every post counts, each stop matters, and the path offers opportunities to learn, adapt, and grow our adventure collectively.
Conservation tips: how to minimize impact and dispose of trash responsibly
Carry a light, compact trash bag from the trailhead and return with it full, ensuring nothing leaves the track.
Limit plastic use by bringing a reusable bottle and containers; this helps long-term protection of the waters and nearby habitats in rica.
Essentials to carry on a single, light day include a compact waste bag, a refillable bottle, and a small container for waste.
Pack-out basics
- Pack-out plan: bring a small, resealable bag you can stash in a pocket; include wrappers, tissues, bottle caps, wet wipes, and any plastic you generate during a full-day outing; never leave this material on the trail, including near the waters and below fragile vegetation.
- Stay on the track and admire the wonder around you; avoid touching or feeding those birds, including ones jumping between branches, and primates; keep voices light and movements calm to minimize stress.
- Trash separation: if on-site bins exist, separate recyclables from organics and limit your portion of waste; if not, place everything in your bag for removal at the end of the visit; this approach receives less waste onto the path over years.
- Gear and safety: wear shoes with good grip; on a suspension bridge or during a quick crossing, test rails and keep a steady pace; this helps a morning routine stay safe and enjoyable.
- Park etiquette: do not pick vegetation, respect treehouse areas and other attractions; take only photos, leave only footprints; this little habit keeps the ecosystem healthy.
- Wildlife distance: maintain the right distance from primates and other wildlife; if a curious animal approaches, wait and let it pass; never attempt to interact or feed.
- Post-visit: returned to the start with your bag empty; plan another trip, noting what worked well, such as keeping a light load on the return; this habit is truly beneficial for the area and those who come after you.
Adopt this best practice as a daily habit; hikers who keep trace light receive long-term access to those pretty attractions and protect birds, primates, and other species. This is helpful, and after years, people returned to the same spot to see the area in good shape, which takes root in local culture.
Nearby experiences: viewpoints, hot springs, and other nature trails around Rio Celeste
Start at monteverde overlook at first light for clear views and crisp air; access is straightforward from the main road, the trail is well maintained, and youll need a light layer as the breeze shifts; youll beat the heat and gather great photos.
From the viewpoints, youll see a range of panoramas: river flats, distant hills, and a second ridge that offers breezes and a smell of damp earth; those spots can be free in some sections, but others require a small entry or a local guide. papagayo makes a great base, with a treehouse stay nearby.
Natural pools along the road provide mineral waters; the second pool area often has a free section, while a maintained facility may have a small fee; entering these zones is allowed where you respect the rules, and primates may be seen in the canopy nearby; mist particles hang in the air, adding to the mystique.
Beyond viewpoints and pools, there are other nature trails with opportunities to stay in a treehouse or nearby lodge; those paths connect monteverde and papagayo zones, and youll find silent moments when the forest breathes.
Practical notes: pack light, wear sturdy shoes, and respect posted signs; you must enter protected areas with care, and you may need to plan around weather; the countrys ecosystems rely on responsible travel, and the smells of earth and rain will linger in mundo memories for years; hack the day by visiting on weekdays, arriving early, and returning to a quiet clearing when possible.