


התחילו את הגעתכם עם תוכנית מעשית ליומיים: קצבו את העלייה הסלעית והבטיחו ביטוח. המקום הזה שוכן גבוה בהרים בגובה של כ-3,900 מטר, שם שכבות של עבודות אבן עתיקות חושפות טרסות נסתרות וחצרות מרכזיות. לטיולי אפריל, צפו לאוויר לח, לילות קרירים ושביל עמוס לחות שמתגמל הליכה איטית וצעדים זהירים כדי לגלות את המסלול לפני שינויי מזג האוויר.
עיקרי הדברים התחילו בעלייה מבוקרת המאזנת בין גובה לנוף. המסלול נפרש דרך פיתולים סלעיים וחומות אבן השכובות בשכבות, וחושף מתחם נסתר המציע נופים לרוחב הרמה. הטיפוס העיקרי הוא בערך שעתיים-שלוש לכיוון אחד, ואחריו חזרה קצרה יותר ואפשרות לחקור טרסות אחרות. הם שים לב כי תה קוקה וחטיפים קלים עוזרים עם הגובה במהלך טיול רגלי מפגשים; ייתכן גם לגלות זוויות חדשות.
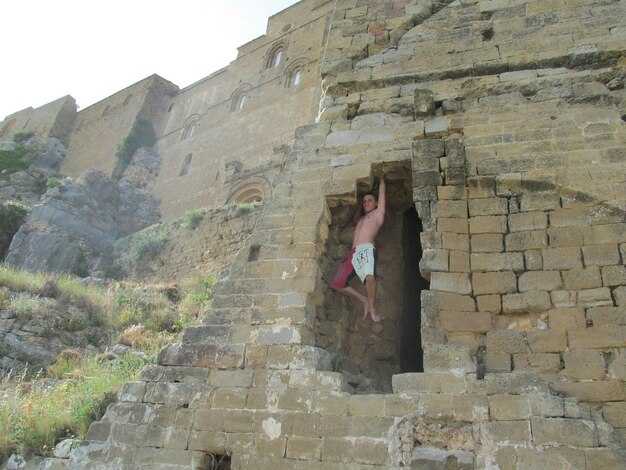
מעשי adventure ציוד: מגפיים עם אחיזה טובה, מעיל חסין רוח, כפפות, כובע, פנס ראש ותיק עמיד בפני מזג אוויר. להביא אוכל וחטיפי אנרגיה לעלייה, בתוספת 1–2 ליטר מים לאדם. המסלול מאתגר וכולל קטעים חשופים, אז תכננו קצב אחיד ושקלו מדריך לבטיחות. הטיול יכול להיות חינם של קהל בימי חול, מה שמקל על לגלות תַּבְלִיטִים עֲדִינִים וְטֶרָסוֹת נֶעֱלָמוֹת בְּעֵת הַטִּפּוּס.
לוגיסטיקת הגעה: יציאה מעיר השער עד הבוקר, הסדרת אישורים מקומיים ובדיקות ציוד עם מפעיל מורשה. מסלול דחוס של יומיים מתאים ליציאת בוקר, טיול יום וחזרה מאוחרת. מדריכים מקומיים מספקים מסלולים מדורגים בשטח ומצביעים על שיחי קוקה לאורך המסלול, והם יכולים לארגן חטיפים קלים ומשקה חם בפסגה. הביטוח מכסה הגנה רפואית בסיסית וביטול; חלק מהמפעילים כוללים אותו בחבילה, בעוד שאחרים מציעים אותו כתוספת.
בסופו של דבר, חוויה זו מספקת ייחודי מבט על גאה מקום באנדים. זה מתחיל בתכנון מוקפד, וה highlights כולל עלייה סלעית, טרסות נסתרות ותצפית פנורמית שזוכה לתואר של מיוחד הרפתקה. אם אתה רוצה ראשי מטרה עם פחות קהל ותחושה רחבה יותר של היסטוריה, מסלול זה הוא בחירה חזקה – אם כי הגעה נקודת ההתחלה בשביל מסמנת את תחילתו האמיתית של הטרק.
מסלול בוקר: תזמון מקוסקו לוואקראפוקרה ותחנות מפתח
התחילו בשעה 05:00 מהמלון שלכם בעיירת שער הכניסה להרמה כדי לתפוס את האור הטוב ביותר ולשמור על הקבוצה לפני ההמונים. זה well- התחלה מתוכננת מצמצמת את הסיכון בזמני הנסיעה וקובעת קצב קבוע לפעילויות שמספקות תוצאות הנאה במהלך הבוקר.
לוח זמנים משוער (בכפוף לתנאים): 05:00–05:20 איסוף מהמלון; 05:30 יציאה; 07:00–07:45 תצפית ראשונה מעל קניונים עמוקים עם scenic צפיות; 08:15 הפסקה ל חטיפים ובקבוק מים בדוכן כפרי; 09:15 הגעה לתחילת השביל; 09:45 תחילת ה בינוני עלייה; 11:15–11:45 חקירת האתר הארכאולוגי והסביבה חורבות עם מומחה מדריך; 12:15 עצירת צהריים עם אוכל קל חטיפים; 13:15 יציאה לחזרה; 15:30–16:30 מגיע הבסיס.
תחנות מפתח כוללות תצפית פנורמית עבור נוֹף וקניונים, ביקור קצר לארכיאולוגיה חורבות, נקודת התרעננות כפרית למים ראויים לשתייה ומקומיים חטיפים, ורחבת המקדש הראשית שבה קונדורים עשויים להופיע מעל הראש כאשר התנאים מאפשרים. עבור רבים תייר צלמים, רצף זה מספק הזדמנויות מצוינות לצילום עמוק אטמוספירה.
תנאים הם בינוני; שבילים עשויים להיות לא אחידים וחלקלקים ב גשום מזג האוויר. נעלו מגפיים חסונות, שכבות ביגוד, קרם הגנה וכובע, והביאו מעיל גשם קומפקטי. השפעות גובה אפשריות; הצטיידו במים בכמות מספקת ובערכת עזרה ראשונה קטנה. עבור insurance, בדוק את פרטי הפוליסה לפני היציאה.
רשימת אריזה: מים (2–3 ליטר), חטיפים, הגנה מהשמש, ז'קט קל, מעיל רוח ותיק גב קטן. מצלמה או טלפון עוזרים לך ללמוד תוך כדי תנועה במהלך עצירות מודרכות, ואתה יכול הנאה הנוף באמצעות הבוקר.
אפשרות זו מתאימה תייר מחפש שילוב קומפקטי של טבע וארכיאולוגיה. א מומחה-מסלול מודרך מספק הקשר ושומר על קצב. משפחות עם ילדים צריכות להתאים את הקצב כדי להימנע מעייפות; טיולים פרטיים מציעים יותר שליטה עבור אחר לוחות זמנים או העדפות, כולל התחלות בוקר נינוחות בעונות גשומות.
בסביבות הצהריים תצללו אל תוך ההיסטוריה האזורית ותיהנו מ- נוֹף ופּרספּקטיבות קַנְיוֹן, ועמד על במת המִקְדָּשׁ עם אווירה אַנְדִינית. הטיול מחזיר אותך עם תחושה מחודשת של sanctuary וגדול יותר ללמוד about regional heritage.
What to Pack and Wear for a Morning Waqrapukara Trek
Start with a lightweight, layered system: base layer, mid-layer fleece, and a windproof shell. Your setup should include a 20–25 liter daypack with a rain cover and trekking poles for stability; the final forecast will determine extra gloves or a thicker layer.
Footwear matters most on the approach: sturdy hiking boots with ankle support and moisture-wicking socks, plus gaiters if mud or loose scree are expected. Walking on uneven sections demands firm grip and reliable ankle protection.
Thermal layers are non‑negotiable: wear a breathable base, a warm mid‑layer, and a shell that blocks wind. In the colder hours of dawn, even a thin insulated layer makes a big difference, and you can shed it as the sun climbs.
Sleeping comfort is practical for rest breaks: bring a compact sleeping pad to sit or lie on when you pause, especially if you’ll spend longer stretches at higher spots.
Coca and acclimatization go hand in hand: you should consider a small amount of coca tea or leaves if culturally appropriate; many travelers find it helps with altitude and adds a spiritual, grounding moment before the climb.
Headwear, eye protection, and skin care: a warm beanie, gloves, sun hat, and sunglasses are essential; SPF 30+ sunscreen and lip balm protect skin from strong rays at elevation.
Hydration and nourishment: carry 2–3 liters of water per person and electrolyte sachets; pack lunches or snacks, and confirm with your guide whether box lunches are provided. Note that some operators apply a separate cost for hot meals, so ask about costs and rates before departure.
Weather awareness drives packing choices: mornings are colder and winds at higher sections can be brisk; be prepared for rapid changes, and use a breathable outer layer to regulate temperature while you gain elevation.
Personal items and safety: a small first‑aid kit, whistle, and a compact flashlight or headlamp with spare batteries should live in every bag; keep valuables secure and within easy reach for quick access during the ascent.
Views and route notes: expect hidden vantage points along canyons and ridgelines offering spectacular, panoramic scenery; start early to maximize light and minimize crowds, and learn a few historical details from your guide while you move within the agreed track.
Place and preparation mindset: your morning climb combines physical effort with cultural insight, so pace yourself, monitor the weather, and respect local practices around waqra areas; a thoughtful setup now reduces final stress later and keeps the experience enjoyable for every participant.
Trail Difficulty, Elevation, and Pace for a Morning Visit
Begin at 6:30 a.m. to catch cool air and steady light, finishing by 10:30–11:00 a.m. if your pace is consistent. In peru’s high andes, altitude can affect pace and breathing; adjust speed to your condition. The route runs 5–7 km round trip with 400–700 m of elevation gain, depending on route choice and loops; expect rocky stairs, uneven rock slabs, and short steep segments.
Trail profile and highlights
- Difficulty: moderate to challenging in places; uneven footing, exposed sections on the upper portion, and several switchbacks.
- Distance and pace: 5–7 km round trip; 3–4 hours of moving time; add 30–60 minutes for breaks or photo stops; a slower pace is recommended at altitude.
- Elevation: base level around 3,800–3,900 m; summit between 4,200–4,500 m; total gain roughly 400–700 m; acclimatization matters for condition and energy.
- Footwear and gear: sturdy hiking boots with solid traction; trekking poles help on loose rock; keep devices charged and a backup power bank.
- Weather and climate: mornings can be cool and breezy; pack a light rain layer, sun protection, and a warm layer for shade or wind.
- Terrain and surface: granite and compact soil with exposed terraces; watch for loose stones underfoot.
- Sites and vantage points: multiple terraces provide sacred-looking views; the stonework is traditional and highlights the skilled construction.
- Snack and service: a traditional snack and hot drink may be available from a local chef; this is optional and depends on the operator.
- Among the highlights are terraces with sacred views and traditional stonework that reveal a remarkable engineering heritage.
- Hike, walking, feel: maintain a steady hiking pace and walking rhythm; feel your breath balance with the ascent.
- Position and rhythm: best photo positions are on the terrace edges where the panorama opens up; keep a steady walking cadence.
- Request: if you have a pacing preference or want to adjust the route, communicate this ahead of time to your guide or operator.
Practical tips and safety
- Insurance: verify coverage for high-altitude walking and emergency evacuation; carry policy numbers or digital copies for quick access.
- Items and devices: pack water 1–1.5 L, energy bars, sunscreen, hat, windproof layer, small first-aid kit; bring a map or offline navigation app and a spare battery.
- Condition: monitor hydration and fatigue; step aside if lightheaded; avoid overexertion, especially for first-time visitors at this altitude.
- Seamless planning: for trips seeking a full-day experience, pair with additional sites and a return by afternoon; some operators offer free time between stops.
- Position, walking pace, rain contingency: start with a comfortable pace, adjust on the go; if rain arrives, seek shelter at established terraces or resume after a safe rest.
- Safety note: stay with the group; carry a simple signaling device if traveling with others; inform someone of your plan and expected return.
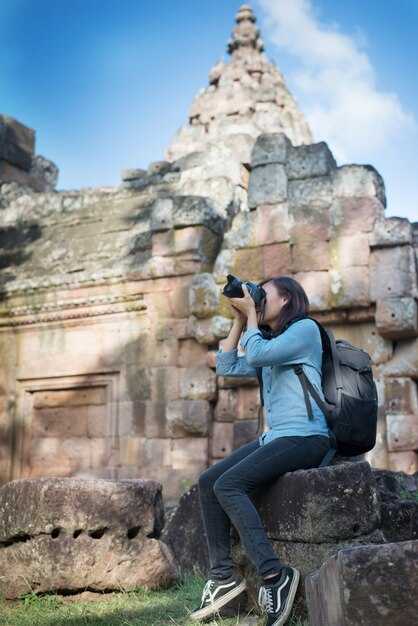
Best Photography Spots and Dawn Lighting at Waqrapukara
Arrive before sunrise with a compact kit and a sturdy tripod to lock in the first glow on the main towers. youll want to shoot from the lower terrace and from the northern ridge to capture the deep, sculpted silhouettes as the sun climbs the mountain. in november the air stays crisp and the light shifts quickly; check weather and rainy conditions, since a misty morning can give soft colors while a clear spell yields sharp textures on stone and green slopes. the distance to the best viewpoints is usually short, within a 15-minute walk, leaving you plenty of time to test different frames before shadows lengthen. the pukara silhouette grows with light, guiding the eye along the ramparts.
Sunrise Vantage Points
From the southern approach, the sun crowns the ridge with warm gold, making the rugged blocks glow and revealing carved details that stay deep in your frame. a cave on the lower ledge provides a sheltered option for a moody silhouette, especially when wind softens the air. if you want a wider scene, step back to the main overlook and pan across the valley to include distant mountains and the sacred stone alignment that lines the horizon. youll also notice that foreground greens emerge better after a dry stretch; carry poles for balance on uneven ground.
Gear, Timing, and Practical Notes
expert guidance: keep your gear light; a wide-angle 16-35mm and a mid-tele 70-200 cover most tasks, but an optional prime can deliver sharper night shots. for dawn shoots, plan two frames: a wide view and a tight crop. if you visit in november, expect variable weather; rainy conditions can create reflections on stone and grass, also fog that adds mood. the distance to the main vantage is usually short, but the trail can be slippery after rain; wear proper fitness gear and consider trekking poles to improve stability. youll want to protect your camera from moisture with a rain cover, and leave time for a quick review of shots to ensure you captured the desired light. if in doubt, bring an extra battery; you might need it after a cold dawn. questions about camera settings? start with ISO 100, f/8, 1/125s in bright light and adjust to 1/60s or slower if the sky is pastel; also bracket if you have the opportunity. leave the area with care, respecting the site and local guidelines.
Booking Steps, Inclusions, and Meeting Point Details
Book the early-morning slot to maximize light, watch the dawn over the mountain, and discover the place before the crowds arrive.
Booking Steps
Step 1: Make date selection and list all participants’ names and ages in the online form.
Step 2: Confirm group size with the local desk; you may be called to verify travel details and the arrival window.
Step 3: Receive a confirmation with a booking code and the items included in your itinerary.
Step 4: On arrival, present your ID and the code, and watch the safety briefing before departure.
Inclusions, Meeting Point, and Practicalities
Includes licensed guide service, permit fees, safety briefing, bottled water, snacks, and basic first-aid equipment; packing recommendations follow in the packing paragraph.
נקודת מפגש: כניסה לסנטה פלאזה. חלון ההגעה ופרטי האיסוף נמצאים באישור שלך. המדריך המקומי שלך, ששמו סנטה, יקבל את פניכם בשער ויוביל אתכם לנקודת ההתחלה; סעו יחד כקבוצה לזרימה חלקה.
מתקנים והערות מעשיות: שירותים ואזורי ישיבה מוצלים זמינים באזור הרחבה; העלייה כוללת מדרגות המתנשאות לגובה כמה מטרים, עם חלקים לא אחידים לאורך השביל. נעלו נעליים יציבות, הביאו ז'קט קל, קרם הגנה, כובע, בקבוק מים רב פעמי וכמה חטיפים. הנחיות אריזה: כללו פריטים אלה ושכבת גשם קומפקטית כדי שתישארו בנוח. מסלול זה מציע נקודות שיא מדהימות ומשמעות קדושה; ביחד, אתם והמדריך שלכם יכולים לגלות נרטיבים מקומיים תוך כיבוד הנחיות ההגנה; באחריותכם להישאר על השבילים המסומנים ולקחת את כל האשפה איתכם.