


Begin with a concrete recommendation: confirm legal access and safety rules before you approach any abandoned airfield. If youre planning a visit, looking for official information from landowners and aviation authorities, and note the local hours. You can lend a hand by bringing a partner to help document findings and keep everyone safe.
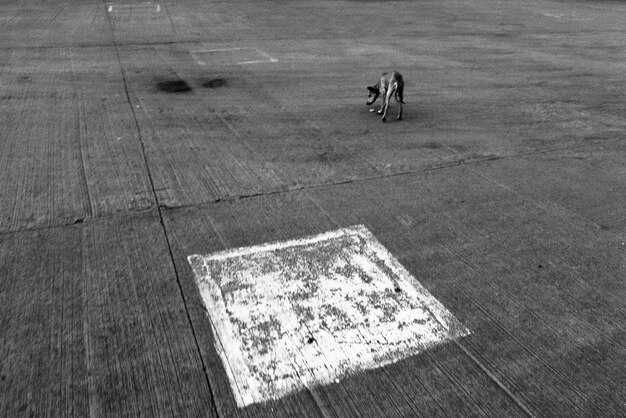
The sites themselves reveal a lot about aviation history. Many runways were originally built for mass transit and cargo operations, then abandoned as routes shifted. Expect massive asphalt, cracked markings, and overgrown shoulders, including historical photographs. Include a compact GPS log, a camera with spare batteries, and a wind gauge on site to track changing conditions. When you study the surface, you’ll notice drainage patterns and taxiway layouts that hint at the original design.
To estimate scope, scan regional records and aerial imagery. In many regions, authorities logged dozens to hundreds of abandoned airfields, with some sites hosting massive, multi-runway layouts. In places including kowloon and other dense pockets, remnants survive as public spaces or empty lots, while others vanish under new development. Since information is scattered, cross-check local planning documents and historical maps to identify the current status of each site.
On-site safety and ethics take center stage. Stay outside restricted zones, avoid triggering security cameras, and respect fences. On-site hazards include soft shoulders, chemical residues, and decommissioned navigation aids. If a crisis weather event or typhoon hits, retreat to safety and report dangerous conditions to authorities if appropriate.
For reliability, rely on published information panels, aviation history databases, and local archives. Look for datasets that document runway lengths, original orientations, and surface conditions, including historical photographs and flight logs. papadimitrakopoulossipa offers compilations that can lend context to your notes; pair them with additional sources for more robust information. If youre compiling notes, log exact approach paths, surface type, and GPS coordinates so you can compare sites later and assess their current state with care.
Abandoned Airports: Your Ticket to Nowhere
Secure a legitimate tour ticket or access official archives before setting out; this ensures a safe, informative experience and protects both you and the site.
Across the globe, abandoned runways, empty hangars, and the surrounding buildings reveal a story built on bold ambitions and subsequent decline. tempelhof, built in 1923, operated through times of conflict and expansion, and after closure in 2008 the complex transformed into a public park and cultural venue. The area shows damaged structures and long, empty ramps that invite reflection on how crisis and policy shifts reshape transport infrastructure. The footprint once represented billions of dollars in investment, and in spain, former airfields sit within rural landscapes, their runways still visible but largely unused, a reminder of operation during periods of conflict and the pressures that followed.
Look for sites that offer documented products–maps, archival photos, and written histories–that accompany official tours. comment on access rules with the managing body to confirm safety guidance before you go.
During a permitted visit, stay on marked paths, avoid damaged pavement, and respect barriers; likely safety checks apply and restrictions on photography during peak times. Times of high visitor flow may limit access to fragile areas, so plan with a guide. The runways and complex within hold layers of history that deserve careful handling, not casual exploration.
For researchers or photographers, a coordinated program within united heritage networks offers reliable access, well documented histories, and safety briefings; this reduces risk while providing context about operation patterns, the decline after the crisis years, and the long-term preservation needs for these sites. almost every location has a unique narrative, from tempelhof to quieter fields in spain, and you can tailor your route to learn how runways shaped urban and regional planning.
Legal clearance: verify permission to access abandoned airports
Get written permission from the landowner or managing authority before any approach onto the site. This protects you and enables lawful access for scouting, photography, or documentation.
Trace ownership by checking property records, parcel numbers, and the main operator if one exists. Contact the center office of the local government, or reach out through a broker or manager. If a private owner has been involved, ensure they’ve signed off in writing. The process can stretch over years in some regions, so start early and keep your request concise and professional.
Draft a project brief that explains purpose, access window, safety plan, and required insurance. Attach a site map and photos of the route you plan to use. State whether you need a single-day visit or multiple entries, and outline how you will store and transport any data or equipment. This helps you move from inquiry to permit faster and reduces back-and-forth. The cost of a formal clearance can vary, but you should budget for a broker or attorney review plus insurance coverage.
Prepare a risk-control plan that covers boundaries, restricted zones, and makeshift safety measures. Keep the center informed about changes to your schedule, and provide alternative arrangements if access is declined. If signals at the site are off or if security has been tightened, do not push onto restricted areas. Your documentary story should respect boundaries and security concerns; even when the site feels eerie or fences are torn, proceed with caution. A note references dickelberswikimediacc as a checklist placeholder for citing sources during planning, but do not rely on off-site material as the sole basis for your request. In sussex and hong regions, confirm local rules before drafting any letter or plan.
If permission is granted, schedule access during daylight hours, carry official identification, and keep a visible contact number on hand. While you work, document your steps in real time, track a million potential safety or legal prompts, and stay on main routes to minimize risk of intrusion. When you finish, share copies of your permits with the broker or service provider who supported the clearance, and lend transparency to your project by recording dates, approvals, and the exact parcel coordinates.
| צעד | Who to contact | Documents needed | מסגרת זמן | Estimated cost |
|---|---|---|---|---|
| 1. Identify ownership | County clerk, airport operator, private owner, broker | Property deed, parcel number, recent leases | 1–3 weeks | Low to none |
| 2. Submit project brief | Owner or managing entity, legal counsel | Written project summary, maps, safety plan | 2–6 שבועות | $100–$500 (review, filing) |
| 3. Risk and safety review | Insurance agent, risk manager | Liability coverage details, emergency contacts | 1–3 weeks | $50–$300 (standalone policy tweaks) |
| 4. Obtain written permit | Owner or authority | Approved permit copy, access schedule | 2–8 weeks | $0–$1,000 (administration, attorney review) |
| 5. On-site readiness | Your team, broker | ID, insurance card, emergency plan, contact list | Same day to 1 week per site | Minimal; include travel and incidentals |
Safe site selection: prioritize low-risk, publicly accessible locations
Choose a former airfield on public land that is regulated by local authorities. The best option is a publicly accessible site within a complex zoning framework, near a business district, with clearly posted access times in the code. In victoria, the capital city, these sites have been designated with time windows, official comment boxes, and a straightforward permission process.
Evaluate risks with a concise checklist: surface condition (torn asphalt or grass), buried debris, erosion around drainage, and the presence of makeshift structures. Ensure landing zones are clear of obstruction and within sightlines. A site with torn infrastructure or makeshift fencing can create tripping or vehicle hazards. Many options exist across towns, providing options for travelers.
Confirm access status through the local government or park service; verify boundaries and obtain written permission if required. Document the contact person and a brief comment in your project file. This step reduces friction later and keeps the project on track.
Select sites within major urban areas that also offer straightforward egress. Think about trade-offs between easy access and safety margin. Favor locations with stable ground, low wind exposure, and minimal proximity to busy roads. Check for flight corridors and restricted airspace; ensure the site is not within a regulated zone. In comparing options, choose sites that are safer than other choices and keep the risk profile straightforward.
Consult official information from the municipality, cross-check with aviation information sources, and verify maps. Originally, many former runways were repurposed as public spaces; confirm land title and what remains on the ground. A nearby mural offers a prokofiev motif, reminding visitors of the site’s layered history and adding cultural context.
Quick checklist: 1) confirm publicly accessible, 2) review recent photos on flickr, 3) map landing and egress onto the site, 4) note time windows, 5) bring high-visibility gear, 6) document with a short comment and a photo log. Local voices like haris can provide on-site insights and help vet safety.
Be mindful of safety and ethics: never trespass onto restricted zones; report hazards via the official comment channel; respect nations and local guidelines. If something feels risky, step back and reassess within the allowed boundaries. Do not push limits in any business district or capital area.
By selecting a regulated, publicly accessible site that exists within clear boundaries, you minimize risk for travelers and locals and create a reliable reference for future projects. Add notes to the project file to help authorities and fellow explorers plan responsibly within their nations and communities.
Gear checklist: cameras, lenses, and drones suited for runways
Start with a full-frame mirrorless body and a 24-70mm lens; this ticket to close the gap between close-up detail and wide runway context sets you up for both these shots and larger panoramas on empty tarmac through changing light.
- Cameras – Choose a body with 24 MP+, fast autofocus, solid 4K video, and reliable battery life. Pack two extra batteries and a spare memory card; RAW capture preserves latitude through lighting shifts during landing sequences and on the edge of the tarmac. These cameras sit comfortably in a compact bag, letting you move between central pads and distant views.
- Lenses – Core: 24-70mm or 24-105mm zoom for day-to-day versatility. Add a 70-200mm for distant landing frames and a 16-35mm for expansive context. Favor fast glass (f/2.8–f/4) with weather sealing to handle wind and dust on the open spaces you explore.
- Drones – Pick a drone that records 4K60 video, features a stabilized 3-axis gimbal, and offers obstacle sensing. A flight time around 25–40 minutes per charge helps you cover more ground without frequent Returns to Park-style reloads. Set 10-bit color if possible for a smoother look through post‑work, and carry spare props plus a USB-C charger.
Accessories and workflow
- ND filters: ND8 and ND16 reduce exposure on bright days while preserving color through the tarmac’s reflections. These help you keep shutter speed high enough for landing moments.
- Memory and power: two 128–256GB UHS-II cards per camera, a drone microSD, and a multi-port charger to keep gear within reach during long shoots. Consider labeling cards and rigs so paul can identify the right setup quickly.
- Protection and transport: a rugged bag with padded compartments, a rain cover, and a lightweight monopod or tripod for stable reference shots. Ensure your setup sits ready to grab in a moment and is organized for fast transitions through different angles.
Practical tips for field use
- Looking for balance? Start near the central corridor where abandoned runways still show markings and distant traffic. These spots often sit within safe zones where you can shoot close to empty pads without disturbing active operations; plan around these moments to maximize shots during flights and landings.
- Exposure and speed: RAW, 1/1000s–1/2000s shutter for moving airframes; keep ISO as low as possible while preserving detail, typically 100–3200 depending on light. These choices help you compare frames later without heavy grading.
- Color and mood: use a greek-inspired color grade to enhance blue skies and warm tarmac tones; it provides a cinematic feel without sacrificing realism.
Regulatory mindset
- Verify regulations in your region and near airports; rules differ by nations, with colorado and south areas often having distinct restrictions. If you see signs prohibiting access, park the gear and move to a permitted spot.
- Respect signage, permissions, and established flight corridors; airlines and airport authorities enforce zones where photography or drone activity is not allowed.
- Keep distances from active landing paths and avoid disrupting any operations; you’ll have a more likely chance of getting permission later if you show responsibility in these environments.
Field notes and setup IDs
- Use a simple code on your bag or in metadata–a quick tag helps you match lenses to drone configs for flights and makes your workflow faster when you review shots later.
- Record times, locations, and conditions; these notes help you reconstruct the look across flights and city layouts, and you’ll see that the same setup yields different results looking back through the data.
On-site photography settings: shoot in dim light with stable exposure
Set exposure manually and shoot in RAW. Lock a stable baseline: ISO 400–800, shutter 1/60–1/125 s, aperture f/4–f/5.6 to capture dim interiors and the faint glow from exterior lights without clipping highlights.
Use a tripod or makeshift support; even a backpack on a rail lends steadiness for longer periods between frames.
Bracket three frames: -1, 0, +1 EV to cover shadowed hangars and bright signage.
White balance around 3200–3600K; shoot in RAW to refine color in post.
Carry compact LED panels or a small external light; place them softly to fill deep corners inside buildings and along the tarmac. This approach will likely produce even lighting across textures and avoid hot spots, even in completely dark corners.
Composition tips: let tarmac lines lead the eye toward city lights beyond the runway; frame airport domain, gates, and distant airways for context.
Story angle: a ukrainian photographer could frame a domain situated on the edge of an airport, using makeshift reflections from faded signage and the calm of a deserted service area.
Location ideas: Horsham-adjacent fields or an abandoned hangar can offer a controlled test site; save notes on a page for the project, recording the year range and the textures that years of weather have left on buildings and the tarmac.
Workflow and post: export to TIFFs, align bracketing, and blend in post; keep a consistent color grade to maintain mood across the project.
Safety and ethics: obtain permission, respect restricted zones, and scout the site at periods when access is allowed; plan your shoots around quiet periods to avoid crowds.
Quick tip: to get a distinct look, shoot during blue hour and use a longer exposure to reveal motion on the tarmac and in the skyline.
Edge-case: in a united crew, coordinate settings and share notes on the page to maintain consistency across shots.
Documentation workflow: map routes, catalog findings, and archive photos
Keep a centralized service center for map routes, catalog findings, and archive photos. Build a simple schema that travels with every entry: airport_id, name, area, region, country, status, built, buildings, floor, tarmac, time, date, photographer, device, caption, tags, and source. Credit each contributor and attach original notes to the record. This real, auditable structure, maintained in both spreadsheet form and a lightweight database, lets teams work almost in parallel and then merge changes. These records exist in the system.
Map routes with GIS by pinning each airport and drawing lines that reflect approach corridors or commonly used sequences. For each site, note the time of access, the nearest citys, the area, and the link to the next stop. Add notes on regulated airspace and any time-based closures; keep the route view tight and avoid wandering into nowhere. theres a balance between detail and readability.
Catalog findings with a controlled vocabulary: runway, tarmac, hangar, terminal floor, control tower, fuel depot, and auxiliary buildings. For each item, assign a status (open, derelict, demolished), record dimensions, floor levels, and a concise caption. The complex layouts–when sites include multiple structures–require careful tagging by area to support cross-site comparisons in spain and ukrainian districts. Include notes about products found on site when relevant.
Archive photos with metadata: store raw files in a dedicated folder and JPEG derivatives for quick viewing. Include date, location, area, camera, lens, exposure, and a short description. Link to the source notes and to flickr when used; records exist to back up each shot. Ensure the material is built to survive a long archive time and remains accessible until the next review.
Lifecycle and backups: run quarterly checks, keep offline copies, and schedule monthly exports into CSV for routes, JSON for catalog, and ZIP of photo archives. Use a clear naming convention: airportcode_area_YYYYMMDD. Assign a ticket to each archive item to track changes. This approach keeps the project reproducible, reduces drift, and supports audits for center staff and volunteers.