

 32 הדברים הכי טובים לעשות בקנאנאסקיס – מדריך מלא לארץ קנאנאסקיס">

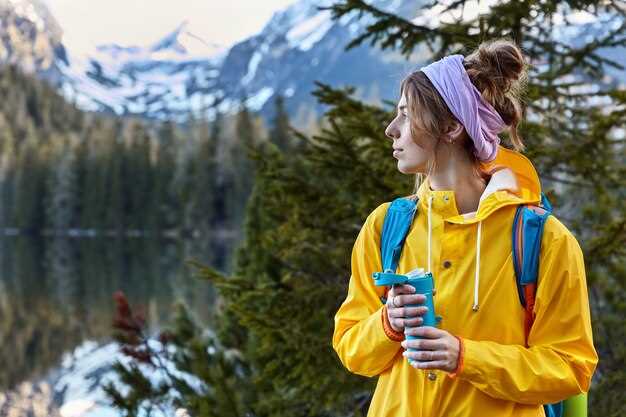
:התכנון להיום: להזמין נופש באגם ליד שדה התעופה ולמפות את 32 ההרפתקאות שלך באמצעות המדריך הזה. This guide יכלול קניונינג, תרבות, אגמים כחולים ורגעים ששווה לצלם. חפשו גמישות השכרה אפשרויות וטווח מחירים שמתאימים לכל אחד תַקְצִיב.
מאת גב מהרי הרוקי ועד למפרצי הטורקיז, תרדפו אחרי שמיים כחולים בטיולים המתאימים לכל הרמות. התחילו בטיול נינוח לאורך שפת האגם, ואז התמודדו עם מסלולי קניונינג מלאי אדרנלין. כל רשומה כוללת משך זמן, רמת קושי והערות בטיחות מעשיות שיעזרו לכם לתכנן בביטחון ולהתאים יום אחר יום תראה מה לעשות הלאה.
בנוסף לטיפים למסלול, המדריך מדגיש את פרסה צורת מעברים פופולריים, ניו זילנדים בקתות, ואותנטי תרבות תחנות עצירה. תגלו לא מעט. הצעות מֻנְחֶה הרפתקאות, מסלולים ידידותיים למשפחות, וכן תַקְצִיב- אפשרויות ידידותיות למשתמש עם ברור price טווחים. ה חוף האגם הפרקים כוללים מפות, הערות חניה ונקודות הצילום הטובות ביותר לכל עונה.
:הגישה פשוטה: טוס לקלגרי Airport, ואז סעו כשעה וחצי לקנמור, שם ציוד פרקטי השכרה חנויות עומדות לאורך המסלולים. השתמשו ב תראה קטע לבחירת השילוב הנכון של פעילויות, החל מטיולים קלילים ועד כאלה מלאי אדרנלין הרפתקאות. אוסף זה מציע תוכנית תמציתית לסוף שבוע ארוך מושלם או לחופשת אמצע שבוע ממוקדת.
?מוכן להתחיל? הקש על ההורדה והתחל לתכנן את הבעיטות שלך, עם שקוף price פירוק ו תַקְצִיב הכוונה שמסייעת לך למקסם את הערך תוך כדי הנאה מהטבע במיטבו הכחול והרחב.
מסגרת מעשית להפיכת 32 חוויות בקנאנאסקיס לתוכניות ממשיות
בחרו ארבעה חוויות המקובצות לפי אזור ועונה, ולאחר מכן תכננו כל אחת מהן לבלוק של יומיים-שלושה עם בסיס אם בקנמור או בלודג' ליד דוריין. גישה זו מעניקה זמן בטבע ושומרת על נסיעות בין מוקדים בפחות משעתיים סך הכל בכל יום. התחילו עם עלייה אחת בבוקר, פעילות מים אחת, הפסקת בראנץ' אחת ולילה רגוע אחד במקום לינה כדי להתאפס. אם מדובר בחורף, החליפו במסלולי סקי; אם מדובר בקיץ, הדגישו מסלולי קאנו ומסלולי הליכה ארוכים יותר. שיטה זו מניבה דפוס גמיש וניתן לחזרה שתוכלו לעשות בו שימוש חוזר לאורך סופי שבוע או טיול קצר, והיא גם מייחסת קרדיט למדריכים מקומיים על בטיחות ובדיקות ציוד.
שלב 1: מיפוי חוויות לפי אזור. קיבוץ אזורי דוריין ומרכז קנאנסקיס עם אזור לואיז ונקודת התצפית האוויאה כנקודות עוגן. יצירת מטריצה פשוטה עם מרחק בקילומטרים וזמן נסיעה בין מוקדים. שמירה על מסלולים בתוך חלון של שעה וחצי עד שעתיים כדי להימנע מעייפות. הכללת כיסי שממה הנגישים ברגל ופעילות מים אחת לכל בלוק. עבור מטיילים בינלאומיים, יש לציין גישה נוחה מקלגרי ואפשרויות העברה משדה התעופה. יש להשתמש בקרדיט כדי להכיר במדריכים ובמארגני טיולים שיכולים לשתף טיפים עדכניים לבטיחות ובדיקות ציוד, ולסמן את התחנות הציוריות ביותר לצילומים.
שלב 2: המירו ארבעה יעדים ליחידות יומיות. תוכנית בסיס לדוגמה מתחילה בקנמור. יום 1: טיול זריחה במעגל דוריאן (כ-12 קילומטר, 4 שעות) ואחריו הפסקת בראנץ' של שעה בבית קפה מקומי. יום 2: סשן קיאקים באגם קאנאנאסקיס תחתון (כ-6 קילומטר חתירה, שעתיים) עם פיקניק של שעה על החוף; סיימו עם טיול נינוח לבית קפה באזור לואיז הסמוך. יום 3: טיול באגם לואיז (כ-8 קילומטר, 3–3.5 שעות) שמסתיים בתרגול גולף של שעה וחצי במגרש סמוך. כל יום כולל חלון מעבר קצר ותוכנית מגירה גמישה למקרה שמזג האוויר ישתנה, כדי לשמור על קצב ידידותי לוויליאם ולקבוצה. שאטל סראי יכול לקשר בין נקודות התחלת מסלולים כשצריך כדי לקצר את החזרה, ומרווח של שעה עוזר עם עצירות צילום ובדיקות ציוד מגן אישי. תבנית זו מאפשרת לכם לבחור מסגרת יעילה ביותר של יומיים או שלושה ועדיין לכסות מספר נושאים.
שלב 3: סגרו לוגיסטיקה. הזמינו מקומות לינה עם אפשרות ביטול גמישה, במיוחד ליד תצפית האוואה או בקתות לואיז. הזמינו השכרת קאנו וציוד מים לפחות שבועיים מראש, ואשרו מועדי חבטה לגולף שבועיים לפני הטיול. ארזו מגפיים, שכבות ביגוד, מעילי גשם וערכת מיקרו-ספייק לחורף. לחורף, הכינו תוכנית גיבוי לימי סקי ומסלולי הליכה קצרים יותר שנשארים ברדיוס של 5 קילומטרים אם הראות מצטמצמת. תזמנו חיבור שירות באמצע היום להעברות מהירות לתחילת המסלול ושמרו על דף מסלול מודפס לאורחים בינלאומיים שאולי לא משתמשים כל הזמן במפות בטלפון. ההכנה הקפדנית הזו נותנת לכם שעות אמינות בשטח בלי להרגיש ממהרים.
שלב 4: סקירה ושיפור. לאחר טיוטת תוכנית ארבעת הבלוקים, בדקו תחילה פחות משתנים - שני בלוקים בכל סוף שבוע - ובצעו התאמות בהתאם לזמן הנסיעה, מזג האוויר והקהל. רשמו שעות, מרחקים ורמות נוחות בפועל, ואז הקצו מחדש משאבים לריצה הבאה. שמרו על תוכנית משותפת עם קו תקשורת ברור לשינויים של הרגע האחרון, ורשמו הערה לגבי מקומות מועדפים לבראנץ' ואפשרויות לינה. שינוי קטן מניב לעתים קרובות חוויה חלקה יותר באופן ניכר בכל 32 החוויות.
| חוויה | Day | מרחק (ק"מ) | זמן (שעות) | לוגיסטיקה מרכזית | לינה |
|---|---|---|---|---|---|
| דוריין לופ - טיול בזריחה | Day 1 | 12 | 4 | שביל קנמור; חובה נעלי הליכה; שאטל סראיל מחבר בין נקודות התחלה של שבילים | קנמור לודג' / בקתת האוואה |
| קאנו באגם קאנאנאסקיס תחתון | Day 2 | 6 | 2 | השכרת קאנו; חגורות הצלה; חניה ליד האגם; אורחים בינלאומיים יכולים להזמין משוט מודרך | לודג' באזור לואיז |
| טיול ציורי בלואיז לייק + בראנץ' | Day 3 | 8 | 3–3.5 | התחלה באגם לואיז; עצירה בבית קפה מקומי לארוחת בראנץ'; להביא מצלמה לתמונות | לואיז לודג' / בקתה על שפת האגם |
| מִנְהַג הַגוֹלְף בְּאֶרֶץ קְנַנַסְקִיס | Day 3 | 0 (קישורים מקוצרים) | 2–3 | זמן טי שוריין שבועיים מראש; הנעלה מתאימה; בדיקת מזג אוויר | מלון קנמור |
הערות: ויליאם שומר יומן שוטף של מרחק וזמן כדי לייעל מסלולים עתידיים, בעוד שלואיז אוצרת אפשרויות בראנץ' ומדגישה מקומות עם נוף ציורי. תצפית האווה היא עצירת שקיעה אמינה אם אור יום מאפשר זאת, וחיבור סראיל מסייע להפחית חזרה על עקבות בין נקודות התחלה של שבילים. מסגרת מעשית זו תומכת בגישה חוזרת על עצמה לאורך עונות השנה, עם נקודות נתונים ברורות שתוכלו להתאים לסוף השבוע הבא שלכם בקאנאנאסקיס.
מזחלות כלבים בספריי לייקס: הזמנים הטובים ביותר, עלויות ושלבי הזמנה
Book the morning 2-hour dog sledding run for calm trails, firm snow, and views that lift your heart.
Best times span late December through March, when daylight is sufficient and the dogs stay energetic. Expect 1–2 hours on the trail, plus a safety briefing and transfer. The longest options reach about two hours on certain packages.
Prices range from CAD 120 to CAD 250 per person, ranging by package length and inclusions. Some experiences include a warm drink or a light breakfast after the ride. Gear is provided, and renting extra outerwear or boots is available if you need it. Included are safety briefings, trained guides, sleds, and the team of dogs; confirm gear specifics with your operator.
Step 1: Choose a licensed operator in the Spray Lakes area, with meeting points around Louise Creek and near the center along the Lougheed corridor. Step 2: Check availability for your date and preferred duration (half-day options exist). Step 3: Select a package, review gear inclusions, and confirm participant details. Step 4: Complete payment and receive a booking confirmation with the meeting time and exact location. Step 5: Arrive 15 minutes early to meet the crew, fit harnesses, and hear safety instructions.
What to wear and bring: layered, moisture-wicking clothing; a warm hat and gloves; waterproof outerwear; sturdy boots with traction. The operator provides sleds, harnesses, and dogs; you may rent additional gear if needed. After the ride, a quick breakfast or hot drink at the lodge is common, depending on the schedule.
Expect a guided course that includes a bridge over a quiet creek and scenic viewpoints. Guides explain the basics of snow patterns and glaciology to help you read trail conditions. Theres a backup plan if weather or trail conditions force a pause, and crews adapt quickly to keep you safe. The route avoids climbers’ routes but may share connectors around the creek and bridge sections. The experience has pros for families, couples, or groups seeking a Canadian winter adventure.
Planned itineraries and flexible times help you fit the ride into your day. The center in Spray Lakes offers a modern setup with trained guides, reliable gear, and clear safety protocols. You’ll leave with knowledge and memories you can share around Louise Creek and beyond, and you’ll appreciate the mind-stirring views and the heart of canadian winter. Everything you need for a smooth experience, including packing lists and safety tips, is covered in advance so you can focus on the ride. Bring a sense of wonder, and you’ll return with a story that lasts longer than the last snowflake on your sleeve.
Family-Friendly Trails, Accessibility, and Kid-Oriented Stops
Troll Falls Trail is the best first pick for families, offering an hour-long stroll with kid-friendly switchbacks to a roaring waterfall. The path stays mostly flat and broad, arriving at a halfway viewing rock where formations display nature’s patterns up close, perfect for little ones to spot. Pack light, carry water, and plan for arriving early to beat crowds and park easily. This route truly proves that Kananaskis can feel like a mini Alps experience without leaving the valley.
For accessibility, prioritize trailheads with paved or gravel paths, ample parking, and restroom options. In Peter Lougheed and Ribbon Creek areas you often find wide, well-marked loops that work with strollers or boots for older kids, with gentle grades that let little ones walk down comfortably. Always check january conditions and bring traction if needed; timing your visit around meals helps, and you can plan a quick halfway break to enjoy the view.
Kid-oriented stops keep the journey engaging: interpretive display boards along the trails, a gentle swing at select trailheads, and relaxing picnic spots in parks nearby. Every kid will find something to enjoy along the way. Whether you want a quick loop or a longer family hike, you’ll locate trails that stay within reach. After arriving, you can arrange a stop at a nearby winery or bakery to share flatbreads and drinks, giving the day a tasty finish. The halfway point is a natural pause to rest, refuel, and let kids filter what they’ve seen–rock formations, birds, and wildlife glimpses–into their memories.
To maximize the day, check blogs and viator guides for current family-friendly routes; many travelers credit these sources for practical tips. That can mean a longer day, so pace accordingly. Whether you’re planning january visits or weekend trips, you can plan within your plans and adjust as needed for energy and weather. Always bring water, extra layers, and a small camera to display your favorite moments. Boots on, timelines fixed or flexible, and you’ll enjoy a relaxed, accessible outing that leaves everyone saying yes to another family adventure.
Seasonal Guides: Snow, Ice, and Summer Alpine Adventures
Begin with a guided sunrise snowshoe session near Stirling, easily reached from the airport in a short drive; the remote backcountry offers a mirror surface and a feel of spacious quiet, ideal for hikers of all levels.
When ice dominates, hire a local naturalist for two to three hour-long high-traction sessions on safe routes; microspikes or crampons provide three-point contact, keeping your legs steady on challenging sections while you prove your skills to yourself.
Summer alpine adventures center on early starts to beat heat, with easy-to-moderate hikes that climb to alpine meadows dotted with aspen and wildflowers; plan a 6–8 km loop with 500–700 m of gain, leaving time to enjoy a picnic or a local burger and cheese at a nearby roys area stop. For families, shorter options exist within a 60-minute drive from the center; for bigger days, a helicopter-assisted approach can access high ridges with minimal effort, letting you cover more ground and enjoy dramatic views.
Gear checklist and safety notes: bring layers, a compact shelter, and hydration; at the center, check the up-to-date amenities, restrooms, and warming huts; parking rates vary by season; within a day trip, you can manage everything without overnight constraints in dorm-style lodging; if you might want a longer stay, look for a host family or bunk-style dorm to reduce costs. Chill evenings around the lodge add a relaxed finish to the day.
Heading into backcountry, sign-in at the backcountry center, know the local avalanche forecast, and plan a turnaround time; for remote routes, book a guide in advance; the link to current conditions is posted at the tourism center and via local guides’ pages; booking in advance gives you the chance to secure a spot; if you can’t commit, consider a 1-hour intro session to feel the terrain with a guide.
Gear, Safety, and Packing for Short and Long Kananaskis Trips
youve got a planned packing list: use a 40–60L pack for 2–3 day trips and a 70–90L pack for longer stays, then assemble gear a week ahead to avoid delays.
Shelter options include a reliable 3-season tent, a compact bivy, or accommodation in cabins or a lodge; if youve planned stays at Marian or Mueller facilities, verify bedding and heating in advance to avoid surprises.
Sleep system: imagine a 3- to 3.5-season bag rated for -5°C to -20°C (adjust to season), plus a closed-cell or foam pad with R-value around 3–5; add a liner to manage moisture and extend warmth without extra bulk.
Clothing should use a layering approach: moisture-wicking base, insulated mid-layer, and a waterproof/windproof outer shell; pack extra socks, gloves, a hat, and sturdy boots for slopes and rough trails.
Cooking and food: bring a compact stove with fuel, a small pot, and a pan; store cheese and other perishables in a bear-safe container or hanging system; plan meals around restaurant options or lodge kitchens if you prefer ready-made options; carry at least 2 liters of drinking water per person and a filter if you expect sources along your campsite or site. Pack spare batteries because cold temps drain them.
Water management and safety gear: filter or treat water, carry a map, compass, and a charged phone with offline maps; carry repellent for insects and maintain clean campsites to deter wildlife; keep a whistle and headlamp accessible for emergencies; look ahead to another potential site if weather shifts.
Wildlife awareness: store smells in bear canisters or hang food 4 m high and 3 m from trunks; avoid cooking near sleeping areas; if you encounter wildlife on a campsite, keep distance and back away slowly; a bird sighting can remind you to close food bags quickly.
Site planning and accommodation: book cabins or a lodge in advance; if you stay at campsites, check water access and plot location; at Mueller sites or Marian sites, verify rules and quiet hours; always look at weather and contingencies; have a back-up plan if your route changes.
With the right gear and careful preparation, you can enjoy both short escapes and longer stays in Kananaskis with confidence.
Fast-Track Photo Spots: Capture 32 Experiences with Minimal Detours
- Barrier Lake Overlook at dawn – calm reflections, minimal detours: set a tripod for a long exposure, then swing by the center of Kananaskis Village for a mouthwatering cafe break and quick booking before the next stop.
- Troll Falls waterfall – easy loop walk keeps you on track; shoot the mist from the sheltered side, using a 0.6–2.0 s shutter to balance light and water detail, often yielding a juicy, vibrant spray.
- Rawson Lake shore at first light – jucy reflections of evergreens, with peaceful water that rewards a low ISO and a mid telephoto; birds hover over the fringes, giving you naturalist-grade silhouettes.
- Elbow Falls lookout – a wide shot with a family-friendly trail; capture the falling cascade with a graduated ND for calm tones, then enjoy a quick walk to a nearby cafe for value snacks.
- Spray Lakes Reservoir shoreline – broad panorama without backtracking; stack a few verticals to show the scale, and use a polarizer to reduce glare on heavily sunlit sections.
- Ribbon Creek Bridge at sunset – shoot through the arches for a center-of-frame composition; a 24–70 lens keeps the river’s bend clean, while a slow shutter adds gentle motion to water.
- Powderface Lookout – alpine air and clear sightlines; a couple of wide frames plus a tight foreground provide variety, and you could cap the stop with a quick gravel-bike ride along the road.
- Pocaterra Trailhead meadow – mid-morning light on wildflowers; use a tripod-mounted macro for detail and a wider shot for context, then book a short rest at a nearby café for crop-and-post ideas.
- Kananaskis River bend near a rocky bank – set up a low-angle shot to emphasize flow lines; include a nearby log or saddle-shaped rock to frame the scene neatly.
- Elbow Valley plateau – expansive skies and quiet grasses; shoot from shoulder-height to exaggerate depth, using a polarizer to punch greens and blues.
- Barrier Creek canyon viewpoint – a compact, cinematic sweep; shoot two frames (horizontal and vertical) to cover foreground rocks and distant ridges, then savor a quick center-spot break at a local cafe.
- Spray Valley wildflower patch – macro detail on petals and insects; keep ISO low, then switch to a landscape frame to show the surrounding forest, often with birds circling overhead.
- Canopy-edge forest trail near a clear brook – mossy trunks and sun spears create natural rhythm; a narrow-angle shot invites a calm, immersive feel and a brief stop at the trailhead cafe.
- Riverside bend just below a small spill – use a slow shutter to render silk-like water; frame the bend with winding trees to lead the eye, then check a quick booking for the next route.
- Waterfall alcove along a forest path – capture the cascade in a tight frame and a wide landscape; a second shot from the pool’s edge shows the surrounding cliff texture.
- Open meadow with distant ridges – airy light and long shadows; a panoramic stitch reveals depth, and you can balance color with a gentle crop at the cafe stop.
- Bridge overlook over a winding river – compose a leading line from the railing to the far bank; a 35 mm lens keeps sharp mid-tones, ideal before a cycling break on a nearby bike trail.
- Shady grove with a sunlit gap – backlit leaves create luminous bokeh; shoot both a tight flower frame and a broader forest scene to show contrast.
- Open lakeshore at midday – calm water, clean reflections; use a CPL to keep glare down and a compact selfie frame to show your gear, then enjoy a quick bite at a cafe.
- Wildflower hillside with a distant peak – place a focal point in the foreground and the peak in the background to convey scale; this spot often rewards a second, sunset frame.
- Rocky riverbank with pebbles – texture-rich foregrounds pair well with soft water; a drone-friendly detour can offer a fresh perspective, if permitted, before heading back to a cafe center.
- חציית נחל גרוב – לשקף את העצים במים לסימטריה; להשתמש בפילטר מקטב כדי להעמיק את גוני הירוק והכחול, ואז לתעד להקת ציפורים ידידותית חולפת.
- אחו אלפיני ליד בריכת קרחון – אוויר צח, מים צלולים כזכוכית; צלם סצנה רחבה, ואז מאקרו הדוק על פריחה אלפינית כדי לגוון את הסט שלך.
- ערפל נמוך ליד חורשת אורנים - לצלם בגוון דמוי שחור-לבן ליצירת אווירה; חשיפה ארוכה יותר תניב מעטה רך וחלומית מעל העצים.
- תצפית אוכף הרכס – נופים דרמטיים רחבי זווית; רצף בסוגריים לוכד טווח תאורה, ותרצו להמשיך לתחנה הבאה בלי דיחוי.
- אבנים מכוסות שלג ליד נחל - לתפוס מרקם עם עדשת 80–100 מ"מ; צילום תקריב בתוספת סצנה רחבה יותר יוצרים צמד חזק.
- מזח שקט על שפת האגם – צילום ממוקד סימטריה עם קווי ההנחיה של המזח; עומק שדה רדוד מדגיש את מרקם פני המים.
- שביל יער עם אור מנוקד – מסגור חלקי של נושא על רקע קרחת יער מוארת; שימוש בזום בינוני כדי לבודד דמות בודדת או ציפור במעוף.
- בריכת נחל נסתר – מים שקטים כמראה וסלע מכוסה טחב; צילום מזווית נמוכה מדגיש מרקם ועומק, ואז הליכה קלה לאורך הגדה חושפת פרטים נוספים.
- מדף סלע עם נוף עמק מרהיב – איזון בין פנורמה רחבה לאלמנט קדמי קרוב יותר כדי להוסיף קנה מידה ועניין.
- כיכר הכפר עם דוכן קפה – ניגוד עירוני מהיר בתוך יופי טבעי; לצלם אנשים וציוד בתנועה לתחושה חיה במרכז הפריים.
- גשר מתחת לחופת עצים ירוקי-עד – לצלם דרך הענפים למראה שכבתי; עדשת 70–200 מבודדת את הגיאומטריה של הגשר בעוד ציפורים מרחפות מעל.
- טיילת על הנהר בשעת בין הערביים – חשיפה ארוכה מרככת את המים תוך שמירה על פרטי השוליים; תחתום את הסט בצילום חמים של בית קפה והערה קצרה על הזמנה למסלול אחר.
- שיחי יער עם פירות יער לאורך שביל – פרטים מקרו על הפירות והעלים; פריים שני מצלם את השטח שמסביב כדי להראות את עומק הצבע.
- מפרץ שקט ליד אגם קרחוני – צבע השמיים משתקף במים; לצלם גם נוף רחב וגם השתקפות צרה כדי למקסם את המגוון.
- אחו שטוף שמש עם קווי רכס רחוקים – לתפוס פסי צבע מפרחי בר ועד לאופק; פנורמה עדינה מוסיפה תנועה מבלי לאבד מיקוד.
- מעמד ליבנה עם זרם - קווים אלכסוניים מגזעים מכוונים את העין; תריס איטי על הזרם מניב מים חלקים וענפים חדים.
- גוון ערב מעל עמק רחב – צלם פנורמה מרובת שורות, ואז התמקד בעץ זוהר בודד לניצוץ מוקדי.