


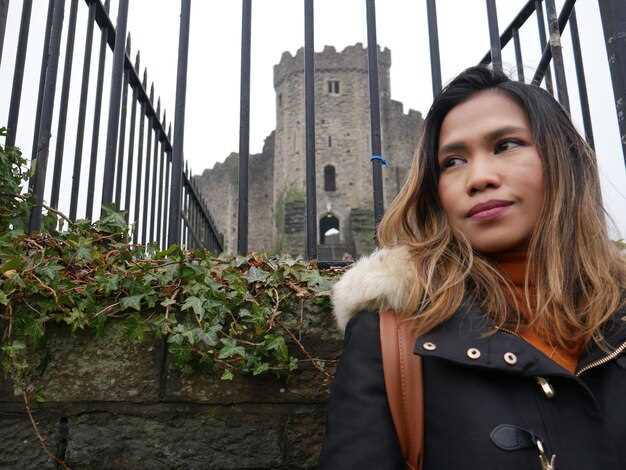
Begin at Calton Hill at dawn to capture Edinburgh Castle in a warm glow, with the skyline unfolding and Duddingston Loch glinting in the distance. This first shot sets your heart on the day and shows plenty of framing options in the Old Town. A quiet loch moment nearby can balance the stone mass of the city and give your camera a chance to reset between angles.
Walk down to the Royal Mile toward Victoria Street for a cascade of colour against stone. From the opposite side, you get a clean silhouette of the castle framed by narrow lanes. Notice how the roof becomes a drawing line that guides your eye. With many steps and short blocks, you can build a sequence that captures motion and stillness in one shot.
In Stockbridge, the quiet corners offer floral accents and plenty of natural color. Stand back near the end of a narrow lane to capture the old brickwork, and use a low angle for a dramatic foreground that leads the eye toward the rooftops and a distant church spire. This area offers lots of chances for a clean, crisp shot.
Finish with a riverside stroll along the Water of Leith toward Dean Village for calm scenes that contrast with the city. The path offers long shadows at golden hour and the old mill buildings provide built texture that reads well in poster-sized prints. For a broader city vibe, head to Portobello Beach at sunset to catch the sky against water and masonry along the coast.
Edinburgh’s Most Instagrammable Places The Ultimate Photo Guide; – House of Gods
Start at arthurs head at the front of the city for an early light shot that stays instagram-worthy all day. This view, with milk on the stone and a clear skyline, lets you post a clean, bright image without spending a lot. If you only have one location, this front vignette becomes your anchor shot and sets the tone for the rest of the day.
After that, stroll toward the House of Gods area to catch photogenic textures and lines that lead the eye toward the heart of the city. See how the summer flowers soften the stone and provide color pops that work as a perfect instagram backdrop for a quick post. If you’re visiting the university quarter, you’ll find campus silhouettes that pair nicely with the temple’s architecture, creating a cohesive set of instagram-worthy shots across the feed.
Plan a halfway loop: start at the front steps, bend to the halfway corridors and capture a head-on shot, then finish with a second shot from a different angle. This area offers lots of photogenic moments in summer, and a potter-inspired corridor can give you Hogwarts vibes for potter fans. That twist keeps the feed definitely engaging. Budget tip: stay within walking distance, this area is worth the effort for lots of new posts and a versatile set of location angles.
Strategic Angles for Capture Across Edinburgh’s Historic Core
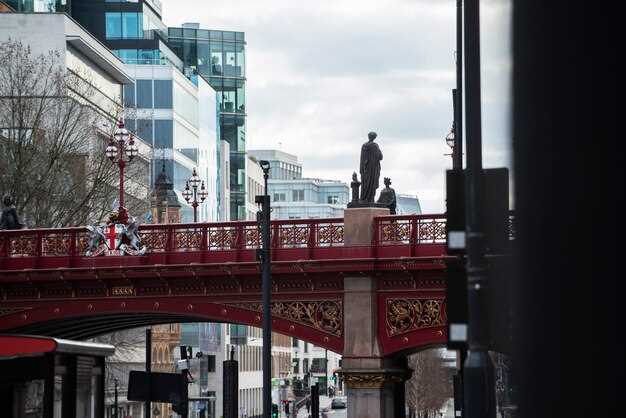
Start at Calton Hill for a strong front view across Edinburgh’s historic core. youll capture gothic spires and built stonework that line the Royal Mile, with a bridge visible in the distance and a single frame that stitches old and new.
Move along the North Bridge to shoot the street below where alleyways turn into hidden courtyards. The light on victorian brickwork will bounce between shopfronts and archways because it emphasizes texture and depth, which reveals contrast you can amplify with a slight tilt. However, avoid overexposure on bright facades.
From Princes Street Gardens, the backdrop includes church towers and the city’s green pulse. Photos taken at sunrise bring warmer light and a calmer street texture. gardeners tend the beds as you frame the hotel silhouettes beyond the line of mid-rise blocks; these spots offer a straightforward mile-long perspective with several locations to choose from.
On the Royal Mile, seek spots where cobbles lead you toward a squat gothic doorway or a vaulted arch, a front-on shot that shows texture and depth. Watching for the hidden courtyards tucked behind busy taverns gives you a second place to shoot and adds variety to your feed.
When visiting the neighborhood around Victoria Street and the Grassmarket, look for spots where a horse statue, hotel signage, and a narrow alley converge into a single frame. Each location is different, and you can switch between them in minutes, definitely keeping your feed fresh and worth a second look.
Calton Hill Sunrise: Weather, Timing, and Exposure Tips
Head to Calton Hill at least 30 minutes before sunrise to catch the first light. The calton vantage sits above the west end, with a walkway lets you frame the city against the Victorian skyline and silhouettes of castles and the palace.
Weather on the hill shifts quickly: west winds bite cold air, and mist from the botanic gardens can blur detail. Expect 2–6 C in winter and 12–15 C in summer; bring layers and a windproof shell.
Timing matters: shoot during blue hour, about 30–40 minutes before sunrise; the least contrast appears just before first light, while the city below starts to glow as the sun climbs.
Exposure strategy keeps the sky balanced: shoot in RAW, use ISO 100–200, aperture f/8–f/11, and a sturdy tripod. Employ a remote or 2‑second timer to avoid shake, and bracket three exposures: -2, 0, +2 stops to capture sky detail and city texture.
Composition options work well: position the National Monument in the foreground, let edinburghs skyline unfold above, and weave in lauriston for context. Include the stables or palace silhouettes for a classic Edinburgh moment.
Budget-friendly tip: you can pull this off with a modest setup; a reliable tripod, a small remote, and an extra battery cover a whole session while keeping costs low.
Visiting notes: the hill is quiet at dawn, you wont notice crowds; also, visiting early keeps crowds away, allowing you to notice subtler tones in the city. Bring waterproofs and wear sturdy shoes, as the walkway can be slippery. The favourite shot tends to be a broad cityscape with the monument rising above the rooftops–experiment with a longer focal length or a wide angle to capture the whole skyline.
Royal Mile Facades: Best Angles to Emphasize Narrow Alleys
Position yourself at the corner across from Cuthberts and shoot along the narrow alley toward its shadowed end. This angle lengthens the passage, emphasizing the vertical lines of the buildings and the grey stone that defines the Royal Mile façades. Use a 24- to 35-mm lens for balance, and include a touch of the surrounding street to frame the context. If you want a pop of color, frame a small sign from lauriston hotels across the way; the contrast makes the stone textures stand out and the scene more photogenic.
These angles work best when you lean into the alley’s tucked doors and hidden corners. Shoot from a mid-height windowsill to catch the doorway arches as they frame the sky, or drop to street level to elongate the perspective across the paving. They reveal the prettiest details: carved lintels, circled numerals, and subtle texturing on the parthenon-inspired pediments that cap some facades. If you see a small circle of light near a doorway, check exposure quickly–these contrasts can shift fast and still look equally powerful.
Evening shoots are powered by street lamps and the last rays of sunset. When lamps glow, the facades take on a cinematic tone; the power of warm light on grey stone makes textures pop. Try a long exposure with a slight tripod to smooth the foot traffic and let the alley breathe; you might capture reflections in a puddle that runs along a carved doorway. These moments across the years reveal the resilience of the facades.
To plan a visit, check the opening times and any reservation at lauriston hotels–theres also a quiet courtyard you can photograph with permission. If a sign or a circus storefront catches your eye, frame it as a counterpoint to the stone. There were arthurs years of trades along these walls, and the weathered surfaces still hold character; you can make them sing by keeping the camera level and letting the lines run straight.
These tips help you capture the Royal Mile façades with intention: the closeness of the walls, the tucked doorways, the hidden details, and the way the light hits at the end of the alleys. When you combine all these factors, you’ll create frames that feel like a curated street scene rather than a postcard. They’re photogenic and tell a story across years, showing how the buildings were built to endure and to invite visitors to explore Edinburgh’s most iconic streets.
Dean Village by the Water: Framing Reflections and Soft Light
Start your shoot before sunrise, when virgin dawn light brushes the Water of Leith and bathes Dean Village in a soft pink glow. You can easily position yourself on the walkway across the river, with the iconic cottages lined along the bank and their reflections blooming in the still water below. From the victoria area, the gothic arches frame the scene, giving you a ready-made composition to read the light.
To capture reflections, shoot with the water at a low angle, and let last light linger on the rooflines and brickwork. Use a vertical frame to emphasize the height of the cottages, and pull in the Botanic Garden’s greenery a little away in the background for a touch of color. The area is national in charm and certainly photogenic, with many shots possible. Let the light move into the frame as clouds drift.
In the late afternoon, switch to a wider view from across the river, letting the sun skim the rooftops and highlight the little details–the ironwork, the window sills, and the tiny doors along the back of the row. If you have a little time, move a few steps away from the main line of houses to include a little sky above the roofs, which adds air to the photograph. What does this view offer? It does offer calm and a sense of scale that is quite atmospheric.
For a different mood, walk to the Botanic Garden, located a few minutes away, and frame Dean Village with a splash of green. The botanic setting gives a natural contrast to the pastel façades, making your shots feel calmer and more layered. You can shoot from the back path that overlooks the river to include both the gothic arch in the distance and the lined trees in the foreground.
Plan a short loop to include the national heritage context of this area: start at the cobbled lane, walk toward the Victoria Bridge, then cross back along the water as the light softens. The Dean Village area rewards walks with multiple vantage points–you can easily go back to the same spot at different times to capture new reflections.
With patience, you’ll love how the river mirrors your own movement, and the little details become more obvious. Read the light, adjust your angle, and shoot many frames; the result is personal, and worth keeping for yourself.
House of Gods Interior: Access, Lighting, and Shot List Inside
Grab the first available access slot via the lauriston entrance and start with virgin light streaming through the high windows. From that view you look across the stone walls to the vaulted ceiling, and the heart of the room comes alive. This is a beautiful, favourite sequence that yields those breathtaking photos-, youve got to move slowly, keep the camera steady, and adjust as the light moves across the textures above. Each frame doubles as a potential photograph and the result can feel like home in a single shot, bringing warmth to your look from this space.
Access and timings
- Plan for a 60-minute session with guided entry from lauriston; book in advance and confirm security clearance.
- Entry point is a stone vestibule; stairs are stone and uneven; there isn’t an elevator nearby, so be prepared for stairs.
- Keep noise low and flash off; tripods are allowed only with permission; if you need stability, a small monopod works well without crowding the space.
- Those arriving early benefit from softer light; there’s usually less foot traffic there.
Lighting
- Natural light enters through high, north-facing windows; the light isnt harsh, especially in late morning, and you can create that dreamlike look by angling your camera to the stone textures.
- Bounce a white card to illuminate the foreground without washing out the Victorian plasterwork.
- When candles are lit, set a warm white balance to capture the golden tones; otherwise keep a cooler balance to emphasise the stone.
- From the calton stone wall you can achieve a broad panoramic shot that shows the space above and around the statue niches.
- You can shoot either with a wide lens or a mid-tele to capture different perspectives, then compare the results in post.
Shot list inside
- Panoramic sweep of the main hall, capturing the stone columns, the high ceiling, and the central focus of the House of Gods.
- Close-up of Victorian plasterwork around the Cuthberts and Knox inscriptions, with a clear view of the stone texture.
- Detail shot of the shrine/altar area: drapery, candles, and a carved horse on the pedestal.
- Texture study of the calton and lauriston stonework, shot from a low angle to look up toward the arch above.
- Light shafts roaming across the floor create dynamic depth; bracket your shots to capture range and texture.
- Favourite corner: frame the heart of the room with window framing and negative space to emphasize calm, pretty composition.
- Looking along the corridor toward the far arch to show depth and perspective from the threshold.
- Macro shot of hardware and door details – capture the grain in the ironwork and the age of the handles.
- From a discreet distance, shoot the ceiling ornamentation and the silhouette of the horse statue in profile.
- Final sequence: assemble a small home-gallery of 5–7 frames that you can share as a cohesive set, from the warm candlelit glow to the cool daylight tones.