


Plan your first outing at a public viewing point near a busy airfield and check with the federal planning department for any access rules and restricted zones.
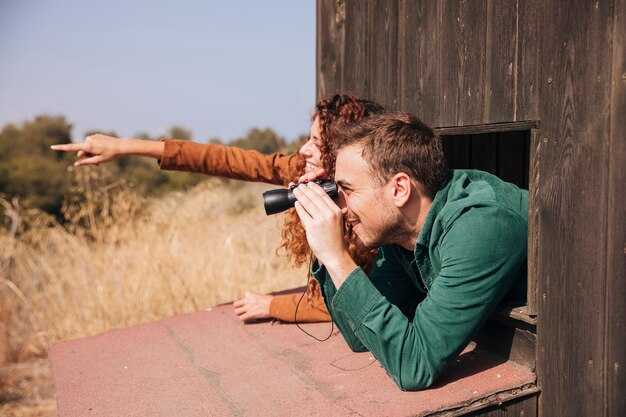
Begin with a lightweight kit: a camera body with a versatile zoom (70–200 mm) and a compact monopod. The সংখ্যা behind your settings matter: 1/1000 s at f/6.3 in daylight yields crisp silhouettes, ISO 200–400 to keep noise low. Various aircraft will appear in different light, each shape demanding quick adjustments. Spots located near runway axis increase chances of usable frames.
Respect local rules and keep distance from sensitive zones. Do not cross fences; confirm access with the department before moving along perimeters. The hobby thrives when observers share findings within a friendly network and offer tips through the সম্প্রদায়. A long-time member named emmanuel often reminds newcomers to plan pauses for clean shots and to avoid crowded, noisy spots.
Plan a regular routine that blends curiosity with safety. Connect with a local কোম্পানি or club to swap spots, times, and lens choices. For বিশেষায়িত tips, track approach paths, log aircraft numbers, and note the shape of each frame to build a simple, friendly portfolio. When a flight swings in, apply a steady shutter cadence, bracket exposure, and capture shots that help you see progress within the network you explored. The thrill grows as you contribute to the hobby and the wider সম্প্রদায়.
Finding Great Spots, Timing, and Photo Ethics for Plane Spotting
Use apps to map spots and plan visits before access. These apps provide live data, routes, and safety notes that help you stay compliant while planespotting.
Planespotting isnt about trespassing; it relies on public viewpoints, permitted access, and good planning. This technology helps you identify active overlooks while respecting local rules.
Spot selection should balance opportunity and safety. Numerous viewpoints along runways or public roads offer clear sightlines, while fenced or private areas require permission or should be avoided.
- Public viewpoints along runways or taxiways are ideal when signs, paths, and signage indicate access is allowed.
- Hidden spots arent worth the risk; skip locations behind fences or marked as restricted unless officials grant access.
- Ownership matters: always respect signs and posted restrictions; when in doubt, contact officials or the airport authority for permission.
- Connect with groups; several members regularly share updates about coming events and safer routes, which helps you plan.
- Log each visit: site, date, aircraft types observed, and any access notes to refine future sessions.
- When using cameras, keep gear discreet and avoid flash in sensitive areas; cameras should enhance, not disrupt operations.
- Use a trusted источник to verify regulations and avoid relying on informal reports.
- Along busy corridors, note where public seating, parking, and viewpoints provide stable setups without blocking traffic or access.
Timing boosts both light and activity. Use these targets to maximize shots and minimize crowding:
- Target windows: 1-3 hours after sunrise and 1-2 hours before sunset for favorable sun angles and wing positions.
- Weather matters: clear mornings yield crisper images and lower glare; overcast skies can mute contrasts but reduce harsh shadows.
- Review local patterns: airports with numerous arrivals often have more dynamic photos during morning or late afternoon peaks.
- Develop a simple workflow to speed setups and transitions between spots, especially when planning multiple locations in a single day.
Ethics and behavior keep planespotting sustainable and safe for everyone involved:
- Always obey officials and posted signs; respect fences and restricted zones; ends of accessible areas require you to relocate to permitted spaces.
- Avoid sharing precise locations that could reveal sensitive positions or disrupt operations.
- Seek permission when in doubt; ownership disputes or private property boundaries must be respected.
- Keep disturbances to a minimum: minimize noise, move quietly, and pack out any trash.
- Document and share responsibly: credit sources where you learned about a spot and alert members to rule changes.
Practical workflow and collaboration:
- Logging: maintain a lightweight log of each site, date, aircraft types, settings, and notes on restrictions.
- Communication: tell your groups about updates and safe alternatives to avoid repeated rule breaches.
- Ownership awareness: verify permissions through official channels before photographing in sensitive areas.
- Activity tracking: keep a running list of sites visited and plans for future visits to optimize your schedule.
Tips for staying current:
- Numerous airports publish access guidelines through officials and clubs; check these before visiting.
- Logging your experiences helps you adjust for seasons, aircraft mixes, and lighting conditions.
- Coming sessions benefit from a prepared plan: assemble gear (cameras, lenses, spare batteries) and review site etiquette with teammates.
- Ownership and permissions evolve; stay informed via groups, official notices, and источник updates.
Choosing Safe and Legal Spotting Locations
Go to publicly accessible viewing areas near the বিমানবন্দর and choose a spot with clear sightlines; this বিকল্প keeps you watching airliners from a safe distance and avoids restricted land. You’ll probably find mornings quieter and angles better in winter.
Check the স্টেটস‘ regulations and the airport’s policies before you go. If a নিবন্ধন process exists, register ahead; this helps you সংযুক্ত করুন with security teams and fellow spotters, and it sets a clear ঠিক আছে। for operation windows. As a rule, you should stay on land that is designated as public and respect posted signage, especially during peak operations. This approach আছে কাজ করেছে well for many newcomers. Good communication with staff helps you adapt to any temporary restrictions.
What kinds of shots do you chase? Look for sightlines to the fuselage এবং মুখ of airliners, with safe distance from any active zones. This necessity ensures your photos show the logos on the tail or fuselage without intruding into restricted airspace. When you frame a shot, aim to capture clear details of the logos and the aircraft type.
Some airports offer বিশেষায়িত spotting areas or official programs. If so, this can work as a dependable part of your routine; it gives you predictable conditions and reduces risk of confrontation. What kinds of shots you aim for will guide your choice of vantage point–toward the fuselage, the nose, or the tail–and whether you সংযুক্ত করুন with a fellow spotter or a staffer. Always deal with authorities in advance and keep a friendly, cooperative tone; your approach should foster mutual respect and safety for all involved, including fellow observers and airport workers.
Understanding Runways, Approach Paths, and Flight Corridors
Review the latest airport diagram and NOTAMs to identify open, publicly accessible spots. Citing official sources, focus on designated areas where security keeps a safe distance from runways and where spotting and photography are allowed for enthusiasts and spotters.
Runway orientation informs which end aircraft use and how lighting and backdrops will present your frame. Study published approach paths on the chart so you know where arrivals descend and where the flight path is most visible from open spots. Plan a route that keeps you clear of restricted zones while giving you clean silhouettes and wings in the light, especially during final approach.
Use telephoto lenses to fill the frame from a safe distance; a 200–600mm zoom on a crop sensor or 400–800mm on full frame yields strong results. Keep a steady stance or a compact support since panning with a moving jet helps you retain sharpness. Practice locking focus on the aircraft’s cockpit area and follow the motion as it progresses through the frame, capturing gear deployment, flaps, and braking at the touchdown moment.
Flight corridors cross regional airspace in patterns that form a constellation of lines over populated areas. Observing from multiple open places lets you document different kinds of arrivals and departures while staying compliant with rules. Sharing a consistent workflow–checklists, location notes, and timings–keeps your shots repeatable and respectful of neighbors and aviation safety norms.
Safety and access rules matter: never enter fenced or signed‑off zones; rely on posted boundaries and designated observation points. Registered groups and airport authorities provide maps and guidelines, and most facilities publicly announce acceptable practices for spotters. There is no dictator over access; adhere to posted limits and review security advisories before you arrive.
To build expertise, map typical wind conditions and traffic flow for your chosen airports and track how these shift with seasons. Use a practice routine that includes preflight checks, gear readiness, and a simple shot log–date, location, aircraft type, and a quick note on framing. When you cite sources or confirm timings, rely on official airport pages and documented flight schedules to keep your plan reliable.
| দিক | What to know | ব্যবহারিক টিপস |
| Runway orientation | End used depends on wind and airfield procedures | Choose a spot that offers clean light and a safe distance from the runway ends |
| Approach paths | Final approach and descent path are charted; visibility varies by time of day | Position yourself where the path is visible without crossing restricted zones; use charts to anticipate shadows and reflections |
| Flight corridors | Defined routes across airspace; multiple lines create coverage opportunities | Move between open locations to capture different lines; respect local noise abatement and safety rules |
| Access and safety | Fences, signs, and official boundaries control entry | Rely on approved observation areas; stay registered with clubs if offered; review NOTAMs for any access changes |
| Equipment and technique | Telephoto lenses help keep distance while maintaining detail | Balance focal length with shutter speeds (at least 1/1000 s for jet frames); stabilize gear; pan smoothly for wing motion |
| Ethics and etiquette | Respect security, neighbors, and regulations | Limit noise, avoid blocking walkways, and share observations with the community in a constructive way |
Timing the Light: Best Moments for Plane Photography
Begin with the golden hour, roughly 60 minutes after sunrise or before sunset, when the light is soft and the fuselage picks up warm color. Create a selection of two or three timing windows within that period and compare how shadows shift across the wings. This approach does deliver crisp color and clear texture on the fuselage, and it works for numerous aircraft types and various liveries, giving you options for different angles. Open your telephoto lens to a preferred focal length (around 300–600 mm) and bring tools like a monopod or a stabilized body. As a planespotter, note the heading of each arrival and connect the times to the field’s activity. Take a shot of a registered aircraft and use it to guide the next action.
Position yourself so the sun stays behind you when heading toward you; this lighting keeps the fuselage illuminated and reduces blocking shadows. Aim to capture detail along the main lines of the aircraft, from nose to tail, while the light highlights rivets and panel edges.
Clouds create a complication, so stay flexible: if a break opened in the clouds, adjust exposure or ISO to keep detail. The complication can be mitigated by bracketing shots or using a fast shutter to freeze movement.
Plan with a map and use search methods to forecast sun angle and planes arriving. Use directly observed conditions and tools to test settings. Use terrestrial light to shape the silhouette and lead the eye along the fuselage.
After the session, reporter notes help track what works: sun angle, heading, distance, and the effect of blocking or open sky. Then followed by another test on an open day.
Beginners’ Gear: What to Bring and How to Set Up
Four core items form your starter kit: a camera or phone, a versatile zoom, a lightweight tripod or monopod, and reliable storage with spare power. If you shoot with a phone, add a clip-on telephoto lens or use digital crop; with a traditional camera, a 70–300mm zoom covers most passes.
Label your gear with your address and ownership details and keep a small printed contact card in the bag. Carry identity like an ID or a business card that shows your name and a phone number for emergencies, and provide quick reference if someone asks.
Pack a compact checklist: setup and safety, timing, collection, backup. This four-part guide keeps you organized during each week of spotting.
On site, place the tripod or monopod at a safe edge, with a clear distance to the flight path. Set the camera to shutter-priority or aperture-priority, enable burst mode, and frame for clean backgrounds. Review the first passes quickly to select the best four or five shots.
Weekly workflow keeps you moving: photograph flights, build a fresh collection of shots, then organize by date, aircraft type, and operator. Track flight numbers and rough distance estimates to build your own treasure of notes, and log anything that finds your eye–angles, light, distance–for future reference.
When access is requested or a staffer asks, show your ID and a short note about your activity. Respect official zones and move aside if clearance is denied. This keeps you safe and avoids friction.
Decide what you prefer to use first–phone or camera–and keep a simple, repeatable workflow that you can follow weekly. If you prefer quick grabs, lean on burst and RAW where available, then bulk-back up later, keeping your notes organized under a single folder set.
Use a simple coding system for your shots: a code field to tag aircraft type, operator, and angle. Log the flight numbers and distances, and keep a weekly backup. A notes file helps you compare trends over time and find that pattern in the data.
Keep a small contact list for field assistance, including a local donald who can help if you need directions or gear swaps. Store that on your phone and as a laminated card in your bag.
If you travel to spots with diverse language needs, note two cues in turkish and chinese to ask for space or directions politely. This helps you stay respectful while you collect media from pilots, airports, and enthusiasts.
Finally, build a personal treasure by selecting a standout image each week and archiving it in a dedicated collection folder. This organized approach makes ownership of your hobby clear and enjoyable.
Model Identification: Visual Cues to Distinguish Similar Aircraft
Read the tail number first; it immediately narrows the model family. If the tail is hidden, the operator logo on the vertical stabilizer usually does the job and tells you the airline and the fleet type. For overhead views, the registration still does the heavy lifting, and you can compare it with fleet lists from data providers to confirm the model.
Wingtip devices, engine nacelles, and door patterns provide fast cues. Airbus A320 family variants typically show sharklets; Boeing 737s can display blended winglets or the newer split-scimitar tips. Engine nacelles help: CFM56 indicates older variants, LEAP-1A/B point to neo/MAX versions. Overhead views reveal intake shapes and pylon fit, which usually leads to the right family.
The nose and cockpit windows provide distinctive cues. The Boeing 787 and 777 families have recognizable profiles: the 787’s curved, slender cockpit panes and smooth nose; the 777’s broad, blunt nose and large engine; the Airbus A350 blends a rounded nose with a distinctive cockpit window shape. If you compare fuselage length and door layout, you can separate the A320-family from longer variants within the same line.
Doors and exit layouts give reliable clues. Count visible main doors and any overwing exits; the number and spacing differ between families and variants. The tailplane shape and vertical stabilizer profile also matter; some types show a distinct sweep or tip silhouette that becomes obvious in overhead shots.
Livery tells a story. The areas where operators fly usually contain unique color schemes and branding; whos operator can reveal the fleet even when the silhouette is similar. Luxury private jets differ from commercial airliners in scale, window spacing, and cabin doors; keeping notes on these features helps you distinguish a private widebody from a busier commercial model.
Tech tools help you verify quickly. ADS-B receivers and online networks feed programming apps that consolidate numerous data points: registration, operator, fleet, and photography from enthusiasts. When you see a match, you gain a reliable identification; otherwise, cross-check with official fleet lists from providers to avoid confusion around mistaken models.
Practical tips for your day around the runway: keep a small notebook to track the story of each aircraft you spot. Record location, time, and the observed cues; this keeps your memory sharp and builds a quick mental map of which areas around the airport host which models. If you photograph overhead, use a concise checklist: tail number or operator logo, wingtip, engine, nose shape, door pattern, and tail silhouette. march roster changes occur as fleets rotate seasonally.
Anyone can improve by sharing results. Keep notes accessible for others and link to the spots where you found cues. The prince of the skies inspires enthusiasts, and a practiced eye reveals differences among numerous aircraft as they pass in the skies. Identifying models does not require fancy gear–focus on reliable cues and data from providers and receivers.