


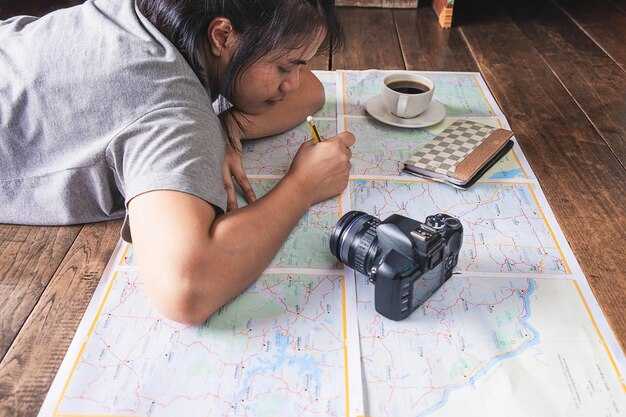
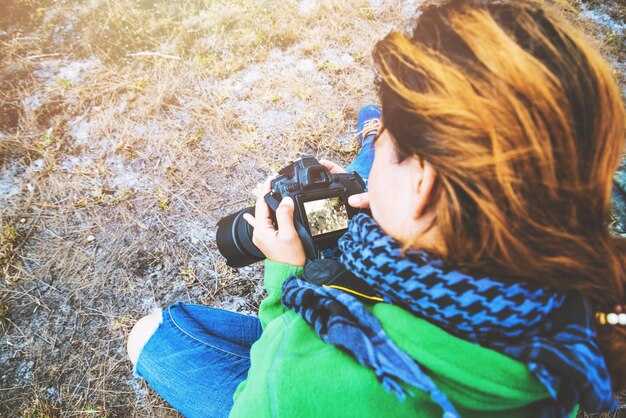
Begin with a compact mirrorless camera and a 35mm lens, plus a pocket notebook, and set aside 10 minutes at each stop to shoot and jot. This simple kit keeps you slow and attentive, turning ordinary scenes into potential stories that live in your notes and on your frame.
In Zanzibar and other destinations, the spice markets, Stone Town lanes, and harbor lights offer immediate sights. You can capture the enormous texture of a curbside stall and the dish of grilled fish with coconut rice. theres a line between telling and showing, so frame people with consent and note conservation issues around poaching to add depth to your piece.
Plan an extensive shot-and-note list for each place, but stay flexible. At the first light, visit two sights and three places you hadn’t planned, and stop to breathe between frames. You’ll often find a different texture in the same destination, and that contrast makes your writing sharper. Respect locals and avoid invasive angles; ask permission before portraits and keep your notes focused on what the scene reveals about daily life.
As you compose the text, pair each image with a few lines that do not repeat the shot. Write while you shoot: a crisp sentence that anchors the moment, followed by a reflective note on how the place feels. Use dialogue with locals where possible, and add sensory details–sound, scent, texture–so readers can travel with you. In Zanzibar’s markets or in mountain towns, you can craft a narrative that is absolutely tactile, and that shows the unseen layers behind a single frame. This approach works across such places, from bustling streets to quiet coves, and it keeps the reader engaged while you build an extensive portfolio of stories with your lens.
Gear and Setup for Travel Writing on the Move
Keep a weather-sealed compact camera or a capable smartphone with a solid mic, plus a pocket audio recorder, a field notebook, and a reliable pen. Use a weatherproof sling bag with a quick-access compartment for the camera, another for the recorder, and a sleeve for notes. Include two high-capacity SD cards (128 GB each) and a 1 TB SSD for instant backups. Add a one-way USB-C charger and a compact power bank to keep devices alive when you’re chasing light. Also, keep a spare microSD card in a separate pocket. If you’re on a safari or city game drives, time your shots for quiet, candid moments.
Maintain balance: a combo of lightweight gear reduces fatigue on long shoots. A flexible tripod or compact gorillapod helps in open spots where a full tripod is bulky. A windscreen on the mic helps in breezy conditions to capture speech clearly. Keep a spare battery named zombo in a side pocket and back up to the SSD at day’s end. In open terrain, plan for an enormous horizon that invites wide establishing shots as you transition from wildlife to street scenes.
Field kit essentials
For wildlife and nature work, the best combo is a compact camera with fast autofocus, a wide-to-normal lens (24-70mm) and a reliable external mic. In open terrain you’ll want image stabilization and a light tripod. Always have the audio recorder rolling while taking notes; the voice memo helps later. Include a lightweight rain cover, a microfiber cloth, and a compact hard case to protect gear during transit.
On-location workflow
In septemberoctober, first light often sits warm and reveals textures in water and wildlife. When you spot mbuna in africa riverside areas, switch to a tighter focal length to capture texture on the fish and the colors of the mbuna. Note the dish from a street stall after a long shoot; you can weave it into the travel piece. Wherever you travel, keep notes on a field-friendly card or notebook and mix in quotes with the mic. Take advantage of an open spot to photograph a quiet moment before the crowd arrives, then return to a warm, human-centered frame for the travel feature.
Photographic Eye: Pairing Images with Your Narrative
Anchor your narrative with one strong image for each scene; it is worth the moment you spend hours refining during travel.
Pair that image with a concise caption that reinforces the mood; choose editorial for structure, or personal for intimacy, and write yourself into the piece within one or two lines to guide them.
Arrange the sequence to guide curiosity: start with a surface observation; once you reveal the context that makes the destination feel real and alive.
Develop your portfolio by pairing images with captions that keep editorial and personal tones distinct yet cohesive.
Concrete field notes boost credibility: hours spent on shoots, notes about lighting, and the small details that contribute to the story.
Find moments looking right at the peak of capture: early light in parks, a fried snack cart, a hippo statue as a playful anchor.
Invite readers to see themselves in your travel through pairing visuals with a concise narrative; your image set contributes to a portfolio that grows with more destination stories, known to readers for an honest tone.
Field Journaling Techniques for Quick, Cohesive Notes
Do a 2-minute field-note routine: jot the place, time, and weather, and capture one vivid image in a single line. When you reach a mountain overlook or a quiet bend along rivers, a camera click can trigger a crisp memory you will rephrase later, and you will see how soon the feel becomes clear and open.
Use a micro-template that fits in two lines: place + scene, action or sound, senses, emotion or mood. Write two lines max for each entry, then move on. Start with the path you follow and mark what changes from the known spot to the next, keeping entries fresh and concise; this drives your note-taking.
Keep entries tight and linked by a simple rule: capture one concrete detail, then add a short reflection. If you notice wildlife or a river’s current, write a single sentence that ties the scene to your overarching theme. This discipline makes your notes feel cohesive, ever clearer when you review them against the context of other days.
During open-air sessions on trails, on the water, or between venues, use prompts: click to note an action, a sound, a scent, or a sensation. If you paddle or are gliding along a river, note the rhythm and the heat or chill in the air. youre quick notes should capture who or what is there, where you are, and why it matters for the next write-up. theres a quiet thrill in gliding past a mountain bend, and this momentum helps you build the memory into a neat line.
Review later, twice: check your notes for repetition and tighten to a cohesive 2–4 sentence fragment. If you have numerous entries, pull a thread–wildlife, rivers, or reserves–and expand it into a readable paragraph. Take a moment to tag by place and theme and store the file with the date; eventually this archive will let you craft vivid pieces for readers.
Research Roadmap: Finding Related Destinations to Enrich a Series
Begin with a focused through-line for the series and select two anchors that offset its mood. Pair hofmeyr and pumulani as concrete touchpoints, including a lodge-based vignette, and map a one-way path that keeps the narrative moving while you collect consistent visuals and voices. This approach profoundly enriches the reader’s sense of place and helps you maintain a crisp storytelling arc. This process is sure to yield a massive, data-rich portfolio.
Use a structured, data-driven approach to locate related places that resonate with your core theme and support a strong editorial arc.
- Define the through-line and two anchor destinations. Describe the vibe you expect for daily shoots, sunset moments, and candid interactions with locals. Tie each anchor to concrete hooks: classic rural scenes for hofmeyr, reflective lakeside portraits for pumulani.
- Build a discovery matrix. Create columns for geography (plateau, bush corridor, coastal ridge), culture (markets, crafts), and visual cues (sunset palettes, daily life). Tag each candidate with keywords to simplify cross-collection searching so they can be pulled into your portfolio quickly.
- Source ideas from widely used channels. Pull prompts from a monthly newsletter, national tourism boards, and editorial briefs; collect three ideas per region. Maintain a living file that expands as you find new angles.
- Evaluate safety and access. Verify road conditions, seasonal closures, and permits; confirm lodging options that fit your tone and gear. Plan for slow exploration days that allow you to build a robust body of work without rushing shots.
- Assess routes for a sequence. Favor paths with strong light opportunities at sunrise or sunset, but ensure you have backups for weather shifts.
- Test-field a small block. Shoot two or three days at each anchor to confirm mood, workflow, and gear needs; extract a few strong highlight moments for the editorial brief.
- Consolidate into the final plan. Compile a short list of five to seven related destinations with a clear rationale, a concise shoot sequence, and a safety plan. Deliver a full set of reference images for your portfolio.
Story Architecture: Crafting a Photo-Driven Travelogue
Begin with a concrete recommendation: choose a spot located between shore and reef where the surface catches dawn light, then shoot a short, repeatable sequence that your readers can follow. A flock of birds flies overhead as you frame that moment, thats the moment you lock in consistency.
Frame a simple arc: address the moment when travellers arrive, capture quiet details, and resolve with a final image that ties back to that first spot.
Use captions to connect images: these concise lines bridge the visible and the felt, especially when you show scenes that are different yet linked by a common thread across a country known to travellers.
Play with light and rhythm: keep the surface motif alive, shift from tight detail to wider context, and let steady pacing carry the reader beyond a single place.
Organize the travelogue into daily chapters that could fit a million micro-moments: a shore spot, a street stall, a reef, a harbour, a peak overlook.
Include underwater texture with snorkelling moments: bubbles, color, and coral patterns contrast with land textures, giving readers a sense of another side of the country.
These elements form a practical framework that will help you balance personal voice with observable detail, guiding travellers to feel the place through light, texture, and sequence.
Keep a simple file system: label shots by location, time, and key motif; those notes maintain your voice as you expand to new spots and stories.